Showing posts with label textures. Show all posts

Monday, 31 March 2025

The Great Rebranding

Monsters Loot Swag - rebranded

 The Great Rebranding of Monsters Loot Swag is upon us.

I decided with full release from Early Access due soon™ that the main brand artwork would benefit from being in the same style as all the other character portrait art, and so set about coming up with a new paintings. This is also the style which the intro and outro sequences will take - and that itself is currently the immediate ongoing work, and really the last thing to do before full release.

Early Access has alas not worked out as I had originally hoped for, being immediately lost into a sea of being ignored, but then I expect that this is just how it goes for the average no-name indie devs launching early access games.

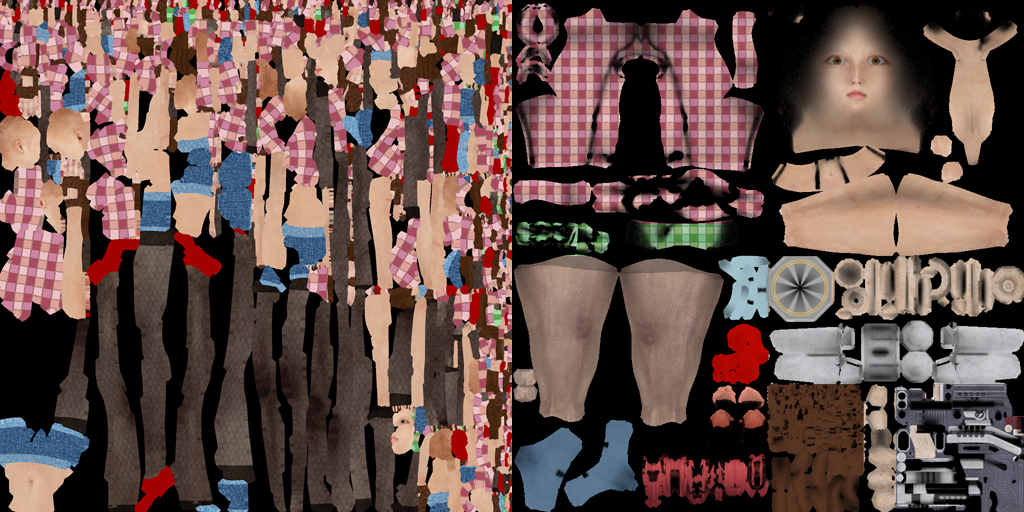
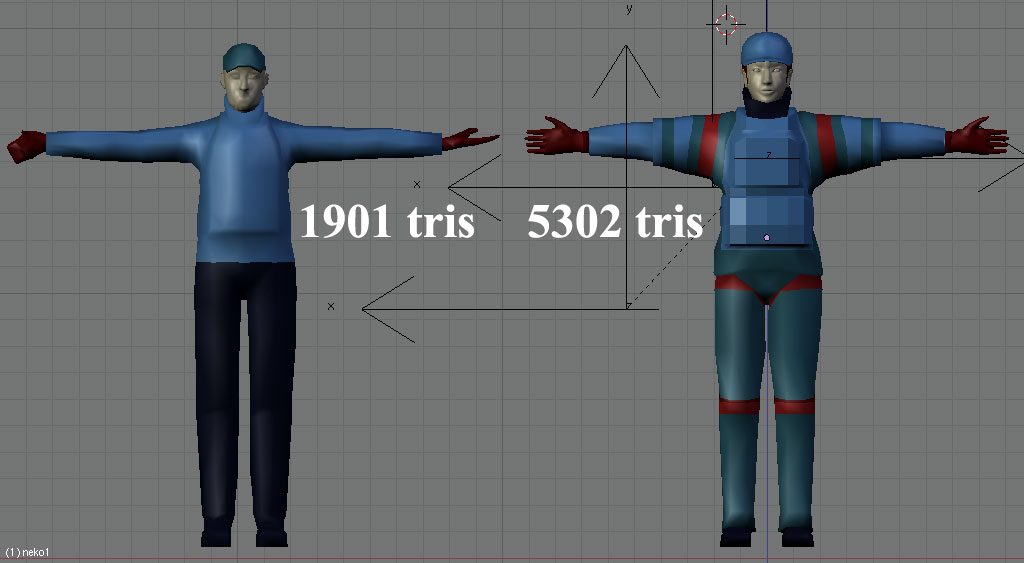
One thing modeling related which I have been doing amongst the veritable onslaught of drawing, has been to retopographize some of my earlier catgirl models. Previously I had used a Blender3D plugin to automate highpoly models down to lower tris counts. Whilst that had saved quite a lot of time, the tris count was still rather high considering the game is a top-down shooter with the characters being fairly small on screen, and the resulting UV maps were horrible strips, not the sort of thing that could ever be considered modder friendly.

Left: Automated; Right: Manual Retopology

 I had used the custom generic player character which I had manually retopologized from April 2024, and this itself reduced polycount by around 60% of what the automated plugin did, all whilst preserving human readable UV maps. I find that due to the small size of the player model on screen, that baking ambient occlusion into the albedo/colour map improves how it looks, even though ambient occlusion still takes place inside the PBR ORM map (occlusion, roughness, metal).

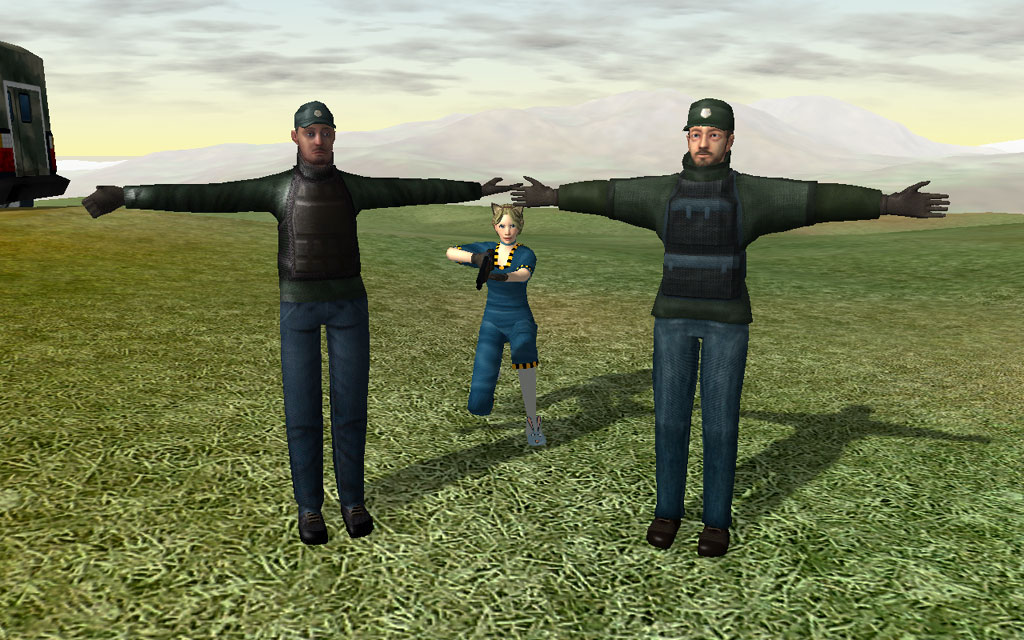
The generic retopologized human character model

So, once again it was a case of do not send a machine to do a man's job ... and all of the presumed labour-saving of yesteryear had been for naught. So now, I am the proud owner of 8 lowerpoly catgirls who all weigh in around 4-6K triangles.

In frog related news I have been forced to put netting over the frog pond as my local murder of corvids have been committing murder in the frogpond. 🐸 

I have been feeding the crows for a while and they've always been very friendly so this sudden turn of events was completely uncalled for. They're big fans of that awful US style burger cheese (wouldn't touch the stuff myself) and also rather fond of monkey nuts, when they're not getting gristly bits of steak or other cutoffs. Also I've seen them beat up Herring Gulls which is what I really want them hanging around for.

So that was the month of March space year 2025, and my efforts to finish off the fluff piece of explaining an actual plot for Monsters Loot Swag continues, taking up much drawing and GUI planning, with all still on course to ship in April.


Friday, 31 January 2025

Space Year 2025

 🎵 In the year 2525 ... if man is still alive ... 🎵

Well I feel barely alive in the year 2025 ... mostly due to having come down with the lurgy ... or the space lizards frying my brain with their invisible doom ray - sometimes it's hard to tell the difference. Fun Fact: I met the guy who did the intro to that song and my dad jammed with him a few times.

Work to complete Monsters Loot Swag continues in earnest. With all of the cosplaying catgirl characters that the player can unlock and control now compelte, it all comes down to designing the final level and final level boss.

For the last map I've gone for a HR Giger / Z Beskinski surealist horror aesthetic. This has required me to make a lot of custom textures, which have been taking up the greatest part of this, the first month of the year. After a while I found my eyes going funny looking at all this stuff.

The Final Countdown With The Final Level

All the rank and file enemies for the final level were designed some time ago, and naturally there will be tentacles, for, as we all know, tentacles are the natural predator of overly excitable catgirls. Once the final level is complete I need to make the level boss and then just a bit more 2D artwork for the randomized "souvenir" system which is already in place and comes with three whole Steam Achievements.

After that I think I'll do a little rebranding of the Steam capsules with some new artwork.

And then it's shipping, come hell or high water.

Early Access has been somewhat disappointing without a single useful crash report in the forums, but alas I expect this is just the price of being a brokeass non-name indie dev in a literally sea of brokeass no-name indie devs. The most useful thing was when the engine got updated to give me feedback on misnamed script errors, something the script IDE alas doesn't. This helped me fix a fair few wrongly named or non-established local variables, the sort of thing that could and probably did cause crashes.

I still have all my Steam Visibility Rounds available for full release, so we will see if that helps boost eyes on at final release time. I remember it working quite well for Airship Dragoon but that was 10 years ago with considerably less released products jostling for attention. Anyhow, we won't know until we launch.

So next game ... how to get eyes on game at release? Early Access gets drowned out so I'm thinking maybe an open beta? Just let folks actually have a play around with a basic but working build and see if they fancy wishlisting it? Well it's a thought, and I don't have any others that cost zero dollars, so we'll probably go down that route.

January is over already, that's like 8 percent of the year gone, which is about as horrifying as it already being Space Year 2025.

Anyhow, back to going googly eyed with Gigeresque texturing ... 🥴


Saturday, 31 July 2021

Selection Screen: Aircraft and Insignia

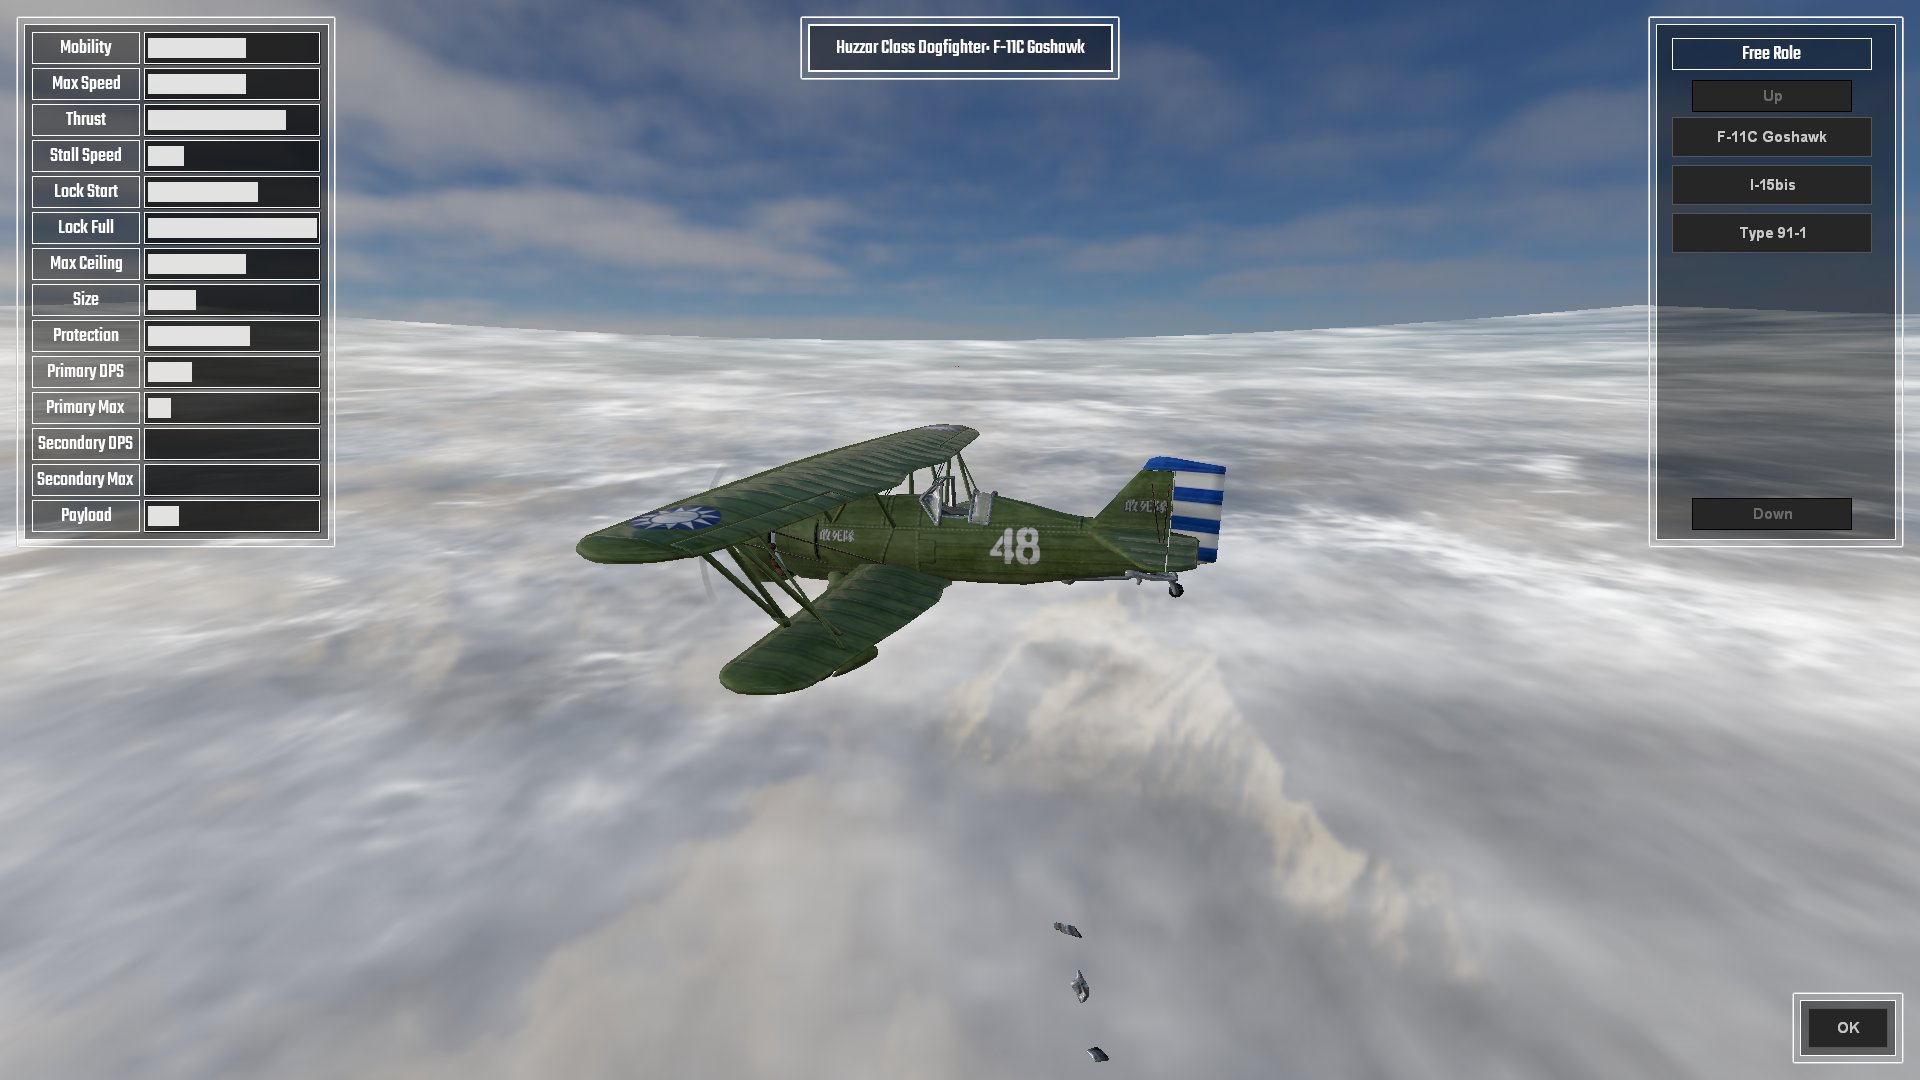
 What's a plane game without a pre-mission briefing and selection screen? Lacking that's what. So here it is.

Choose Your Fighter! Literally in this case ...

Here is where you get to choose stuff for the forthcoming mission. The overview screen is where the menu is, as well as a reminder of the mission objectives and the important specifications of the currently chosen aircraft, which boils down to maximum level speed, stall speed, and at what speed the ailerons completely lock-up and you wish you weren't in a 90 degree vertical dive whilst holding down the turbo button.

The aircraft selection screen details all pertinent statistics of the aircraft, displayed as a percentage bar based on the min-max of all other aircraft; 

(range max - range min) * (value - min value) / (max value - min value) + range min = percentage

All except, that is, for Lock Start which is based on percentage of Max Speed, and Lock End which is based on Max Speed * 2.

The Fastest Paint Job Changes In The West

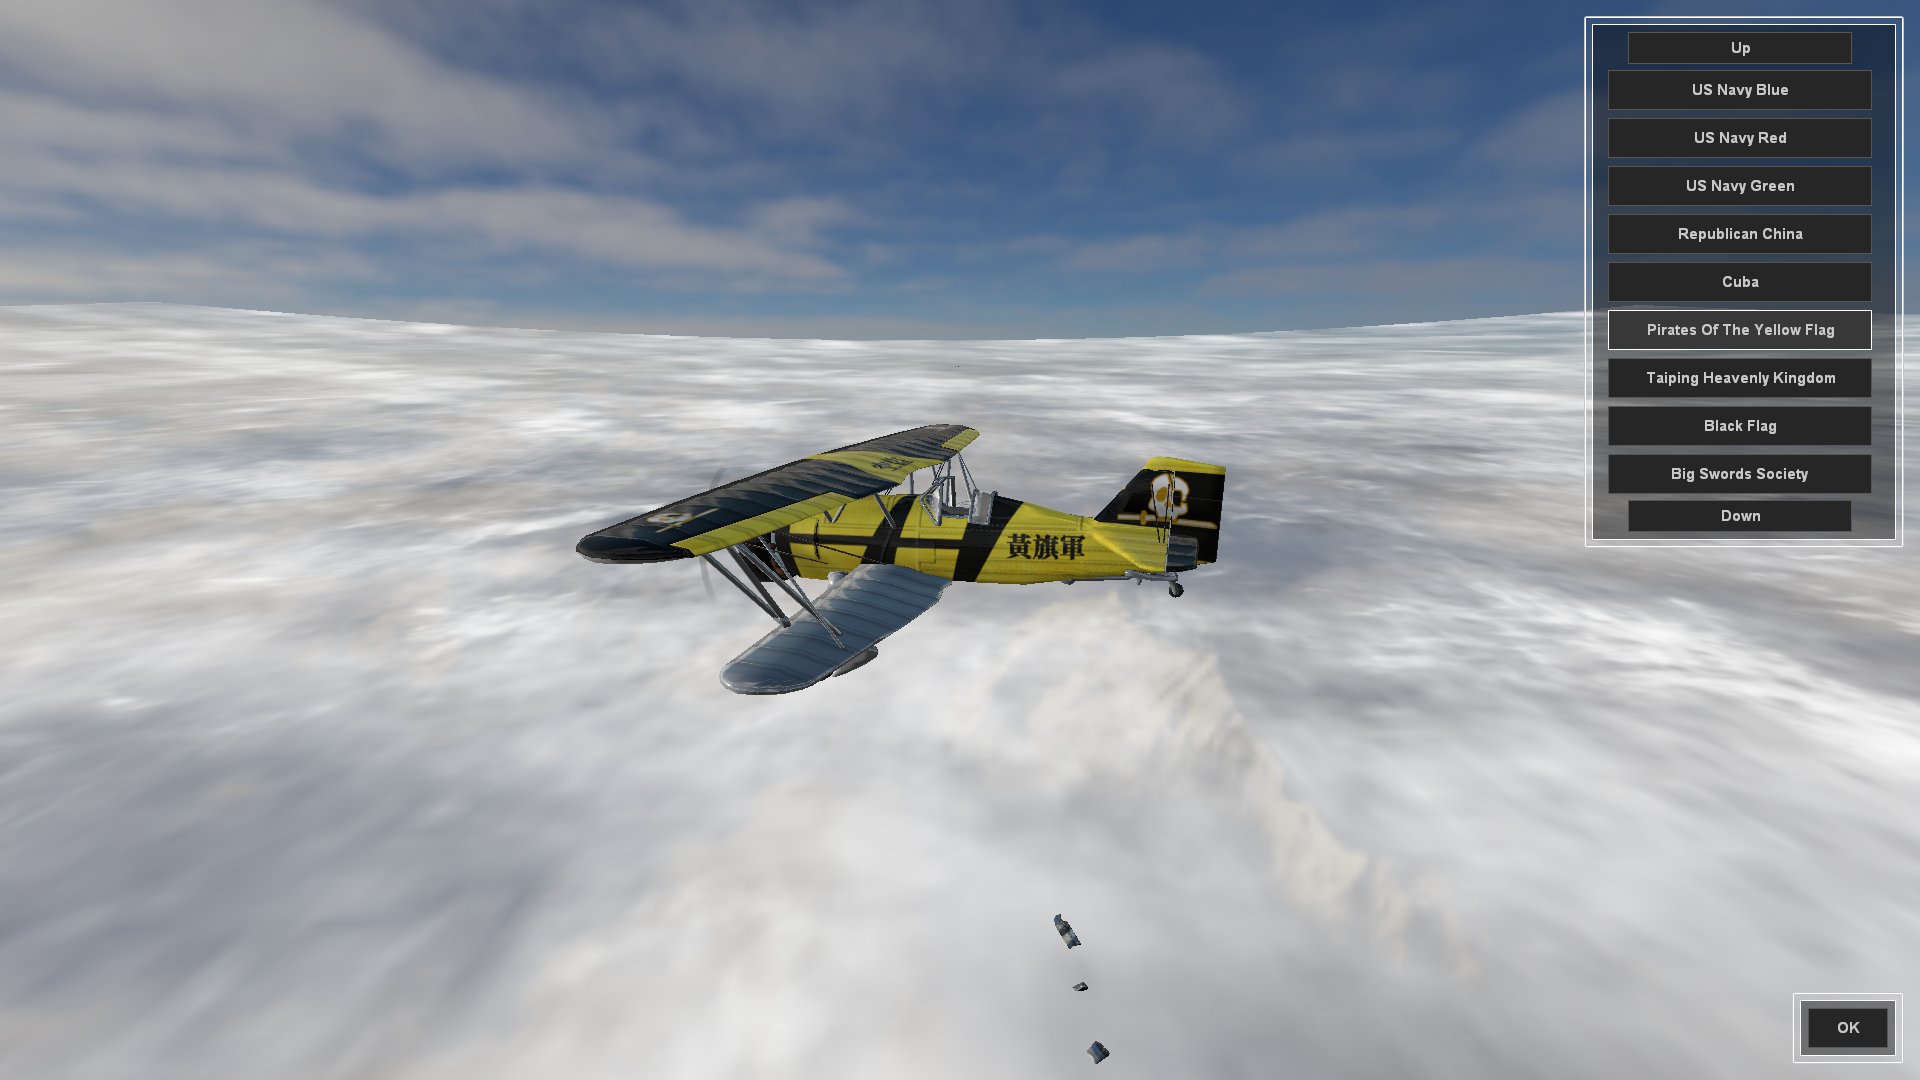
The Insignia screen is where the player can choose their aircraft skin. I was going to call it Paint Job but insignia seemed more fitting. In fact I had a good trawl through the thesaurus for flag, badge and logo before deciding on insignia.

Any skin which can be carried over to other aircraft will be added to newly selected aircraft back in the Aircraft Selection Screen, or default to Dazzle Camo if not.

I am splitting aircraft up into distinct roles (fighter, interceptor, striker/bomber) which have differing effects for lock-up, turbo (WEP; War Emergency Power), stall turns, etc, and am naming these after cavalry units.

So, still to do for the pre-mission screen;

  • Create a Briefing overview where the player can select which aircraft they want to conduct the mission as. Different wings of aircraft will have different roles as mentioned above. Really hate escorting strike aircraft to attack a target? No problem, fly the strike aircraft and have the Ai do the escort mission. This style of play also lends itself rather well to online multiplayer co-op mode.
  • Create a Payload Selection screen that allows aircraft that have external hardpoints to fit bombs and rockets. Also need to create a system for the use of bombs and rockets, as we only have primary and secondary guns coded at the moment.
  • Integrate all of the player choices into the actual mission when it starts.

And here is the whole thing as it currently stands in video. There are three aircraft and about ten skins each.


And that was the month that was. It started with me in shorts getting sunburnt and has ended with me soaked to the skin and wearing a jumper. Classic British summer.

Wednesday, 24 February 2016

Detail And Layering Map Tests

I've been playing around and testing with materials to try and get a good work procedure for creating variation.

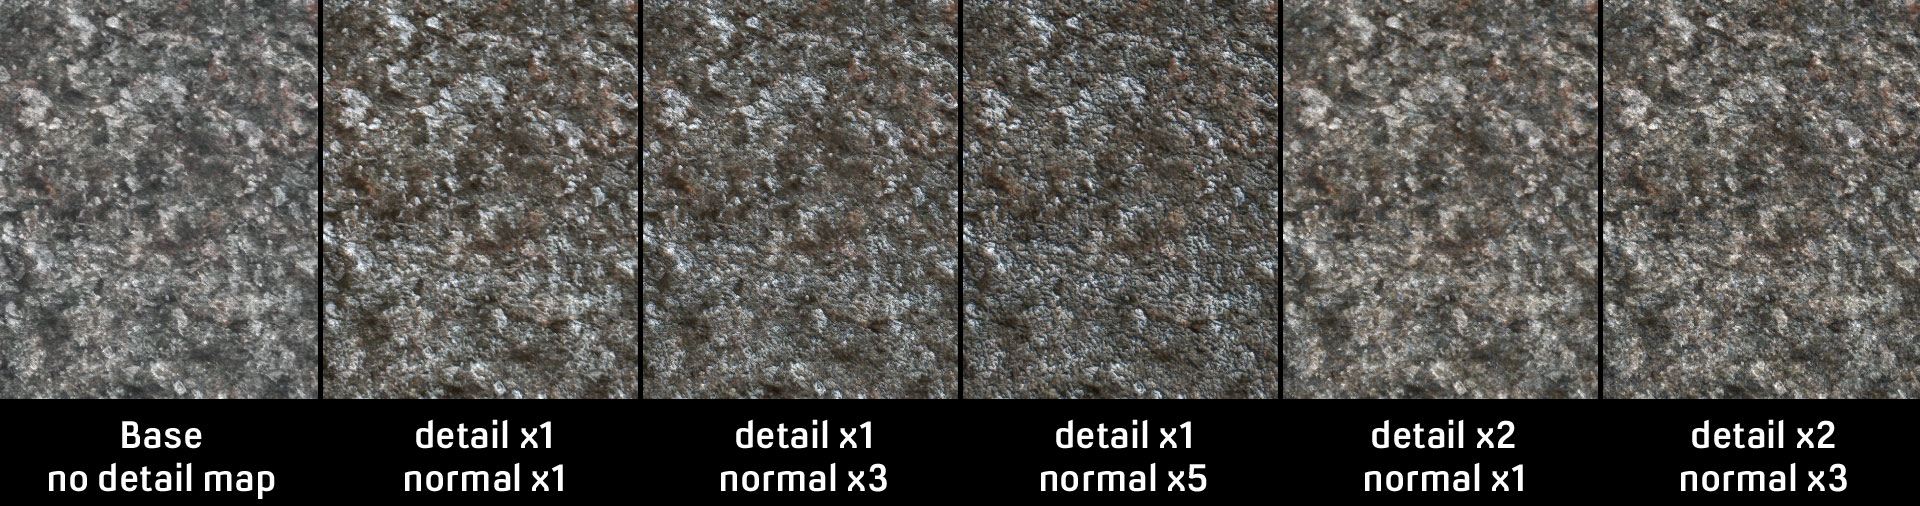
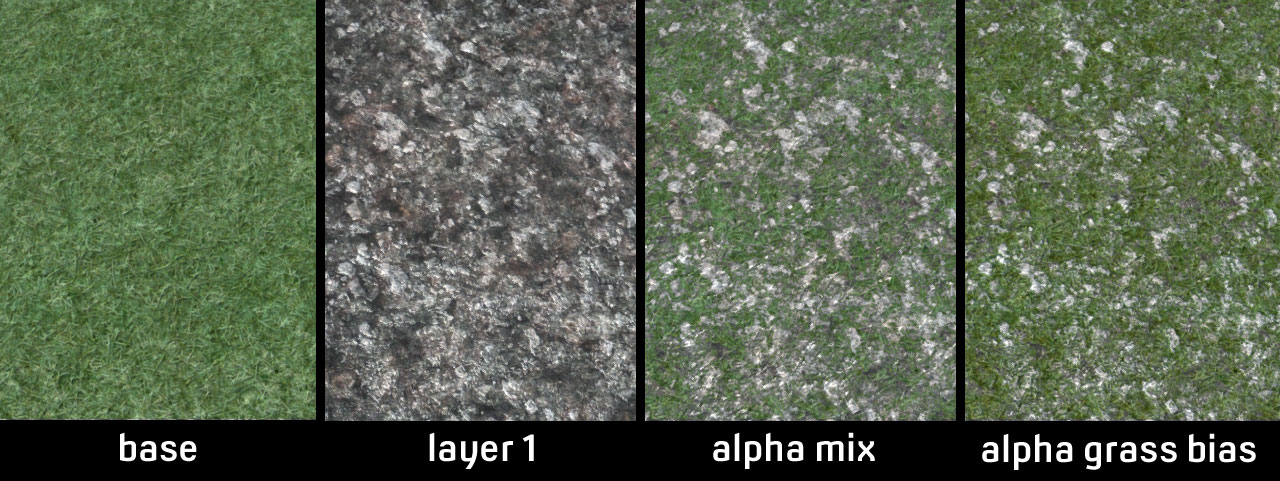
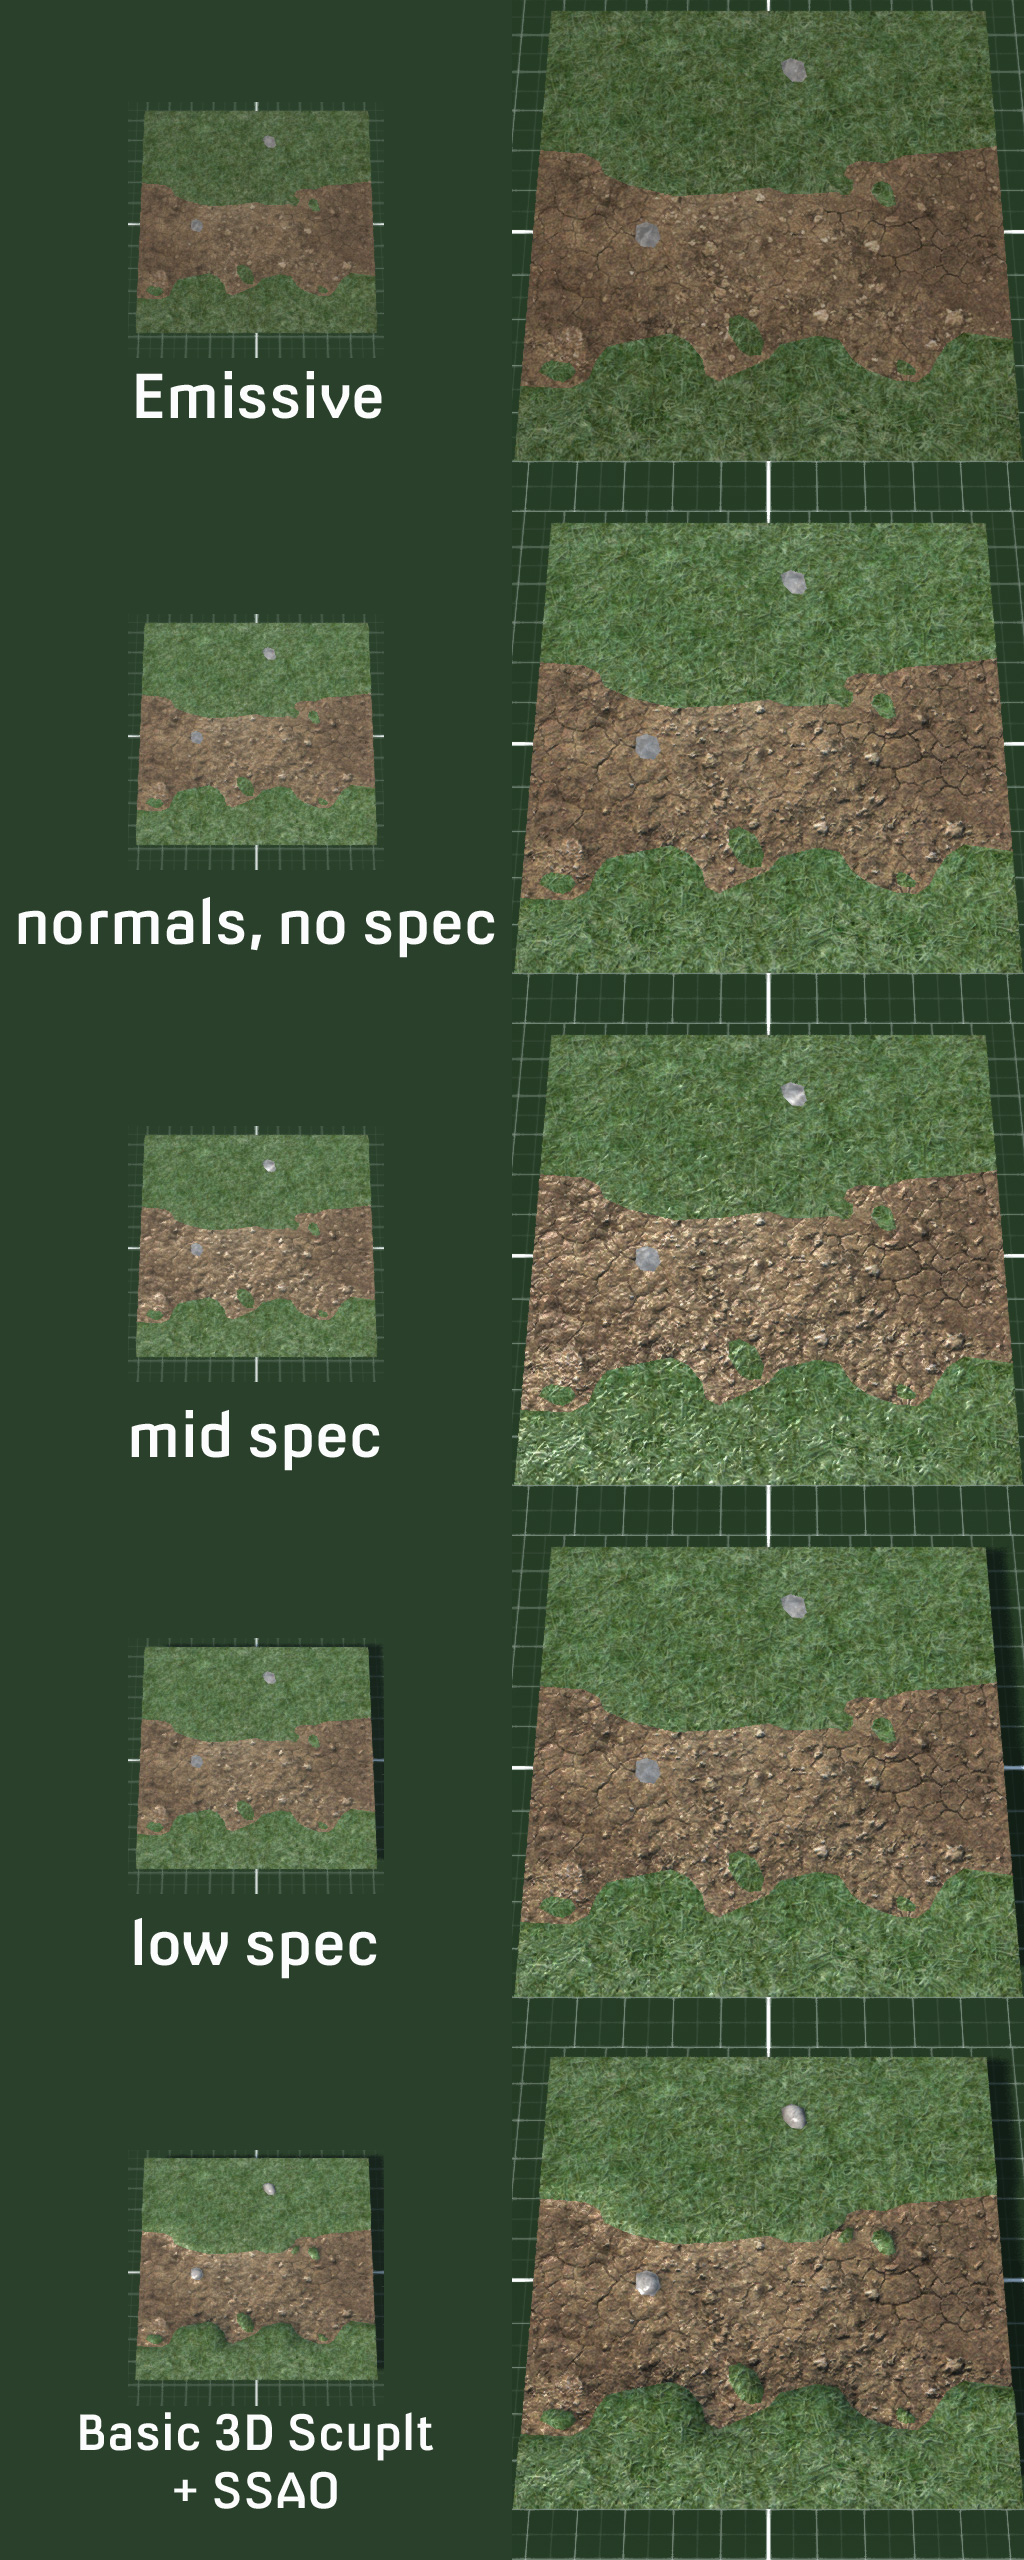
First up, I used some open source art resources from the Torque3D Pacific Demo, which can now be found free for download with all art assets here http://wiki.torque3d.org/main:downloads. I amalgamated various terrain textures with their images marked _detail for overlays, such as grass, dry ground and volcanic rock to create a starting texture. I used the detail textures as specMaps and the original normalMaps, before testing the various slots of detailMap and detailNormalMap in the matieral.


Adding a detail map with a scale of 1 made the highlights and shadows of the diffuseMap stand out more. Hardly surprising as the detailMap is taken from the diffuse. Increasing the strength of the detailNM increased the grain of the image. Scaling the detailMap across the diffuse caused a more even grain without sharpening specific features. I thought that textures tended to look better close up the more sharp they were, and the opposite further away.

Next up I tested layering textures. The idea was to create new materials without having to manually merge two images in an image editing app, thus saving on texture memory in the long run. I took a grass texture for the base layer0, and overlayed it with the volcanic rock texture in layer1, to which I had added an alpha channel. The alpha channel was quite simple, I simply boosted contrast on the reference image and took highlights, mid, and shadows.


After intial testing I thought that the grass was somewhat washed out so I boosted the reduced the mid levels of the alpha channel so that it favoured the grass over 50-50 mixing. Originally I had based the alpha channel directly from the contrast of the texture, but found it better to boost the hightlights and then expand them for white, then expand a smaller area for mixed and have the remaining as fully translucent black. This let much more of both layers appear with only limited fade, making the whole thing sharper.

For the final test I added a mask onto the grass texture to simulate earth or dirt (though this could have done this with another layer between grass and rock to again reduce image quantity and thus texture memory, but these are only tests for visual effect). I hoped this would give a more naturalistic effect rather than just having rock sticking out of grass.

Rock and Alpha Channel (at 25% scale) Very 1-0 with only a little semi-transparent

I also noticed in previous tests that whilst detailMaps, detailNMs and specMaps worked on higher layers, standard normalMaps only used the base layer0. To give the rock layer some extra height, I used the volcanic Nm and Spec for layer0 with the grass texture. I had used the rocks alpha channel to paste dirt over the grass and now reduced the size of the white and grey levels so that more of the dirt would show around the edges. I proceeded to do various tests to see it looked, changing detailMaps, detailNMs, and even tweaking layer1 diffuse.


Eventually my eyes went all googly from looking at tiny changes.


Tuesday, 2 February 2016

Swag Em Up - 100 Collectable Power-Ups

It took some doing, but I managed to design and code, a full 100 collectable power-ups. Most of the artwork is still placeholder but all bonuses, attributes, special attacks, etc work in practice.

They come in 6 flavours:
  • ATTACK - bonus event on striking an enemy. eg: critical damage, exploding attack
  • DEFEND - bonus event on being hit. eg: shield stops damage, retribution attack against enemy
  • TEMPORARY - boost to attributes for x seconds. eg: for 8 seconds speed x2, increased healing
  • PERMANENT - attribute increments. eg: increment health, speed, healing
  • PASSIVE - works passively. eg: cause damage on touch, enemies drop more loot
  • ITEM - Items are single use and player can use any item that they have collected when they wish. Can be good for getting out of trouble when your back is to the wall.
So here's some pics and videos of a few of more of them being tested. See last blog for previous ones.


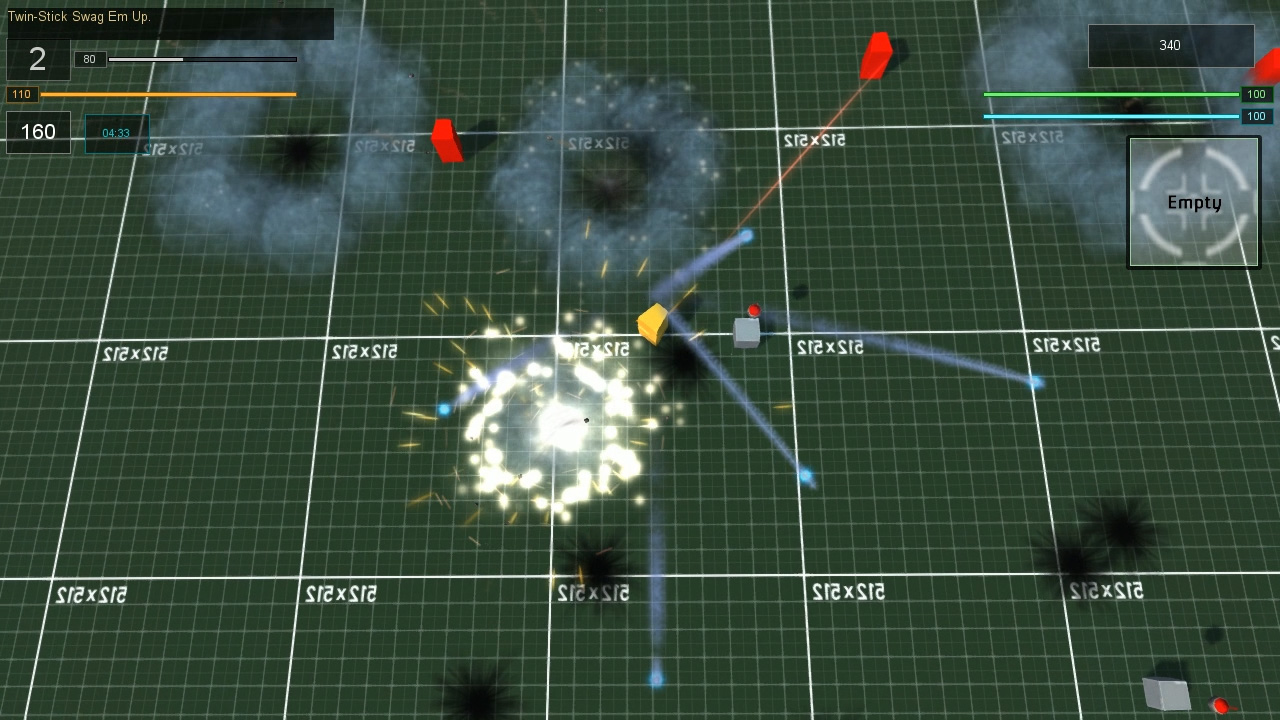
 Bonus offensive machine-gun and grenade spam attacks.


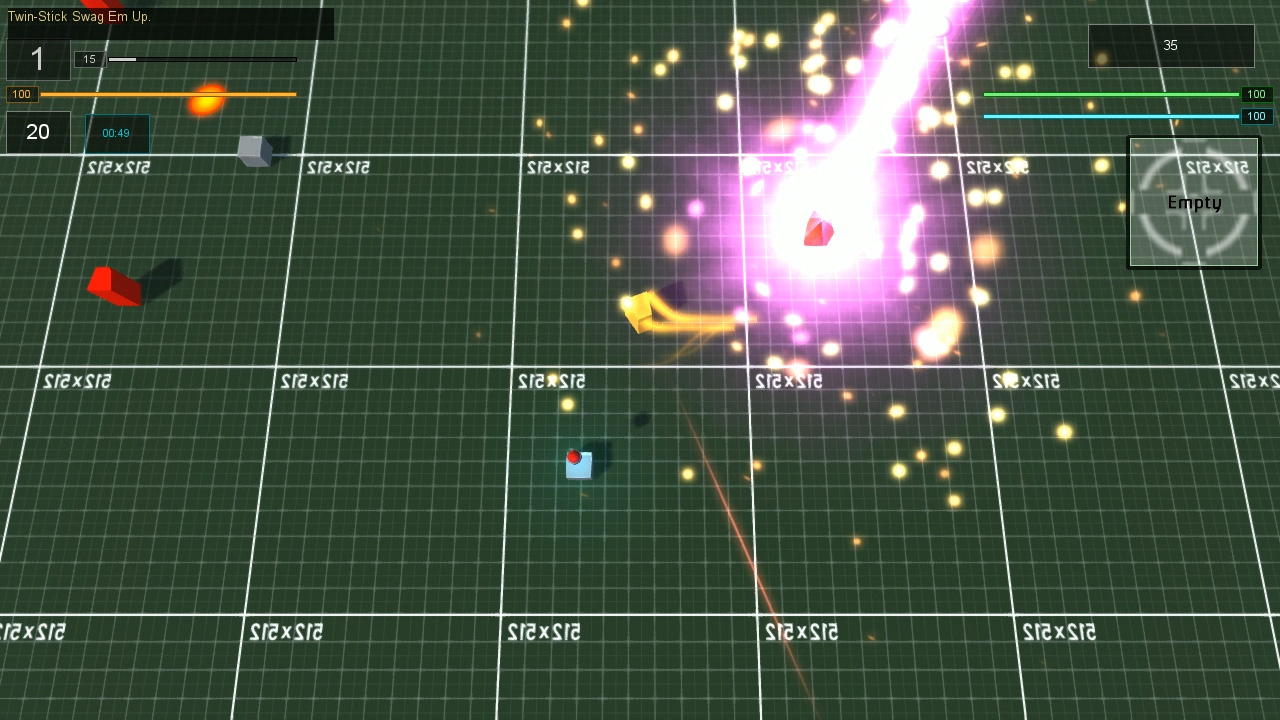
Super Orbital Laser (anyone guessing the source of the name wins a free internet)


The Zone of Brass Monkies - slows all enemy who enter it.


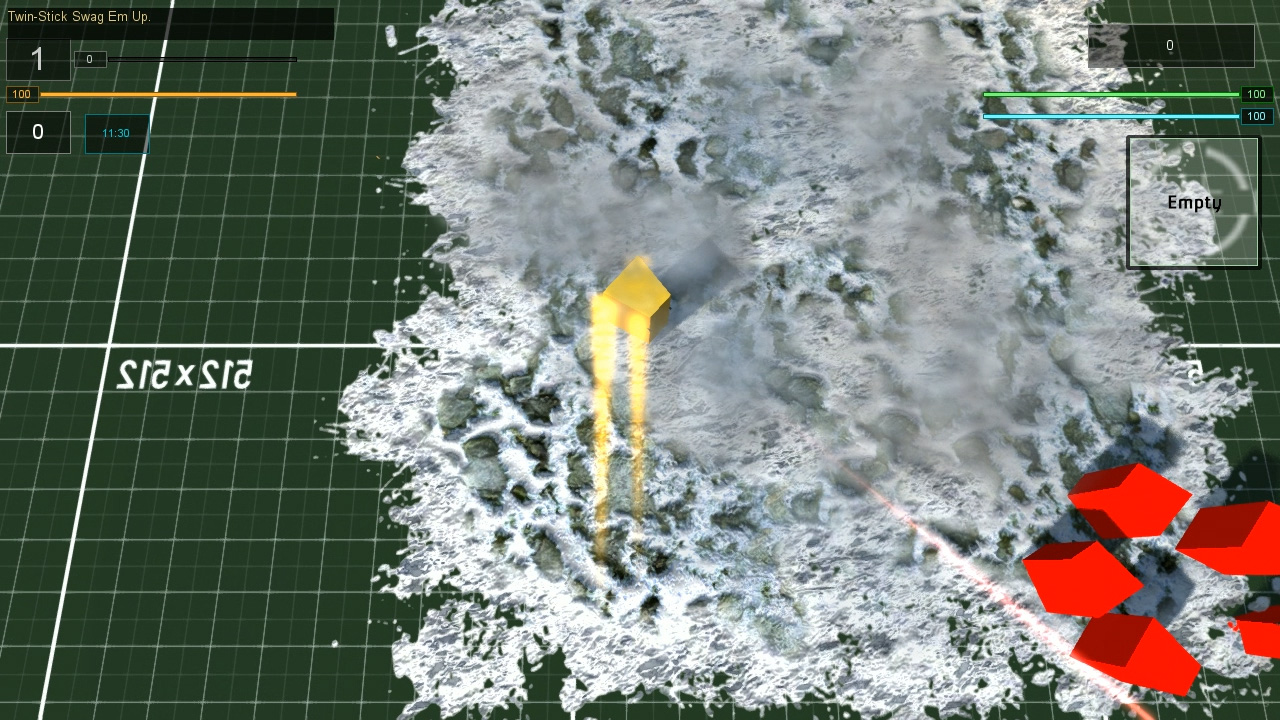
Napalm Strike (need to work on those particles, not entirely satisfied with those flames)


And a quick test of shields in various colours.

I also spent some time reading through the code (this is why it's important to leave comments people!) and found a few things I didn't previously know about explosions - such as you can tie animated meshes to them. This help save a bit of overhead on things as in Airship Dragoon I had spawned "concussion blast spheres" seperately. So I decided to make the basic impact attack a little more interesting.


With the swag collectables coded if not modeled, next up is to test my ideas on how to actually model the environment and levels. And it looks something a little bit like this:


Friday, 17 May 2013

The Boys ... And Johnny Foreigner

We've had the Brits and now we've been modeling all the other factions. All 7 of them, with unarmoured and light armoured troops, with 4 LODs each, with 4 camouflage schemes for Stealth Armour. That's a lot of LODing ...

 Originally I had envisioned the idea of having seperate models for each class within each faction. There are 7 classes and 7 factions. My 7 times table is about the only one I could ever remember as a child ... probably because I liked the number 49 for reasons of no known certainty. 49 would have been a lot of character models ... even more with light, stealth and heavy armoured types for each one ...

Thankfully I scrubbed that idea as utterly impractical before I started, and stuck to the concept of each faction having 1 unarmoured model, 1 model with a helmet for light armour and stealth armour (with a camouflage texture depending on the tactical battle environment), and a global heavy armoured model with different texture for each faction, carrying the factions flag on it's back.

This all still requires 15 character models, 4 LODs each - so a total of 60 meshes - and 49 diffuse textures plus specular and normal mapping. All of which has been a bit of a slog ...

We've had the British Royalists for a while ... even though I scrapped the models and restarted from scratch for the third time to get mesh deformation. Being British, Royalist and Steampunk meant that they had to be The Redcoats. The Brits are actually the only team not wearing Steampunk eyewear - their goggles are hanging around their necks. Light armour is defined by the African Zulu campaign pith helmet.


And here we have the standard dresscap model on the far left, light armoured model kneeling centred, and stealth armoured model on the right in green camouflage. This texture swapping makes use of the built-in "base" skin definition and swaps it on spawn for the appropriate environmental material  - green (for both temperate and jungle), arctic, arid and urban.

The Austro-Hungarian Empire was as close as I wanted to get to zi Germans without actually having zi Germans. I wanted a European faction, and the Austro-Hungary seemed the perfect choice, a regime which spans multiple countries - Austria, Bosnia, Croatia, Czechs, Hungary, Italy, Montenegro, Poland (who cannot into space ...), Romania, Serbia, Slovakia,  Slovenia, Ukraine and of course including parts of zi Germans. As all troops are randomly named with national/ethnic forenames and cities/counties/states as surnames this also gave a wide selection for variaition.


Light armour centre, unarmoured forage caps flanking the sides, wandering through a rainforest, Steampunk monacles aplenty. I did have a bit of a um-and-ah about the uniform, wanting light blue and not entirely certain about the trousers which are those "flying pants" with the winged thighs that stick out.

I turned to the interwebz for inspiriation using You-Know-Who's-Image-Search and the phrase "austro hungarian empire 19th century uniforms", with safe search on.

Now we've had unexpected things thrown up before when a search for ideas on User Interface Buttons - "steampunk buttons" brought the wrong type of button ... and the ladies who were wearing them.


These are not the Steampunk buttons I was looking for ...

And it happened again ... well ... actually it didn't, it did give my the 19th century uniforms ... just in an unexpected genre ...


This was not the context I was looking for.

Anyhow, in the end I decided on a fairly realistic colour scheme of the Austro-Hungarian cavalry - the red jodpurs/flying pants being a nice foil to the predominant light blue, and a flattened forage cap.

The Chinese Dynasty. Dee-nasty or Die-nasty? There used to be a terrbile American TV show in the 1980s called Dynasty which was clearly trying to copy and cash-in on the success of Larry Hagman and co in Dallas. Over in the UK we tended to refer to it as Dysentery :P ...


China meant being able to break away from the usual style of uniform and colour schemes and throw in yellow - technically it's light amber, to go with my repeating amber and black colour scheme that can be seen in numerous places through out the game (especially on the boobytrap warning fences).

I ummed-and-ahhed again for some time about the overall colour, and decided on a green leather vest as a not to the jade emperor. The above picture is a good illustration of how I work - slapping the models into the engine and then changing the textures on the fly to see what looks best.


Unarmoured Chinese Dynasty troops to the left and light armoured walking to the right. You can just make out stealth camouflage armour in the background. They have these small spectacles perched on their nose which are half fashionable, half granny glasses.

The People's Collective is a sort of revolutionary soviet style idea for a faction.  Not so much Reds Under The Beds more Reds In A Dirigible ... and not really red either, the British Redcoats had already commandeered red as their dominant uniform.


I ended up basing the unform on a 1930s Security Apparatus Officer. "Security Apparatus" - I think the modern translation is Murderous Jobsworth Despot. The helmet is from the same peroid, looking remarkably similar to Great War French helmets, but in shiny brass and with goggles to steampunk it all up. Everyone has a little Lenin style beard and the names are all Soviet.

The Ungrateful Ruddy Colonials didn't quite make it in as a faction name but the US Republic did. I had wanted the USA to be "damn Yankee" dark blue but was hestitant on using yellow again for trim. In the end it ended up as two tone blue, dark coat dominant to light pants with a Rough Riders style slouch hat. The helmet is a shiny brass hybrid of US doughboy hat and early prototype brodie helmet.


The US has more modern, nearly cyberpunk style, one piece, wrap-around type goggles and everyone has an Abe Lincoln beard.

Finally, the last - at least in alphabetical order - regime which the player can choose to represent in campaigns and battles is the Zulu Nation.

I had wanted to steer well clear of anything to do with lions, leopard spot cloth and the whole Africa cliche. Oh ... and Vuvuzelas ...

In the end I opted for a more informal uniform based on gentleman's attire. Shirt, waistcoat, pants, gaiters/spats and a tophat and monacle. I had wanted to include the Zulu colours of black, white, red trim, green and yellow.

Initially I had made them a lot more green ... but then they looked like drunks from a Saint Patrick's parade. Adding a lot more yellow brought them too close to the Chinese colour scheme and made them look like they were wearing the South African Foot-to-ball strip. Eventually I decided on a much plainer, white, back, green dominant colour palette. Light armour is denoted as a helmet, which is sort of an ancient Greek facemask with the plume removed.


All names are (ethnic/national) given name - (city/area) family name, including the Chinese and Zulus who normally would have family name first.

Still to do ... are the Dastardly Pirates of Pangea. The enemy the player faces in one off single battle mode and who serve as the insurgents in the Main Campaign if the natives in your captured territories become unhappy with you rule. Also still to do is the heavy armoured character which will feature the same model for all factions but with different coloured textures using the material swapping function. And 6 more weapons to model and then the Tactical Battle part of the game is done.

For the Strategy Overview Map part of the campaigns I need to create a couple of new dirigibles, texture them all, and re-texture the environment hexes. There's still a few GUIs to finalize, some audio to sort out, port it all into a final codebase and make a few more code alterations which I want.

And an absolute shed load of documentation on how to play it to write.
Monday, 4 March 2013

Additional Environments And Gui Redux 9000

Finally I have managed to get round to creating some new maps for the different environments and terrains. Up to now I've been reusing the same map over and over again. Now I have one map for each of the available environments - save for urban which I'm still working on the models for. I am planning on each environment type to have a few different maps, and have managed to come up with a workflow process to create these without too much hassel ... which makes a change from my usual "make it up in a completely adhoc manner" which permeates my existence.

I've reused or modified base textures where applicable in an attempt to keep everything looking uniformed and together. I use the same rock texture throughout all environments so that the player always knows which part of the terrain is an obstacle that cannot be walked up.


Whilst making various new models I also finally got round to replacing the rather awful blue/black hatched deployment areas with some brass poles with flashing amber lights on them. It all looks much better and a lot more part of the steampunk aesthetic.

For the umpteenth time I have once again reworked the aesthetic of all of my GUIs, this time giving them a wood grain look which I think looks much better than the rough, patchy look which they previously had.

I also added two new buttons to equipment selection on the deployment screens. These allow for filling up a trooper with ammunition to the maximum weight or money, and also copying the current troop's equipment to all other unequipped troops of the same class, weight restrictions applying. This all helps making loadout a lot faster and easier for the player.

I'm still not best pleased with the mesh deformation of my - currently singular - player character model and intend to fully rework this. Hopefully it'll end up looking a lot better and I will then be able to get on with making troop models for the Pirates, US, Austro-Hungarians, Chinese, Zulus and Anarcho-Commies, as well as finalise my design for the heavy armour models.


I've also done extensive playtesting of the Main Campaign - the one with the dirigibles in it - and found it to be a bit too easy. I rebalanced the way the Ai regimes work ... and then it became too hard ... fuuuu-. After a bit more balancing it needs a good retest to make sure I haven't made it too easy again ...

I've been working off the MIT console refrator development branch and apart from a few issues with the development branch itself, I think the console refraction is fine. Info on that here.

Anyhow, here's some vidya of the new environmental maps, each one played in the most likely weather pertaining to that environment. Mountains are cold and cloudy, Arid is fine and clear and hot, Jungle is wet, humid and stormy.


Saturday, 1 December 2012

Make A Button, How Hard Can It Be? Fuuuuu-

Question: How hard can it be to make a button? 
Answer: Fuuuu- Also it is as boring as hell making the artwork for half a gazillion GUI objects

I have somewhere around 44 items in game.
Each one needs a GUI explaining what it does.
Each one had a typo which I only spotted after 28 images had been done.
Each of the 28 was fixed.
Each item needs 3 bitmap images for a button for normal, highlight and depressed/toggled on.
Each one was damn boring to do.

Game design is boring. Constantly reiterating and tweaking is boring. Rewriting my whole game 3 times was boring - but at least it had the benefits of being intellectually stimulating. Making sure that half a gazillion GUI elements have a similar pattern on their border is not intellectually stimulating. It's dull. It's one of the many dull and repetitive parts of game design which is devoid of challenge, it's just grind.

Maybe this is what playing an MMO is like?

Now I see why game developers employ so many people, so that they have someone who enjoys dull, repetitive, tedious tasks which require no challenge other than enjoying tedium. I imagine they look like Andy Serkis, after he'd been digitized as Gollum ...

Then there was the artwork for all of the other GUI elements. Suddenly having different GUI elements sharing the same artwork became awfully important. For starters it helps to reduce total overhead on loaded textures. Secondly it means making less GUI bitmaps.

After a bit of jiggery-pokery both my completely different Campaign modes shared most of their GUI elements. Hurray!

Then there was still the slight issue of the player having no idea how to play the game, which meant documentation. I decided on a two fold strategy, having the whole docs in the main menu (still pending) and having individual instructions for each part of the game. For instance choosing and equipping your squad for deployment has it's own GUI docs - which share a common border. They are accessable from the "choosing and equipping your squad for deployment" part of the game.

Docs also presented a new challenge - making them understandable in the least amount of words. So the docs have had a few rewrites to try and distill the necessary information without the reader having to spend hours scrolling through them.

All the docs are kept in a folder name "RTFM".

With so many items in game I'd decided to keep the item button images as a stylized silhouette for weapons with the calibre displayed so that the player can instantly see what type of ammunition they need reloading with and can toggle the "info" button and then press the weapon's button in the inventory to see all of the relevant information on it. None weapon items are displayed with a stylized logo representing it and the the item's name.

All item buttons and information screens are a stylized blue to show that they are interactive - a bit like the idea of a blueprint and it helps to mark them out from the background of the GUI. All "toggled on" buttons are also blue to show that they are interactive. The rest of the GUI's are a stylized red/yellow colour scheme, representative of brass/copper sort of colours which often pertain to steampunk. And it now does have much more of a steampunk feel with the finalized interface.

The interface is by no way completed, the pop-up message boxes still need skinning as do the flags representing the various factions (6 playable choices and 1 Ai pirates) and the background of the main menu is a placeholder.

So, how hard can it be to make a button?

Surprisingly irritating actually.

I'd had an idea of faking a 3D look with a copper/brass style button, having light coming at it from the top left. It certainly looked fake 3D, I just didn't like the style. I set out to gather some influences on steampunk button design via the internet and used relevant keywords about "steampunk" and "buttons".


Buttons where? The internet was not being helpful ...

After a thoroughly exhaustive search of the internet's hottest steampunk cosplayers during which I lost track of time and space, I decided to just make a button that was based on a fairly average button - and throw a border on it to give it steampunk blocky bulk. And in the end I quite liked this attempt and decided to stick with it.

In other news I physically modeled (physically as in virtual 3D models which ... er ... aren't really physcial at all) a variety of weapons - though still have a whole load (though thankfully now a minority) to complete before I'm finished with this part. Needless to say I still haven't got round to having another crack at the deformations on my initial character model, so that's still to come ... again, annoyingly. But I do have a plan of things to attempt with it.

So, getting there, have a couple of additions and tweaks to make to AI scripts and the Main Campaign (the bit with the dirigibles in my ver old videos) needs a few fixes, tweaks and it's startup sequence being brought into line with the new way of doing things which everything else now share (Single Battle and the fully working Bonus Campaign).


Anyhow, here's a video featuring the new look GUIs and a bit in-game battle plus the post battle GUIs. Remember, message boxes and regime flags haven't been touched yet.


In additional news, I need to sort out button clicks prior to the server's creation. And I completely forgot to show the "how to create a squad and equip them for battle" in the video ... which is below. GUI examples and a bit of a scrap in-game.


Tuesday, 25 September 2012

Make Simple Character Model Quickly ... 40 Days Later ...

It was time to start making some basic characters. This shouldn't take long ... and indeed MOST of it didn't ... but then some of it did ...

Magnets!? How do they -

I mean, mesh deformation ... how does it work!?

I had recently played through my Ye Olde FPS - demo of which is still available here at 168mb. I had noticed the quite poor deformation on the shoulder and joint areas of the characters - though admittedly this had been the first time that I had ever looked inside a 3D modeling application and proceeded to model, rig and animate a character ... and it had also been my last. Since then I had created a new bone armature - this time observing some proper Torque structure (bip etc) - and animated to what I considered to be a satisfactory level. My placeholder Ai player model strutted imperiously across the landscape.


She had awesome slippers but appalling vertex deformation ..


I'd rechecked various old bookmarks - many of which no longer existed - and even more that had moved about teh interwebz but could still be found. Particularly I was after the guy who had created Lara Croft in TombRaider Underworld and had posted on GarageGames ages ago. I did find the thread but he'd reorganized his gallery and the pics were missing. Back-tracing to his website I found what I was looking for, simple, clear tutorials on getting meshes to deform nicely.  Also I remembered that I'd previously seen a guy who had worked on Gun had plenty of good general modeling mini-tutorials ... if a rather unfortunate website name poopinmymouth.com.

So, armed with all of this information, I proceeded to knock up my first model. My current project is a turn-based, squad tactics with a steampunk vibe. There are 7 nations/factions and each one consists of a standard unarmoured solider, light armoured - which is the same as unarmoured but with an ethnic/national helmet, stealth armour - same as light armour but camouflaged (yay for setSkinName(%skin); ), and heavy armour which will be some steampowered mini-mech suit - the body will be the same for all nations/factions with the appropriate regime's unarmoured or light armoured head poking out .

So I started out with the unarmoured model of the British Royalists - all factions start with Nation and then Regime/Governance (eg: US Republic, Chinese Dynasty, etc). It's steampunk, they're British, it's got to be a red coat. Throw in flared trousers, big boots, a peaked dress cap and the manly facial hair of whopping sideburns and a big old moustache ... in ginger. And of course goggles ... steampunk has to have goggles ... or a monocle. Not wanting every nations soldiers to have the same type of eyewear I'm going to have to vary it somewhat, so the Royalists have their goggles loose about their necks ... but they still have goggles.

After a fair bit of initial faffing I was pretty pleased and tried the whole thing with my rig and animations and it looked like some sort of terrible mutation had been involved in some sort of scientific disaster ... on a train ... which had crashed off a bridge ... into a Dynamite factory ... More reading up rigging was required and watching copious amounts of video on youTube.

Previously I had assigned vertices to bones via simply grouping them at full strength, which had caused the poor deformation in my first models. Carefully painting the weights seemed like a better idea and slowly but surely garnered better results - as did rebuilding various parts of the mesh incessantly ...

To quote an obese, chain-smoking alcoholic:
Success consists of going from failure to failure without loss of enthusiasm.
 In the end I was either satisfied or beyond caring ... possibly both, and decided it was good enough.


Imperial Strut animation - in the ancient Blender 2.44 which I still use ...

The model is currently only sporting a simple diffuse map with ambient occlusion. Later I shall create the specular and normal maps, as well as add various details to the diffuse, though not too many as I don't see much point in having hugely detailed models or textures when the player is going to spend most of the time zoomed out on the battlefield.

And here it is in video - note, the rifle is currently a whopping bit of 2x4 that I'm using as a placeholder model.


Note: I use an older version of Blender 2.44, and 0.964 DTS exporter. I do use DAE/COLLADA at times, but not for characters. This is mainly down to the animation system changing in the 2.46 version of Blender, and me not wanting to spend aeons learning the new method.


And one final thing. Torque3D game engine is now available under the most permissive of all Open Source licenses MIT.

Thursday, 31 May 2012

I Break Everything And Then Fix It! Oh The Exciting Life Of Indie Deving!

I had a liver detox diet, lost the strange bicycle tire which had appeared around my torso, eat more fruit than anyone had ever eaten before, took up skipping - which is knackerising - bought a few crates of ale and a bottle of baffling expensive rum under the guide of death metal celloist (it was a very pretty bottle),
sat about in the garden because it had finally stopped raining in the Shire of York after the wettest Spring since 1907. And even found time to break everything that I'd done dev-wise whilst trying to fix it.

So I ended up changing my art style again ... immediately after I'd decided on what it was going to be ...

So it is now more "painterly" and less "abstract".


I'd done a bit of refractoring my working level, shrinking the size of the hedges a little and opening more gaps between them. I'd also noticed that I'd been getting a fair few failures on pathfinding with the Recast resource. My terrain is very bumpy and I'd set >1500 custom class CoverNodes about and done pathfinding between them with an automated script to test around 7 million paths. Initially I'd a rather worrying 2.5 million failures, and after a bit of saving throws in my pathfinding scripts, I'd got that down to <200k, and then thrown in a simple "move to nearest node where you can actually get a path" incase that 3.7% failure rate occured in game.

I'd improved my Ai, getting them to make decisions about when they should try and hide from the player. Previously they'd either stopped at distance if they were "support" or advanced if they were "assault". I've always been a fan of turn based strategy/tactics games ... which is why I'm making one obviously ... but sometimes their Ai has been a bit ... daft. Steel Panthers I'm looking at you. I added in a whole load of new thinking to make the computer act more in the way a player would, but still using it's randomized battle plan.

Suddenly my Ai were filled with awesome and powered by buttkicking, so it was time to remove all the little helpers I'd given them previously to make them more competitive, like maxing out their stats, they now get the same chances for decent stats as the player.

Which all goes to make battles more competitive, varied and fair.

Somewhere amongst all of this I'd noticed a few bugs so I'd fixed them, and thus managed to break "many things", again mostly pertaining to the Ai. After a fair bit more hitting IDE with a mallet I got things working again as they should do.


I'd also made a start on creating some player characters - or at least a "base character". I'd looked at some of the meshes that I'd got from Evolver for use in Blender some time ago, and studied one of these as a base for rigging and animating a custom character. I'm doing a SteamPunk vibe, so everyone "struts imperiously". I'm still using Ye Olde Blender 1.44 with DTS exporter 0.964, though I export with collada for the foliage/trees/bushes so I can use vertex painting.

I'd also made a whole load of improvements to my GUIs, such as adding a new button for reserving a shot at half maximum range if you don't want your little chap to be wasting shots on things miles away that he's unlikely to hit. In "loadout" I'd also added the ability to equip one chap and then have his equipment cloned to all unequipped troops - money and individual strength/encumberance permitting - which is incredibly useful when you have a bag of Conscript Militia who can only use basic equipment until they get promoted ... should any of them survive the battle.

Still to do is a bit more Ai thinking tweaking, a bit more environment tweaking, creating some finalized models for troops and weapons, testing the assault and defend gametypes, doing the art for GUIs, and errr ... general stuff. My bug fixing list gets smaller, my todo list doesn't seem to. Oh the exciting life of Indie Deving!

tl;dr good things happened, bad things got fixed, I'm eating a lot of fruit.

Wednesday, 23 March 2011

Death of Drawcalls - Birth of Cutscenes, also Flares, Checkpoints

First up, after years of spamming the site with jokes and the occaissional helpful post, I joined the hallowed ranks of the Titans, striding the earth with inflated ego and a pair of socks pushed down the front of their pants ...

... that's the GarageGames Associate program to normal folks.


Steve joins the other Associates for hor d'oeuvres at their Fortress of Perpetual GrimDark

So, on to drawcalls ... and ... oh wait ...


That's better ...

So, back to them drawcalls. I've a vague recollection of mentioning the damn things before in about a gazzillion blogs, but I'm always on the lookout for screwing every last bit of performance out of the engine. I'd been looking at my last demo and wondering if I could amalgamate more of the textures on the buildings. There's a lot of tiling going on with them ... so I decided to try a few experiments in reducing the sizes and adding more sections on to a single image. There was obviously going to be a fair bit of a loss in detail quality, especially close up - but as my work has obviously never been about heavy psuedo-realism, I figured I'd be able to live with it.


Original prop building at the top (5x 512 tileable textures), new single 1024 texture at the bottom.


And live with it I can. I still need up to 4 meshes for an enterable building (exterior, lightmapped interior, lightmapped props, and transparent windows). But for "prop" buildings I managed to get away with a single 1024 texture. I wasn't always able to get a mesh into a single drawcall, occaissionally requiring more, but over all my worst saving of drawcalls was 50% and my best 80% for enterable, lightmapped buildings. All my prop buildings had their drawcalls reduced to 1 from around 5. I also decided to cut out a lower LOD and suffer a few more polys at mid-range now that there's less drawcalls.

I'd also tried the same thing with my many road sections - but visually they really seemed to suffer in a much more noticeable way. So I decided to make a "supermesh" roadsystem which promptly truncated because I'd turned all the warnings of in Blender ...


So after splitting the new supermesh up a bit I'd added 130K polys to the scene for the loss of a poxy 31 drawcalls and no performance improvement with some dodgy shadowing along the now more open meshes ... which wasn't really win ... and promptly reversed the roads to how they were.

After seeing Brian Mayberry have lots of fun with glowsticks - I decided on more function creep and created flares for my player. I'd wanted to avoid a torch (US: flashlight) as it's a bit obvious and always availalbe in a HL2 type manner --- nice flashlight resource though CSMP. The flares are actually quite useful as some of my levels are intending to be "dark" - in fact Level 1 corridor crawl is fairly dark - and I've hidden pickups in various dark corners.

Which actually brings me to Level 1 of my Campaign - which is about done, just a bit more drawing to do for plot devices., but all the action is scripted and tested and tweaked and retested. There's 2 routes through it, it's got a nice ebb-and-flow of action, from scary melee based monsters creeping about in the dark, to intense, open firefights and back again.

My single player narrative campaign mode did throw up a few new issues. I created a checkpoint system so that a deceased player didn't have to restart at the beginning ... which would be fairly annoying as it takes a good 30 minutes to get through the level regardless of which path you take, and you can crossover between them in a few parts. My checkpoint respawning threw up another problem of finite pickups. Yes the dead Ai drop ammo, grenades, etc - but if you're already bulletless then it's kinda hard to get at a whopping great big alien tooled up to the nines with an automatic weapon from 100 units away when you have a melee ranged cricket bat. So I had all the "static" pickups respawn with the player, via a new permanent field that I added to the code (I'm still slowly chipping away at the cpp before getting around to making a full frontal assault on programming at a later date -- I did try to create a custom "thin" version of shapebase but it didn't go well).

All in all it works quite nicely, the extra ammo helps if the player is finding it tough. The player respawns into the continuing game rather than a reloaded one, so if you've killed half the bad guys at a position before being sent beyond the mortal coil yourself, you only have the remainder to get past. I've still to sort out a full "external" save system for campaign progress or restarting a game half way through.

And so on to cutscenes - or really player controllable in-game comics. There's next/back buttons so that the player can flick through triggered plot scene. These are mostly for story, my jokes, and occaisional hints/tips. The story boards and in-game comics are there to "complement" the gameplay - but there's a big old "Skip" button if the player would rather just get back to the action without flicking through them all.


Never let it be said that I ain't a sucker for dry wit ...

In other news, I added a visual indicator of the number of player lives remaining in the "random battle" mode (3 lives for each area - previously you had to read the info to know this and then keep count), and will also add this to a selectable "challenge" mode for the campaign levels. Eventually I'll figure out some sort of scoring system for all modes as well - not particularly important in campaign, but it takes on more significance in "random battles" and any possible, future co-op mode.

Anyhoo - vidya! Here's the comicbook and flares in action ...


And here's an older one without them which features a play through of the first 5 minutes of one of the routes through the level.


I've a few more things to sort out yet, a bit of GUI refaffing for various menus, and finishing off level 1, plus creating a randomized battle mode for that map. And then I'll release a new demo, probably next blog - which will be done when it's ready.

Saturday, 28 August 2010

Blender-PureLight-Jefferson Starship-ShapeEditor-Prefabs-LOD

Yep, I think that sums up this posting quite accurately ... and if it doesn't, well hell, I ran out of space in the title anyhow.

Blender ... scourge of Damocles, liberator of ... er ... I don't know ... stuff ...
Also Jefferson Starship.

As free goes, Blender's awesome, but rather lacking of a working DAE importer (no, I haven't tried 2.5 yet). But it's free - so workarounds should be expected. It's not like you've forked out a shovel full of cash for PS and then have to patch the PNG exporter, can't say freebie Gimp ever suffered from not being able to export a standard format ...

I'd been thinking of ways to (re)build a town (again ... and again - BSP lol!) since making various test versions, and had come up the idea of using a few stock buldings, repeated through-out the landscape. Basically a detached house, a semi-detached (dual building), a cottage, a large manor house, a church and chapel, a multipurpose large public building with changeable props, and a couple of other things.

And whilst knocking up a detached house in Blender (with 140 collision meshes) I cam across a formula. Exterior Mesh - heavily LODed, Interior Mesh - (just the rooms no details) lods out completely at distance and the exterior takes over, and Props - furniture, stairs and details which lod out once the player is a bit outside. Props is the biggy 5500tris of beds, wardrobes, sofas, toilets, stairs, window ledges - uses 3 textures. Interior is a simple 700 tris, but uses 6/7 textures, and the Exterior has a fair few textures, but quickly LODs down to a simplified single texture (by amalgamating all the materials into a single low-res texture) and Interior also does this, so all good for performance there.

Of course there's one problem ... and that's that the unlit interior looks kinda flat, and in Lowest Lighting is just bloody awful.

PureLight Huzzar. So I decided to tonemap the Interior and Props meshes, giving a little depth and interest to the ambient. Nothing fancy, just a light ambient through the windows, something that doesn't look too out of place if you have in-game sunlight coming in as well.

Also Jefferson Starship.

Now in Max or something, you'd reimport your tonemapped meshes and stitch the whole thing into a file ... but Blender ain't gonna do that, so I cranked out the Shape Editor for a test run. I found that it was easy enough to add a new mesh LOD to my Interior (2 meshes remember, same tris but one has only 1 material) and then a dummy LOD of a single triangle to force the mesh to LODout completely. I soon found that sharing a dummy LOD object with another mesh causes issues so each new LOD/Dummy requires it's own individual dummy LOD object (might've helped if I'd renamed them but nah ...).

Anyhow the upshot was :
Exterior - fully Loded, no tonemaps
Interior - Loded with ShapeEditor, tonemaps
Props - single Lod, Lodsout fast, tonemaps

Also placed correctly, the only thing remaining is to zip them up into a prefab, and drop them into a level as I please. RESULT!

And then I found that somethings can affect lightmapping. SubSurface scattering seems to help lightmaps fight off the power of the ambient and preserve their vibrance.


And as you can see from the above pic, various settings alter the way ambient and tonemaps interact ... and boy, does BasicLighting look nice now! Not that I'm ever going to be using it personally ... but someone ... somewhere will.

Also Jefferson Starship.

Did I mention Jefferson Starship? (caution:Flash)Clovis Music Festival. Tip the parking attendants, if they speak with a funny accent that includes words like "ee bye gum" they might be my folks - don't ask my dad to explain cricket ... Last year featured my mum holding back a horde of hysterical middle aged women as they tried to rush the stage and tear the clothes of a teenage Richie Vallens impersonator ... the lucky young bastard!

Of course some of us poor buggers aren't retired so it'll be business as usual on the one man -who's not entirely sure what he's doing- game development.

Talking of which, I had a quick test of close range combat against a melee based foe.


Which was geniunely quite panicky - so I was pretty chuffed with myself.

Now ... do I really need to make roads with sidewalks/pavements as models ... if I don't have curbs then I could just use decal roads ... but curbs do give a rather urban feel ...

... decisions, decisions the pressures of command ...

Sunday, 7 March 2010

Raging Texture Terror Usurped By Drawcall Delerium!

February flew ... fled ... or fffffff .... apparently ... or at least I didn't get a blog done anyhow. This may or may not be the same thing.

But we've been busy, 'cos ... well ... we're always busy ... and not just with talking about myself in 3rd person.

Having had a good read through some resources, I appropriated all the bits I liked into a custom weapon->clip->inventory system. Figured it'd take a good effort, say 16 hours, so settled in for a mammoth stint. And I did then iron out all the bugs after around 60 hours ... not quite what I'd planned on and hard to say how much of that time was actually spent rewriting the same thing from scratch after various mess ups as it's all a bit hazy but it did all get done in that week, and every possible way that the player could try to break the cycle and cause a bug has been covered. It's really all about logical arguements ... and me not considering all of them before starting. What happens if you have auto-reload and the player hits manual reload? Or tries to change weapons? Or aims down sights in mid reload? Or ... any of a number of things which cropped up as bugs and had to be squashed.


Still have to sort out my first person weapon, arm animations, and it will have to be a seperate arm attached to the weapon model in first person, as expanding on my previous synchronize aim-down-sight with 3rd person model hasn't proved successful.


Ripples - Automatic weapon fire - the perfect skipping stone?

And whilst messing with the whole weapon stuff, we've also had a good go at particle effects in general. Redoing all my weapon impact particles, ditching muzzle flashes in favour of mesh ones, and sorting out the impacts. I also "pooled" as many datablocks as possible for both particles and sounds, rather than having all individual ones listed in the individual weapons' cs files.

After browsing around I found that Indy Games company "Sickhead" had mentioned about the incompatibility of dogs and particle effect sources, and it hadn't occured to me to use actual effects like water or smoke for source material for particles before, as opposed to just trying to draw them, which I had done previously. And it all appeared much better.


Fire and Smoke particles made with real smoke

I also knocked up a little script to loadup specific datablocks for specific missions/levels in an attempt to keep preloading overhead down. I worked out a bit of info on audio and mainmenu music, as well as started to build the basis for my final play GUI. This involved a certain amount of umm/ah about how much GUI to actually have and especially the fate of the dreaded "crosshair". In the end I settle on a fair bit of GUI clutter on-screen, as I'm not after supposed realism. Most of it will be achieved as pop-ups - think inventory system akin to HL2, and I decided on an empty circular reticle as opposed to crosshair/no crosshair, which can be toggled and faded through 4 iterations or turned off completely. I've still a few more design decisions to make on the whole GUI thing ... but most of it is sketched into the cunning plan.


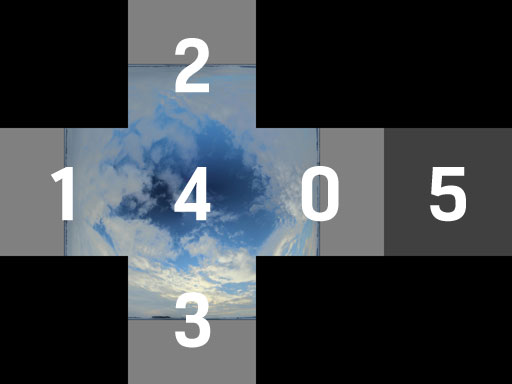
I also started to think about terrains and environments more, knocking up some terrain textures and fiddling with various settings. In the end I decided against parallax and continued to err on the side of numbers of stuff rather than eyecandy. I came up with a painterly style for skyboxes ... all very artistic and not half as difficult to make the sides join up seamlessly as I had initally feared. Also found out/had forgotten that relfection maps need to be rotated 180 degrees from the skybox, so you can't just use the same thing.


Did I mention textures?

As a remnant of TGE/A, when I found my texture memory being devoured by large textures, I've had a bit of paranoia about texture sizes, and had always tried to use as small an image size as I could (max 512) and split UV maps between multiple small textures. Of course this doesn't take into account drawcalls, and so I had a bit of a rearrange, merging a number of UVmaps into single textures. Most noticeably in my AI/Player models, which I had previously split into boots/trousers/jacket/armour/hands/headgear/face/extras - and that all produces a fair few extra drawcalls. Amalgamting all of that into a single UVmap (still only x1024) gives me a reduction of around 1500 drawcalls per 25 Ai characters, and a mild boost to fps on my current GTS250. So, texture memory paranoia has been vanquished! Or at least replaced with drawcall paranoia ...

And I did the same on a number of props which use several textures.


Groundcover is currently placeholder I knocked up quickly

Also did some general tweaking, made more models, messed around with my AI scripts a little, and started to contemplate how best to create an in-game save/load system. And some other stuff ... which I can't remember. Did I mention doubling up weapon selection on the 0-9 buttons a la HL2 so you can choose 20 weapons with 10 keys in a previous blog? If not, that's done too and bug squashed.

The engine I'm using (Torque3D) is another beta and it is shaping up nicely, and I've already been modding how the quality options of the new OptionsGUI works, to make some of the changes more noticeable in both terms of performance/eyecandy gain/loss.

Still on my list of not yet accomplished, are to redo the weapons (for the ump-frickin-teenth time) and have them work with animated 1st person arms which render/no render on 1st/3rd person camera, sort out clip/ammo reloading animations for all of this (12 weapons so far - 20 planned), make some more AI models (say 2 distinct types). After that it's tweaking AI scripts, and then soem actual gameplay making! Which has been so long I might have actually forgetton how to do it!

So ... not too much in February which was planned but didn't get done, and plenty that didn't get planned that did get done --- but that's the adhoc production nature of being one bloke, in his bedroom, trying to make computer games.


If I actually manage to get my proposed demo out by April ... it'll be exactly 2 years since my last demo.

Thursday, 24 December 2009

Organic Modeling Redux Rehashed Rinsed and Repeated

Back to remodeling my remodeled models ... models.
And LODing, lots of LODing.
And we're not going to be rejiggering the pokery again, this is the final cut of character models.

This was what changed the last big alteration, as posted in this old blog.


But frankly there were still plenty of issues, especially with dodgy deformation around the arms, so after fluffy bunny slipper catgirl got scratch built, then tweaked for better joints, everyone else has needed a bit of a rebuild from scratch too.

Obviously the best way to do this is to have a set of standard "base" characters to act as a blueprint, one for male and one for female. With deformation going to be as good as I could get, it was time to plough on with rebuilding my base soldier model. Still sticking to the principals of keep things fairly simple, most characters are sharing the same pants and footware textures. I beefed up the body armour considerably, and so it no longer looks like a leather jerkin from Henry V. So, once more into the breach, dear friends ...

Old versus new version as seen in Blender.


Actually, I trimmed a few polys off the head, it was much too detailed under the cap, and as the cap isn't coming off there was no point in having a full head of hair underneath it. So LOD_0 weighs in at 4958 tris.

I ended up 7 LODs in total, cutting down polys and texture numbers as they go - the last one blank to make sure that the model will disappear totally at 8 pixels. I've found that without having an empty level of detail the last LOD will always display. It hadn't previously occured to me that textures should be LODed out too, but I saw someone ... somewhere ... in the forums mention that the last LOD should only have one texture to reduce draw passes.

LOD_0 - 4958 tris - 8 textures - detail 400
LOD_1 - 3732 tris - 8 textures - detail 300
LOD_2 - 1849 tris - 5 textures - detail 200
LOD_3 - 764 tris - 3 textures - detail 80
LOD_4 - 120 tris - 2 textures - detail 40
LOD_5 - 108 tris - 1 textures - detail 8
LOD_6 - 0 tris - 0 textures - detail 2

Now the reason why 4 and 5 are so similar is that skin reflects, and I found it a bit of a jump when the pale skin colour popped into view, so I made an extra LOD which was basically the same blocky, stick figure as 5, but carried the skin texture for the face, thus easing the popping of the contrasting tone of the two remaining textures.

Bent over Gimp and feverishly scrawling on my tablet, I'd also redrew the textures up to scratch a little more.

And what it looks like skinned in comparison to the old model.


Righty-ho, now I need to knock up a security guard, and then probably work on bad guys of a scary disposition.

Merry Ruddy Crimbo

Wednesday, 15 April 2009

Tris versus Textures

A long time ago, in a galaxy far, far away, someone made a post on the forums or in a blog which gave the memory useage for various texture sizes. I noted that useage did not double with size, but was on a much more aggressive scale. Thus 1024x gave a lot more of a kicking to Vram than two 512x.

So, town2 version (counts on fingers) er ... 4? is done. It's a mesh model, with all of the buildings enterable. No facades this time. The 2 storey facade textures (1024x) have been ditched in favour of standard 512x brickwork textures (which the facades were previously based on and had been used around the map for low walls). All doors and windows are now modeled, and are proper openings. All buildings are now fully enterable and made up of multiple rooms. Each building has at least one staircase, large buildings have two. Access to and from upstairs is granted. Access through all buildings now exists.


Prefab houses

There are currently 6 building types being used as prefabs, with a couple of custom ones (eg: church and chapel - church is still a facade, the only one left). All have at least one front and back external door, a minumum of 8 windows and 7 rooms. All have at least one staircase.

There are 50 buildings in the village. That's 641 windows, 180 external doors, 578 rooms, with 81 staircases, all linked, all useable, all explorable. I didn't count how many internal doors there were, but obviously they are what seperate the rooms so work it out (it might even be the same number as the rooms).

Needless to say this has affected the tris slightly. Tris now stands at around 48k up from 15k. And it's also affected performance - for the better.


From all closed facades to 1399-ish openings for view and movement.

Previously, with most of my Vcard (256mb 7900GS) settings on "performance" with x2 AA and Anisotropic OFF and display on x768, I was recording 165fps with the polysouped, facade mesh.

Dispensing of the services of the 1024x facade textures, and increasing the polysouped mesh by over 500%, I get the following results.

New Vcard settings are "quality" including x2 anistropic and AA. At x768 it gives a whopping 196fps, and at x1050 it gives an equally impressive 127fps.

I did have a few issues with exporting the model. I had to split the model into 6 seperate meshes, as together they exceeded the max vertices count. But as seperate meshes within the same model they exported fine.


There's lots more opportunites to worry about being ambushed. 1399 of them.

So, point proven on Vram and texture size against tris count. This was conducted on TGEA1.7.1, 1.8.1 would probably gain more of a performance boost (maybe 10%). How this will work with new tech remains to be seen, but I'd be quietly hopeful that all will be well.

In the meantime I have a Campaign for Real Ale Festival to go to, the last refuge of Saint George Flag waving, folk singing, Morris Dancing, sandal wearing, unkempt beardies who have a deep understanding of the different forms of droppings excreted by the monstrous badger of doom.

BADGER_OF_DOOM is also the current codename for my project.

God save England, 'arry and Saint George!

Monday, 2 March 2009

Textured Chaps

I've been busy to the extent that February passed without a single blog post. Busy sorting out a host of chaps - and not the sort of chaps exotic dancers may wear either, but manly chaps - and no, not male exotic dancers, although it does feature men in uniform.


Officer Dibble looking a lot less like a two-tone blue blob

Having never actually done anything like this before, it was all a bit of an unknown quantity - but having said that I'm new to almost every part of game design beyond BSP level design and scripting gameplay events (player hits trigger = bad guys spawn/action ensues/badgers attack)

Included in the top left of each series of images is the original, raw version of the model type, as used in my old Dubious Demo way back in April'08.


Generic Bald Space Marine Free Zone - Moustaches and Mullets - the sign of a man so manly he drinks Old Spice and sweats Brut

Being a great believer in Keep It Simple Stoopid I based as much as possible off each other to reuse things like normal maps and share the same basic blueprints. There are 4 base face types, 3 base jacket types, 5 base hat types on a single image file, everyone wears the same gloves and everyone loves denim and hiking boots.

I was also concerned with the horror of stereotype which is the crime against decency and intellect better known as the generic bald space marine that plagues 3A gaming. So everyone has hair and plenty of it, both on head and face. Everyone wears a hat. More game characters should have lush and bountiful moustaches and bad teeth.


Heroes may occaisonally get stuck in a lift armed only with a string vest, but no-one ever puts a cheap suit with a bretton cap.

That's about it on the character modelling front for the time being. There's still a bit of tweaking required when the models pose, a few animations to sort out (though I did alter/faff with some in the last month), and some other related work yet to do. But I'm planning on sorting that out at a later date as I don't want to find something else that needs fixing later on and then have to refaff with it all again. So it'll get finished in one fell swoop.

Next up is back to level design and a specific test. Now that I have pretty much all of the required textures/maps/models/assests/etc for an environment prebuilt, I need to see how fast I can "knock up" a complete level. Also, prior to this but possible at the same time, I have an idea to try on building a BSP in a slightly different manner to my first level.