Showing posts with label drawcalls. Show all posts

Friday, 31 May 2019

Level Design And Level Redesign And Level Redux

Environmental level creation continues in earnest.

Level 4 is a grassland, inspired by the Asian Steppe. Originally the grass was going to be green, but the previous level was predominately green, so for variation I changed it to a more prairie yellowish-brown.
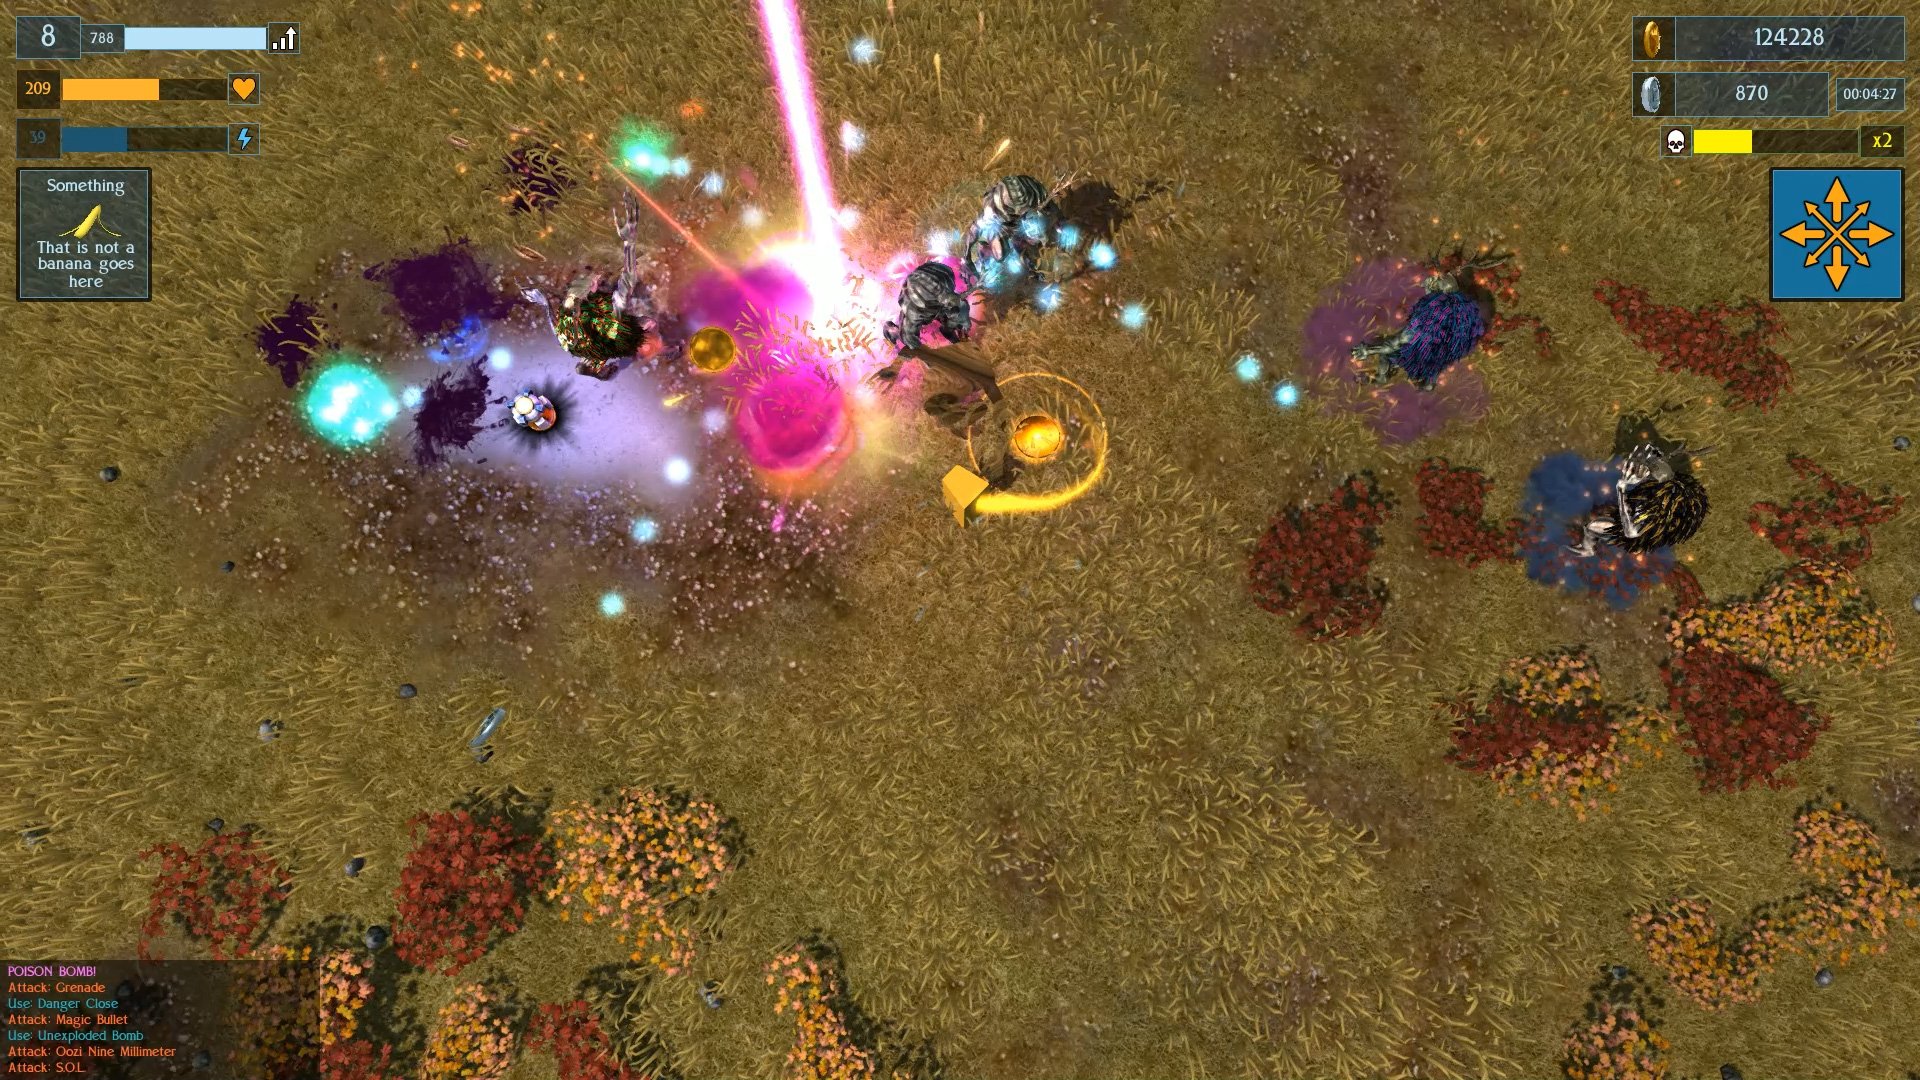
 The Steppe, home to deer-monster, Wendigo-type, thingies ...

Grasslands, by their very nature are somewhat ... well, bland. There's a lot of grass and low rolling hills with more grass and not very much else. The level is mostly wide and flat open spaces, with high, dark, rock walls to limit the playable environments outer reaches. I added a few extra rock outcrops to break up the vast expanse and created a central "hub" mountain which dominates the centre of the map to create a vaguely circular map with a lot of open space. To disrupt the near constant flow of grass I threw in a few autumn coloured bushes which help add variance to the monotony, and clumps of violet flowers for a colour deviation. The violet flowers are all clumped around the central mountain, whilst the red and yellow bushes tend to crowd towards the outer edges of the map. This helps the player orientate themselves a little to their position in the wide expanses.

Whilst planning level design I realised that as the game progressed, the levels were getting too big too quickly. I do a lot of heavy playtesting - because, well, no one else is, so it's the only way to spot issues with things. By level 3 I was getting lost quite easily in the various narrow alleyways of the canyon level.

Whilst developing the gameplay and enemies for each level, I had been using my test level with grid textures for each of the consecutive level maps. This meant that I had always been testing in the same space. When I started to create the actual individual levels I had multiplied the size.

I went back and redesigned the first three levels, first cropping them into a more square shape that would fit inside a 512 pixel heightmap rather than a long thin shape that spilled into a 1024 pixel one but didn't use up much of the available space. This saved on the amount of terrain that the engine had to render and precompile collision for, which in turn saved on the number of polygons that had to be drawn.

The original test level had later become the basis for the first level. This map has a traversable area of twelve percent. Originally I had started by doubling the size for progressive levels but this now obviously far too much. Going back, I redesigned the second and third levels with a formula to increase level size based on around 50%-70% of level 1 size. Thus level 2 now has a traversable area of >150% the size of level 1 at ~20% of the 512 pixel heightmap, and level 3 is >200% larger than level 1 with a traversable area of ~26%. By contrast level 3 has an area of  ~33% that the player can traverse.

Smaller heightmap sizes obviously reduce the amount of renderable terrain triangles and collision calls. For the first time I also used the "remove terrain tool", creating holes in the terrain in areas which the player would certainly never be able to see on-screen. This helped reduce the renderable area further.
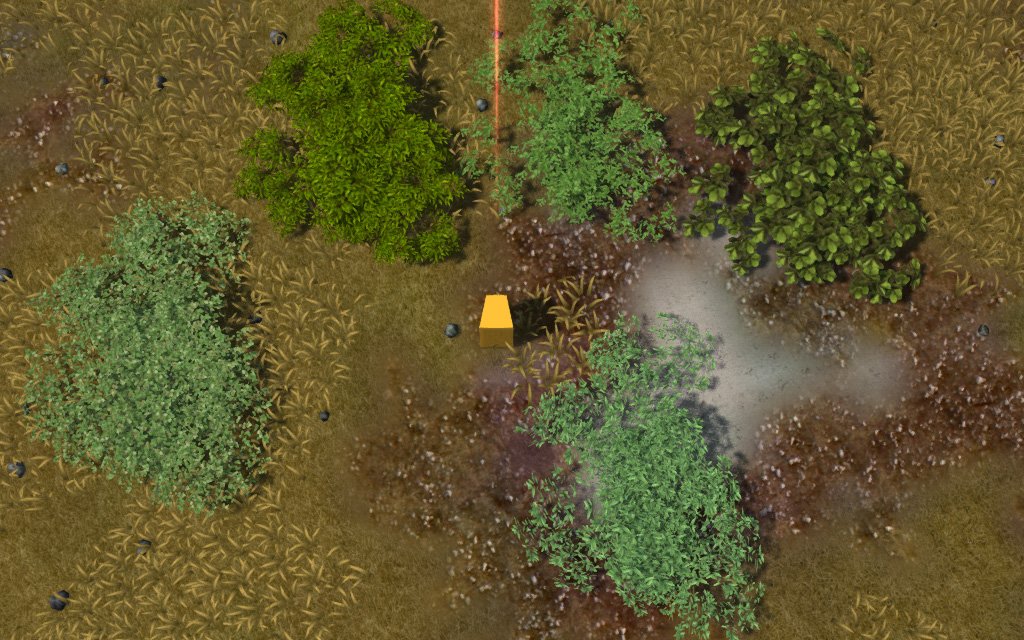
Thick foliage.
Thinned foliage -50% polygons. Textures with less leaves show more transparency.

In the spirit of creating complex but also lean environments to reduce overhead I had another look at all my foliage. Whilst grass clearly needs all of it's polygons, I thought that I might be able to save a few on the bushes as the leaves near the undersides are not all going to be visible, obscured by those on top. I selected all the polygons that could be seen from directly above and deleted the rest. Depending on how thick the textures are with leaves, this thinned the viewable foliage somewhat, but for a saving of a whopping 50% polygons. Bushes are there to add movement in the wind and prevent the levels from looking barren, they're not there to hide the terrain beneath them so being more see-through is not a problem.

I tried the same idea with trees but the saving were so small - around 10% - that it didn't seem worth bothering with, so I left them as is.

And that, has been the month of May, 2019. Also the local internet exchange blew up and I was reduced to living a stoneage existence, devoid of memes, waifus, and all the important work related sites and indie game and engine development discord channel I rely on for day-to-day information about work.

In the meantime I rewrote various bits of code related to spawning the player in more open areas, reworked some effects and did manage to have a little play around with the (PBR) Physical Based Rendering package due for release with the next update of the engine.
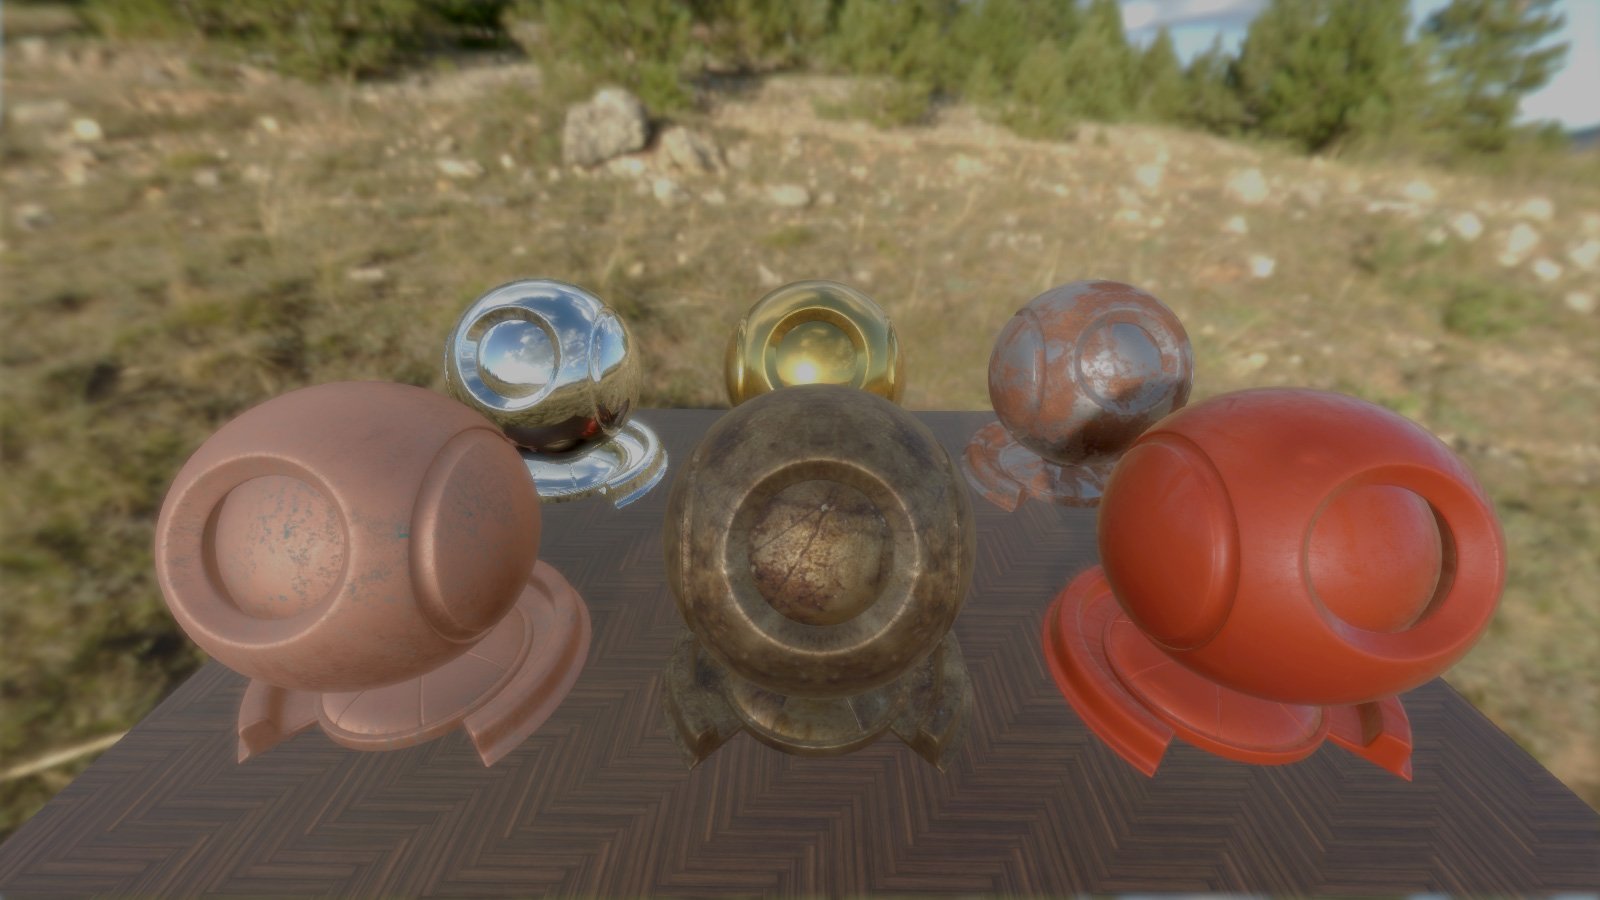
PBR coming soon ... ish ...

Not entirely sure which bit of the development cycle I will tackle next. I might continue with level building as I am now 40% complete, or I might go back into 3D character modelling and finally replace that yellow placeholder cube with an actual player character.

In the meantime, have a look at some gameplay testing for level 4, The Steppe.


Tune in for next month's exciting instalment of the game development that never ends!


Friday, 12 February 2016

World Building Test And The Secret Of Grass

Onwards to world building. I had decided to dispense with the stock terrain and foliage systems, and instead thought of constructing each level out of custom meshes.
With the game's perspective being topdown/high-isometric, I had decided that polycount would not be much of an issue for the whole thing to run smoothly, as not too much of the game world would ever be visible at any one time. I intend to tonemap all of the world geometry with third-party app pureLight, though I've also used Blender to do this previously, and then set the in-game lighting to incorporate lightmaps, so that the diffuse/albedo map is influenced by the tonemap but the normal/specular maps are altered by the dynamic lighting.

Before I could getting cracking on world building, there was the small issue of coming up with a functioning work process, as well as load testing, and the awkward issue of how to get grass to animate without using the forestObject's moving foliage shaders. Players love stuff on screen, and if there's one thing they love more than stuff on screen it's moving stuff on screen.


How do I into grass?

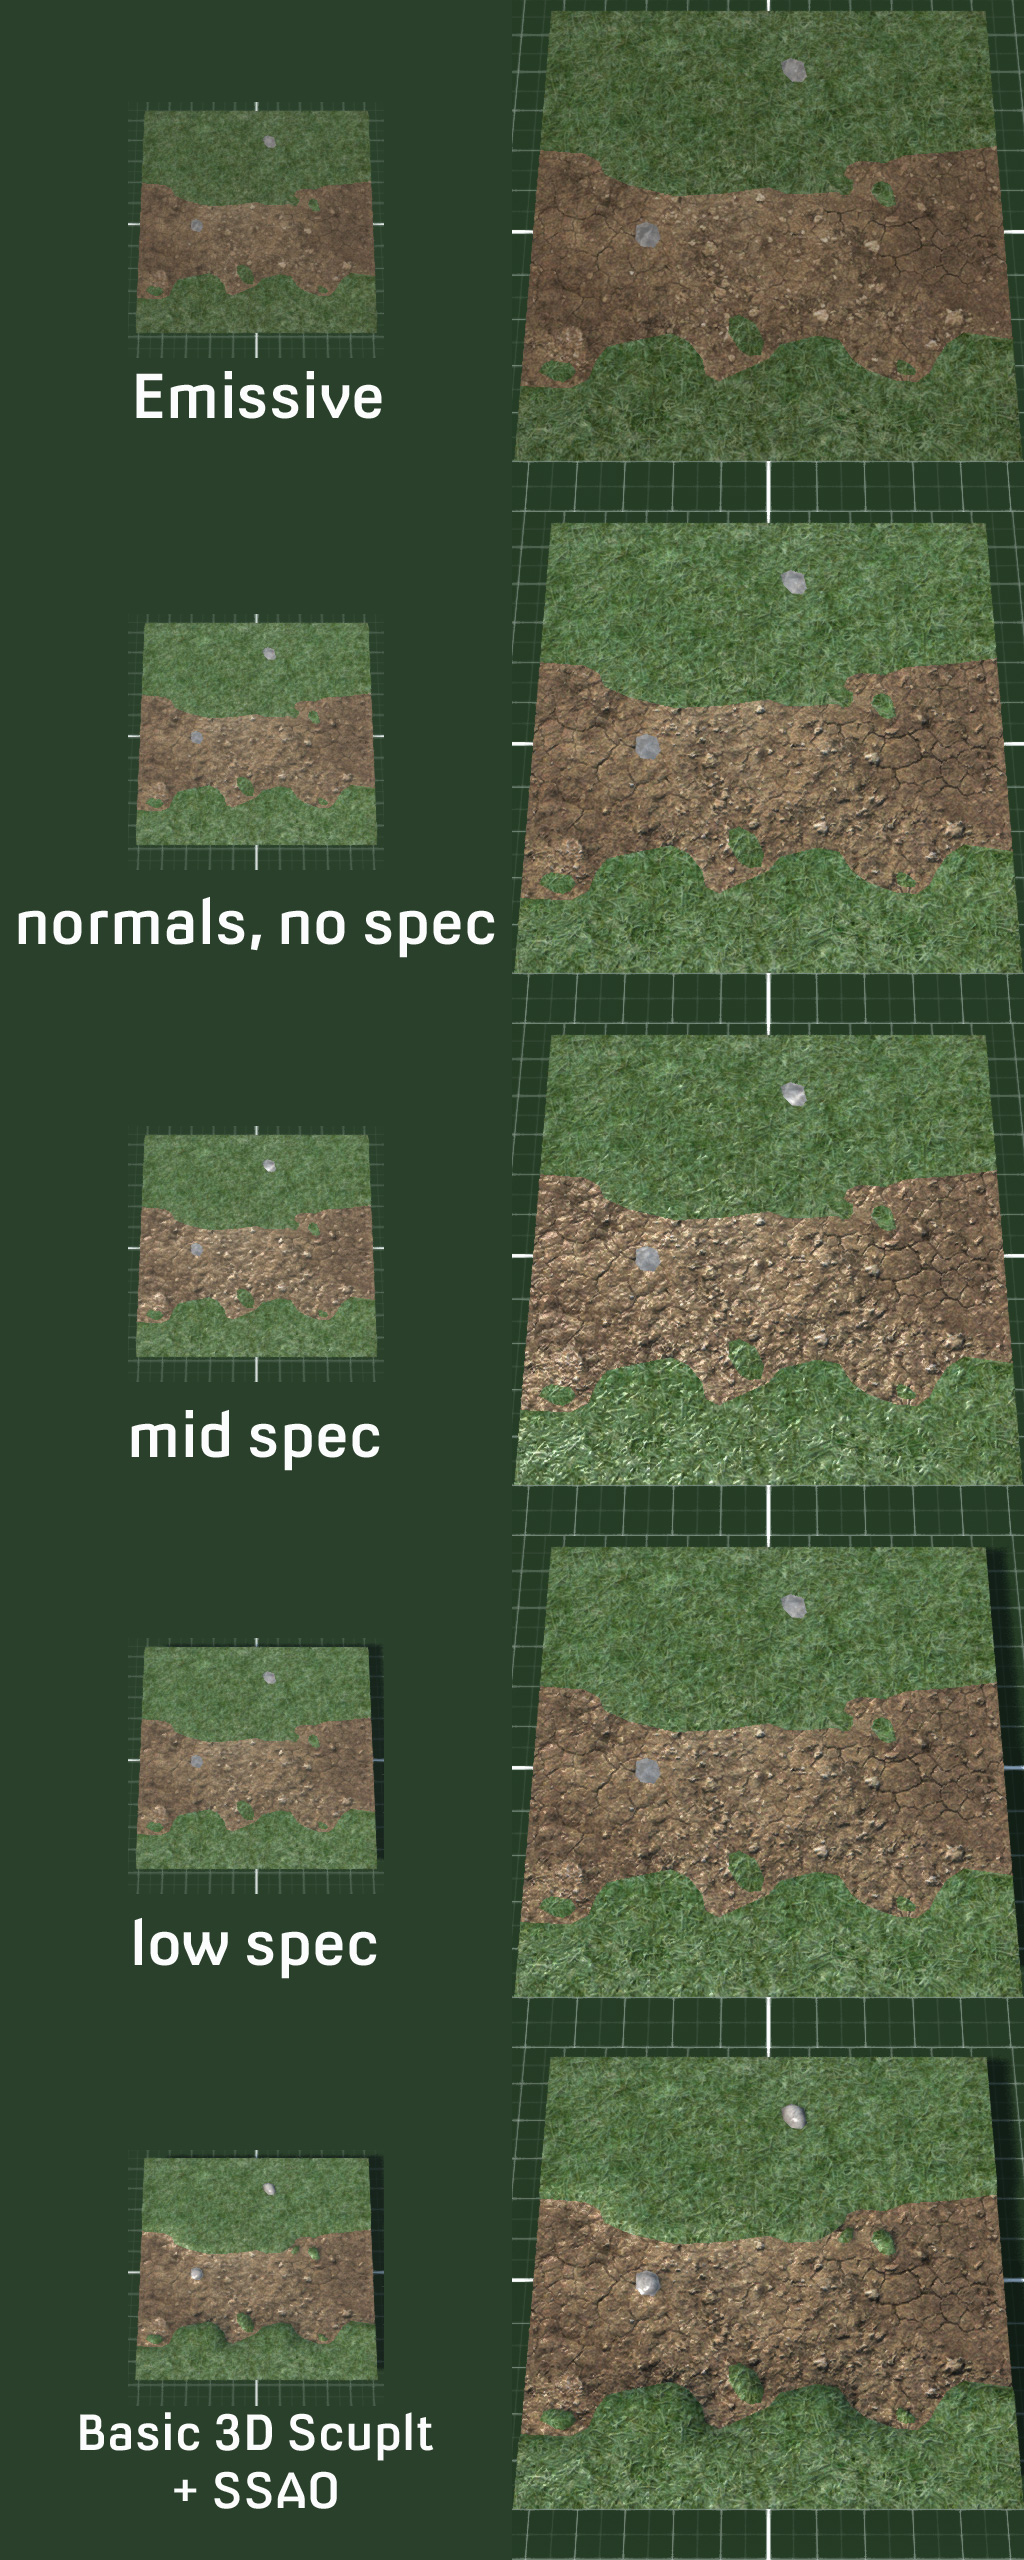
First up, basic construction testing. I decided on a 10x10 mesh with multiple textures of grass, dirt, and rock - 1 drawcall per material. I was not particularly bothered about polycount for testing so there's a lot more geometry than needed. I wanted to create a few islands of grass and rock to make it look more interesting. Specular was initially somewhat overkill and really needed toning down to almost off, but just enough to create some very slight highlights. I modeled the mesh for some physical depth, raising grass and rock layers.


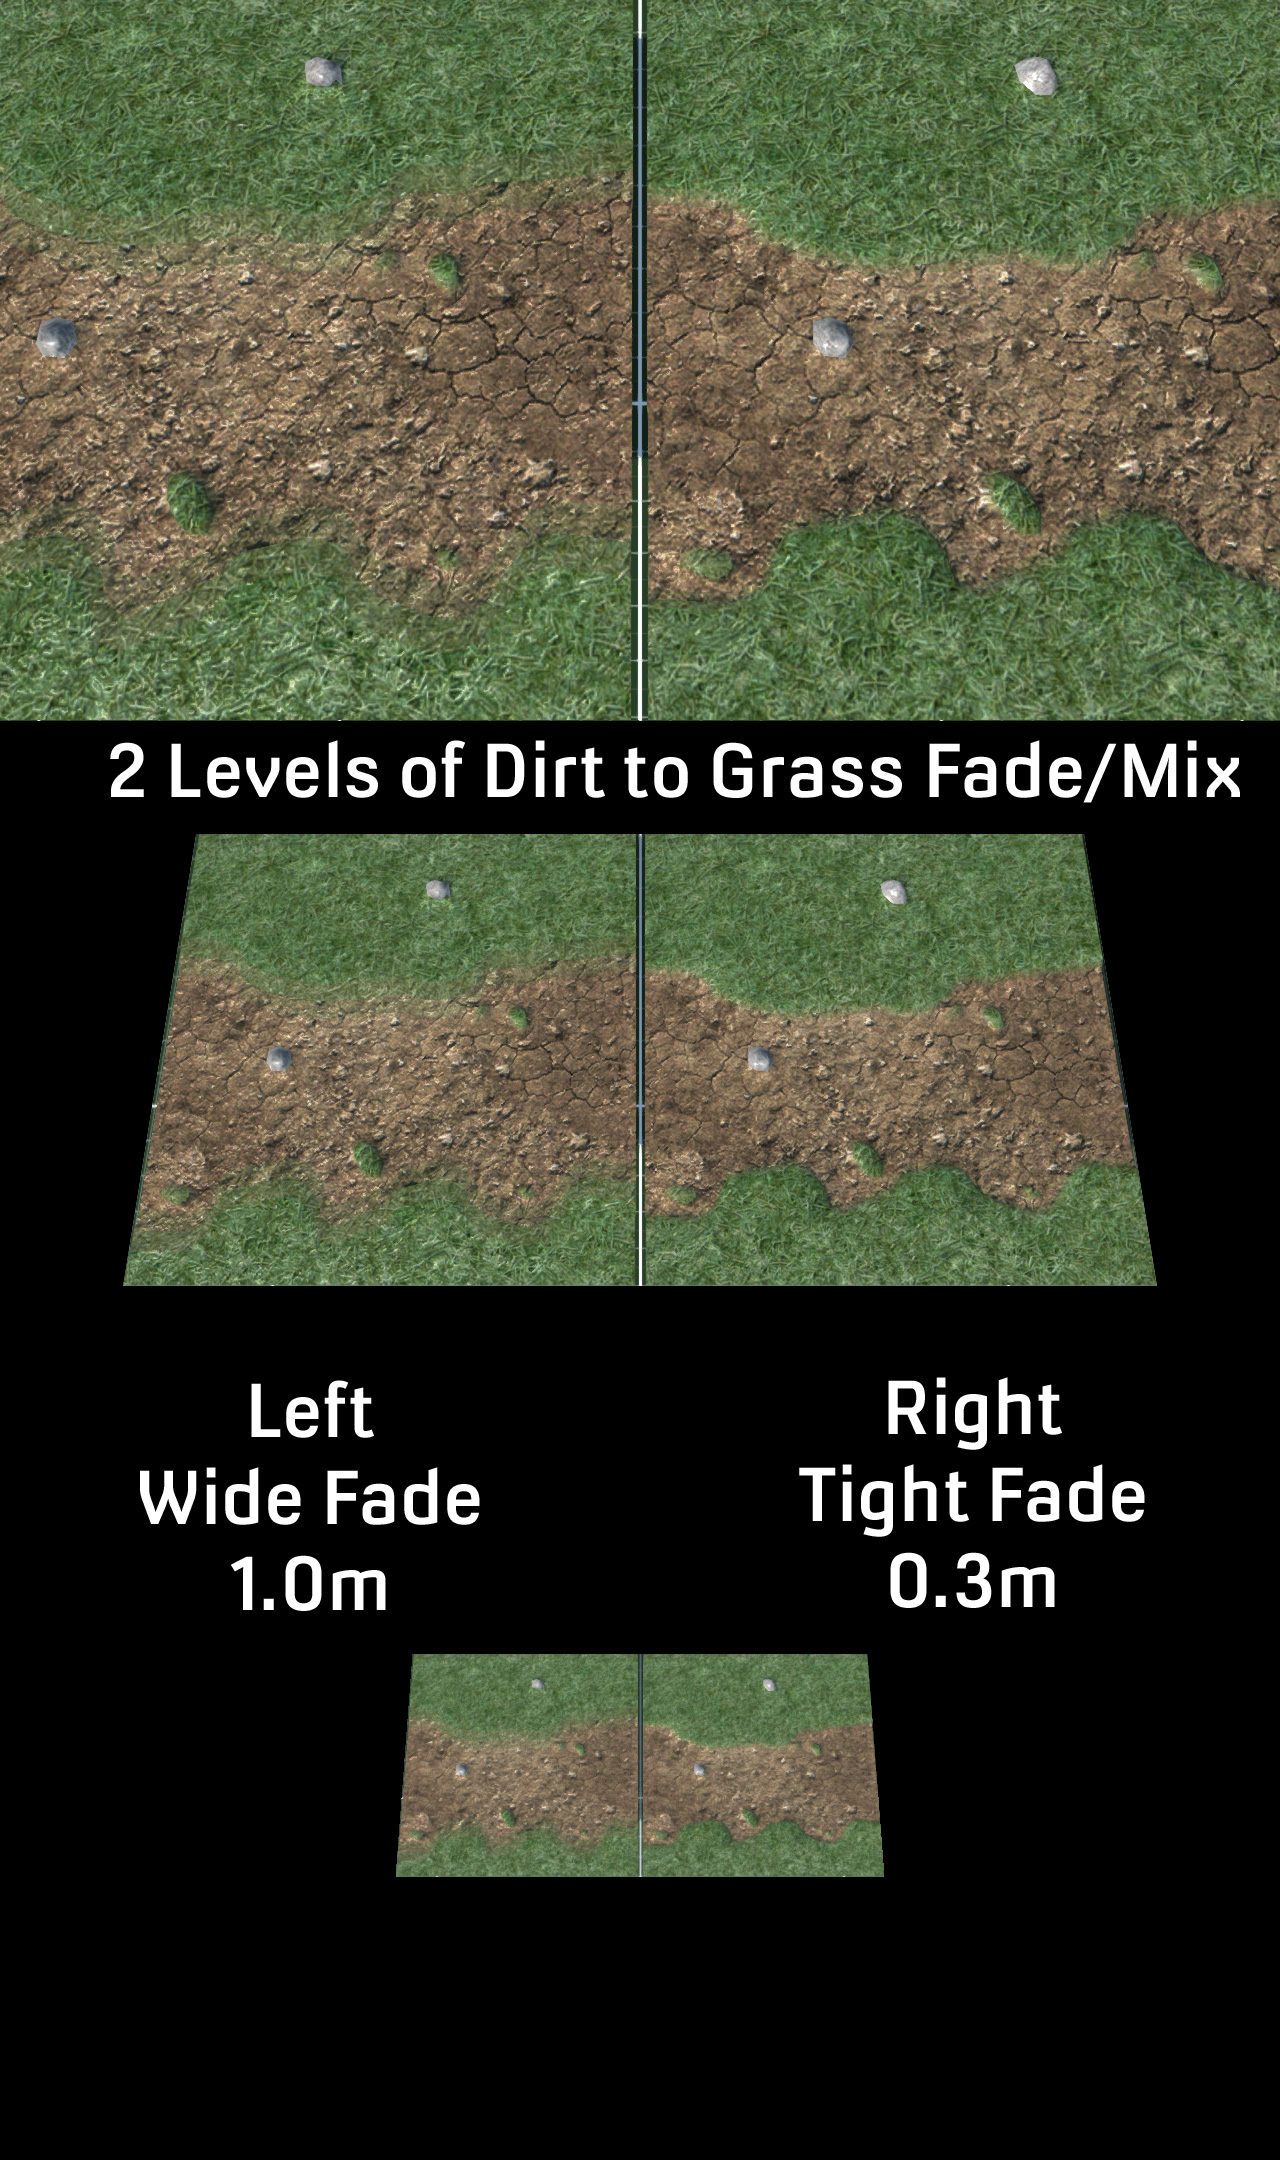
Not bad for a start but the edges of the grass and dirt were a little hard. Of course in real life, grass and dirt don't just fade into one another, but in video games things look odd without blending. I tried various levels of blends but found that just 2 worked fine for what I wanted. Spreading the blend over a metre seemed enough distance  to break up the harshness of the change from dirt to grass.


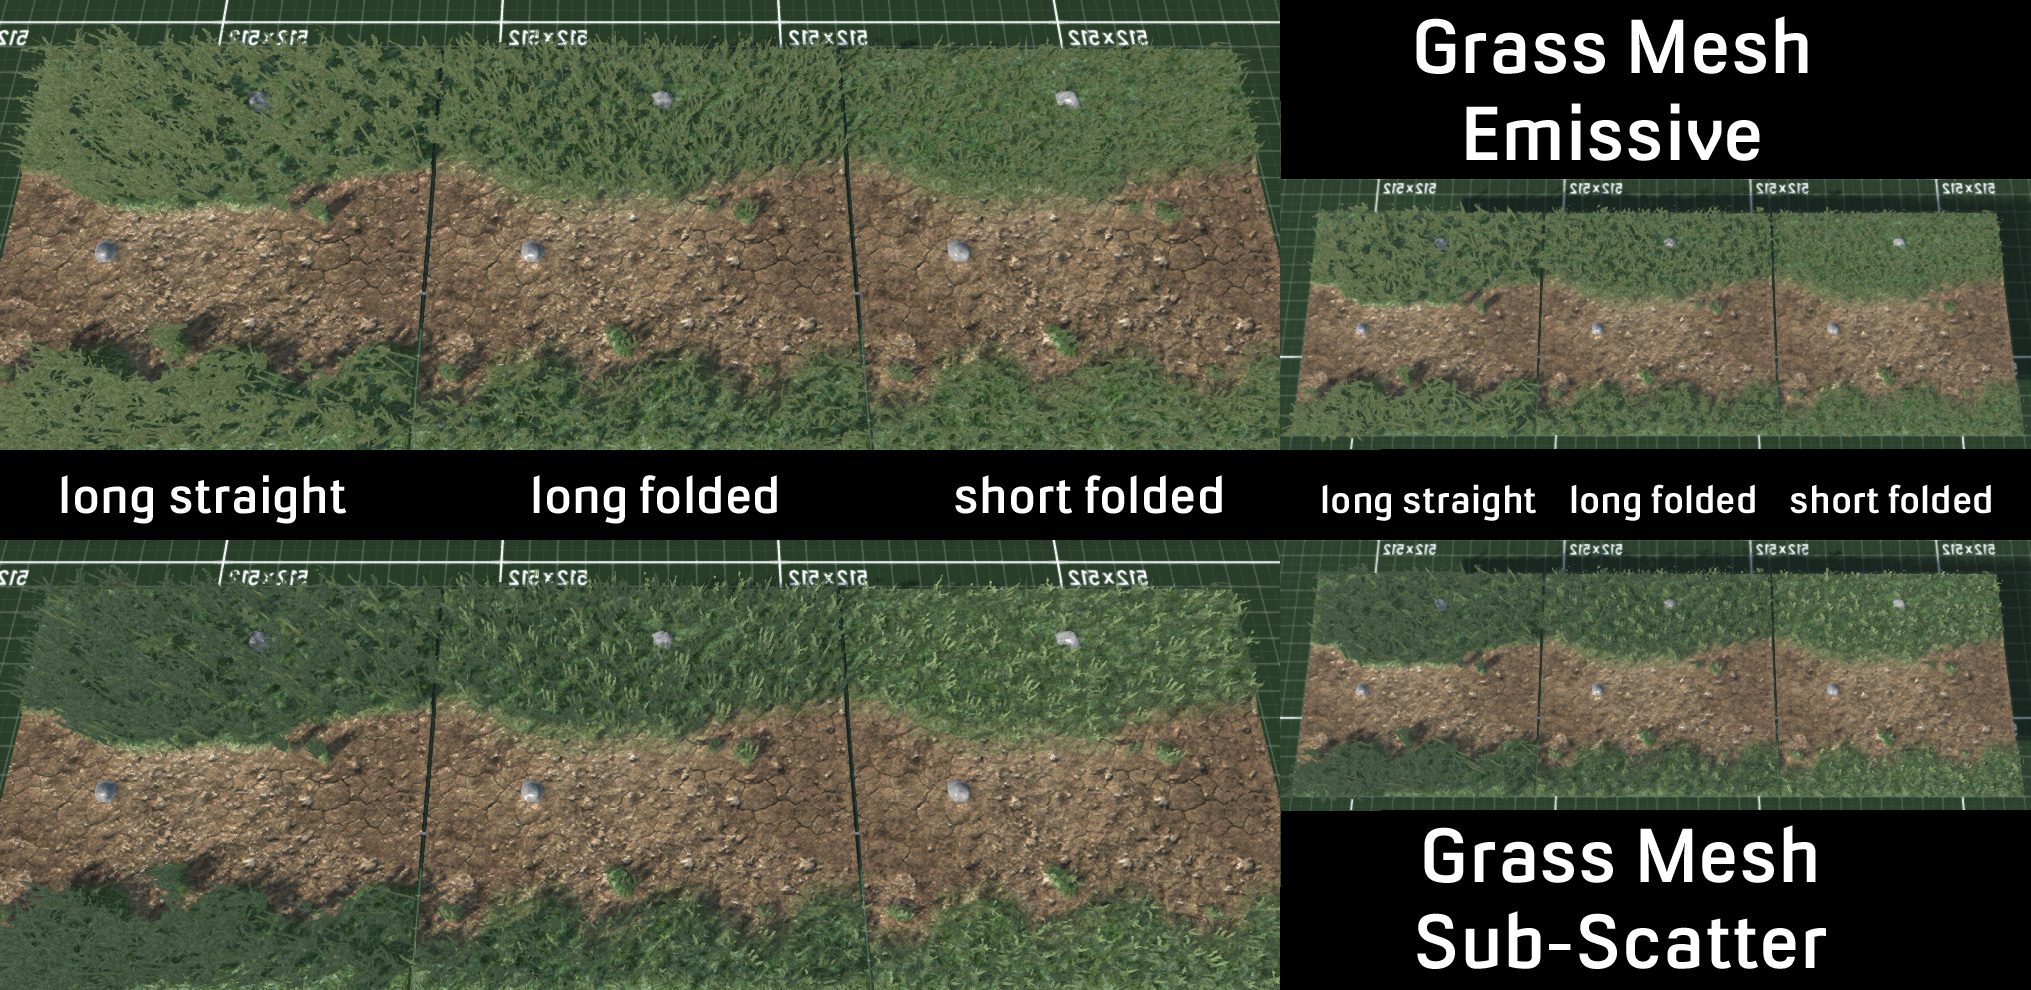
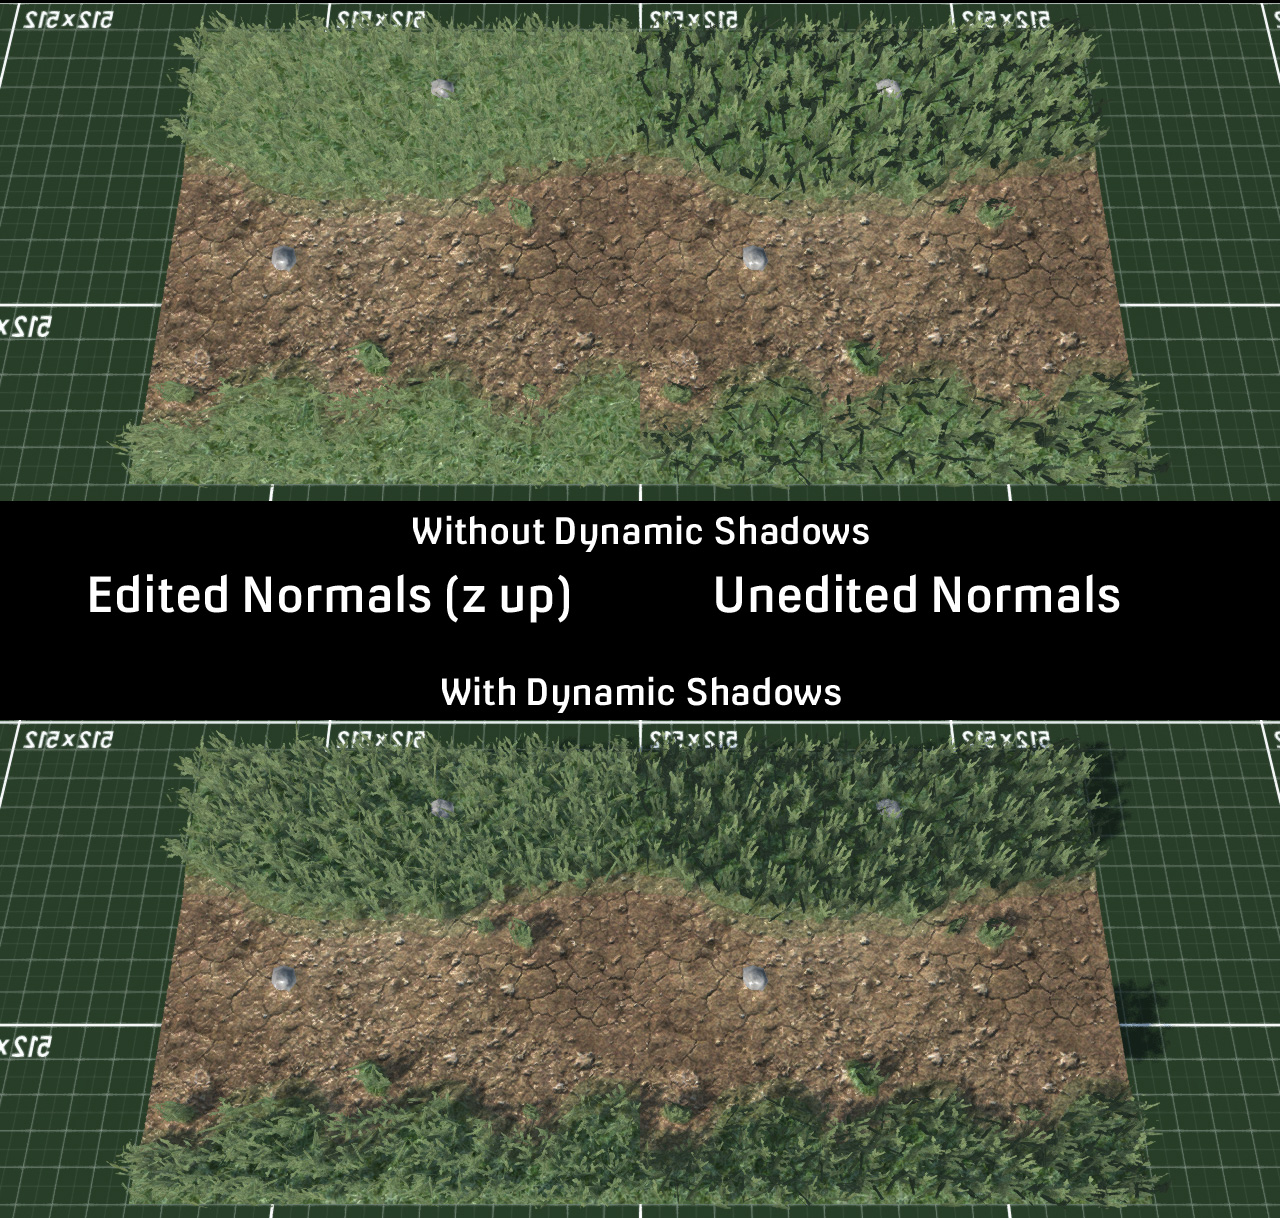
Satisfied with how modeling was going I moved on to grass and immediately hit problems. I found a grass image to use as a placeholder and covered the grass terrain texture in a couple of thousand planes for testing. With the game's high viewpoint, having straight polys looked bad, so I set about dividing the meshes and bending them over at an angle so everything leaned and tilted. Polys facing directly away from the main lightsource had some strange and frankly annoying blackness to their planes. Using an emissive material solved this - but then everything looked like a uniformed colour and became just an amorphous mass. Adding subscattering to the shadows helped to ease the harsh blackness of the polys but it still didn't appear as though they were being properly illuminated.


So off I went on an intrepid quest to find out what the hell was going wrong via insert-your-favourite-internet-search-engine-here. Normals were the problem. Foliage normals apparently need to point up to receive proper lighting. But alas the ancient 2.44 version of Blender from 2007 which I still use - because ... convenience - cannot into normal editing - however the new 2.76 version can. Luckily most of the hotkeys seem to be the same so it wasn't too difficult to pick up, and normal editing itself is just a modifier.

Goodbye horrible black stuff ruining the aesthetics of my foliage

I had decided that making an animated texture for moving grass would give the look I desired with very low overhead. I had created a huge level with over 9000 meshes for load testing, and just to see how bad it would be,  I used bone animation to move the grass polys and the framerate immdiately died to around 20 fps. So, just as expected then, back to animated textures.

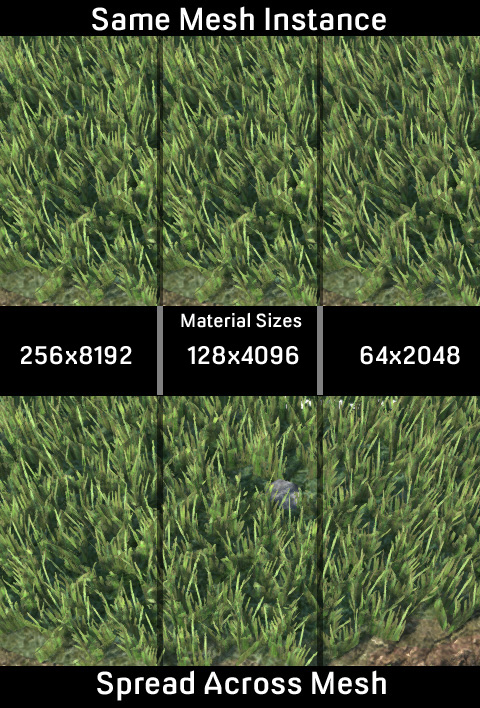
I created a high poly grass mesh in Blender based on this little gem found on the internet (http://forums.torque3d.org/viewtopic.php?f=18&t=18#p53), and then animated it using multiple bones, and rendered out the frames. I tried various frame numbers and speeds, and it shouldn't be too much of a surprise that the more frames an animation has, the better it looks, so I settled on 32 frames. I found that the grass didn't really need much movement in the animation, and in fact looked better with less, rather than wildly thrashing about with higher movement. The renders also scaled nicely. Originally taken at 256 pixels, it gave a rather terrifying size of 8192 pixels, way more than older GPUs would want to cope with. It could be reduced via "nearest neighbour" to prevent blurring to 64x2048 and still look good.


One thing which I had noticed was an annoying uniformity of movement in the animation which gave an unpleasant  "swelling" effect. Setting different planes to different parts of the UV map meant that they played different parts of the animation and helped break up the regularity. I also decided to create multiple animations based on differing meshes and combine them all into a single atlas/mega texture. I ended up with 1 thick grass render with lots of grass stalks, a thinner medium one, and 2 thin small ones. I then combined the 2 small ones to be anew  medium one, and finally added the other medium to create a new thick mesh. All in all, this gave meanimations for 6 different sized grass clumps to help combat the sameness of just one animated texture. Combined together on a single 2048 pixel image, there was plenty of space for further cosmetic variations such as colour, lightness/darkness, saturation changes and the sort.
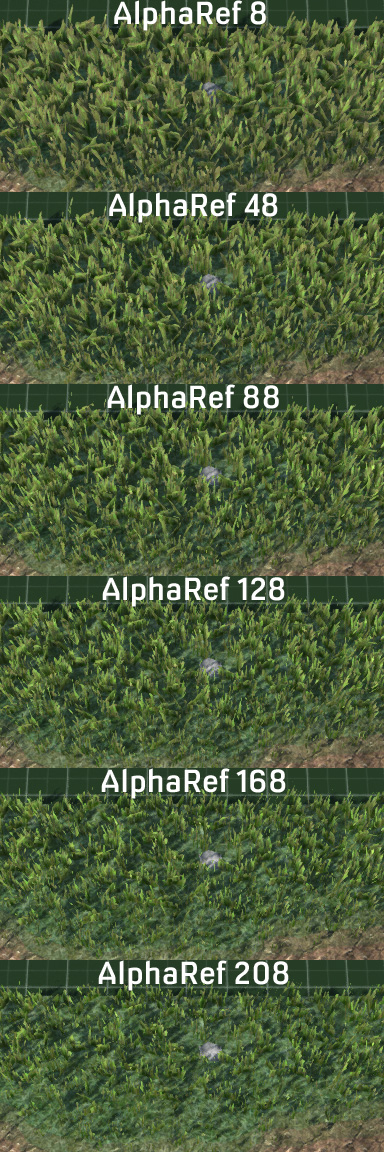
I had a little play around with alpha reference to see the difference have thick to thin grass made.


Quite happy with conquering the secrets of grass I moved on to load bearing. I had previously created a 1 kilometre level, filling it 10,300 copies of the mesh. Viewed in it's totality it was 119 million polys, 124,000 drawcalls and a mspf of 666.667 - which gave me a sudden urge to play Iron Maiden's greatest hits. However, even close in the result was 40 million polys and 5 fps. A quick check of culling revealed ... well, not as much culling as I had hoped. With the camera set back and angled a lot more was rendering in the fustrum than was actually visible. Of course during these tests I had no "Level Of Detail" for my 10K meshes. I made multiple levels of LOD and set up the options preferences so that they reduced polys and materials the lower you set it, but also LODed hard outside of the immediate camera view. In the end I had things down to show the highest LOD on screen all at once with 70 fps, 665K polys with 913 drawcalls and half of that is shadowing which won't feature as much once I start using lightmaps and the diffuse material filters the main dynamic light source.

I also tested less instances of meshes, combining 9 of them into a single object. This reduced the total number of meshes from 10,300 to a mere 1,160. Polys went up slightly to 772K, drawcalls fell dramatically to just 235 - a third of which was shadows, and fps rose to a thrilling 100+ fps. All of which was somewhat to be expected.

So here's what that all looks like with the additions of screen spaced ambient occlusion and a vignette shader around the edges. I think having the grass bent over a little more might help aesthetically, but I'm quite pleased with the result and the performance.


Wednesday, 23 March 2011

Death of Drawcalls - Birth of Cutscenes, also Flares, Checkpoints

First up, after years of spamming the site with jokes and the occaissional helpful post, I joined the hallowed ranks of the Titans, striding the earth with inflated ego and a pair of socks pushed down the front of their pants ...

... that's the GarageGames Associate program to normal folks.


Steve joins the other Associates for hor d'oeuvres at their Fortress of Perpetual GrimDark

So, on to drawcalls ... and ... oh wait ...


That's better ...

So, back to them drawcalls. I've a vague recollection of mentioning the damn things before in about a gazzillion blogs, but I'm always on the lookout for screwing every last bit of performance out of the engine. I'd been looking at my last demo and wondering if I could amalgamate more of the textures on the buildings. There's a lot of tiling going on with them ... so I decided to try a few experiments in reducing the sizes and adding more sections on to a single image. There was obviously going to be a fair bit of a loss in detail quality, especially close up - but as my work has obviously never been about heavy psuedo-realism, I figured I'd be able to live with it.


Original prop building at the top (5x 512 tileable textures), new single 1024 texture at the bottom.


And live with it I can. I still need up to 4 meshes for an enterable building (exterior, lightmapped interior, lightmapped props, and transparent windows). But for "prop" buildings I managed to get away with a single 1024 texture. I wasn't always able to get a mesh into a single drawcall, occaissionally requiring more, but over all my worst saving of drawcalls was 50% and my best 80% for enterable, lightmapped buildings. All my prop buildings had their drawcalls reduced to 1 from around 5. I also decided to cut out a lower LOD and suffer a few more polys at mid-range now that there's less drawcalls.

I'd also tried the same thing with my many road sections - but visually they really seemed to suffer in a much more noticeable way. So I decided to make a "supermesh" roadsystem which promptly truncated because I'd turned all the warnings of in Blender ...


So after splitting the new supermesh up a bit I'd added 130K polys to the scene for the loss of a poxy 31 drawcalls and no performance improvement with some dodgy shadowing along the now more open meshes ... which wasn't really win ... and promptly reversed the roads to how they were.

After seeing Brian Mayberry have lots of fun with glowsticks - I decided on more function creep and created flares for my player. I'd wanted to avoid a torch (US: flashlight) as it's a bit obvious and always availalbe in a HL2 type manner --- nice flashlight resource though CSMP. The flares are actually quite useful as some of my levels are intending to be "dark" - in fact Level 1 corridor crawl is fairly dark - and I've hidden pickups in various dark corners.

Which actually brings me to Level 1 of my Campaign - which is about done, just a bit more drawing to do for plot devices., but all the action is scripted and tested and tweaked and retested. There's 2 routes through it, it's got a nice ebb-and-flow of action, from scary melee based monsters creeping about in the dark, to intense, open firefights and back again.

My single player narrative campaign mode did throw up a few new issues. I created a checkpoint system so that a deceased player didn't have to restart at the beginning ... which would be fairly annoying as it takes a good 30 minutes to get through the level regardless of which path you take, and you can crossover between them in a few parts. My checkpoint respawning threw up another problem of finite pickups. Yes the dead Ai drop ammo, grenades, etc - but if you're already bulletless then it's kinda hard to get at a whopping great big alien tooled up to the nines with an automatic weapon from 100 units away when you have a melee ranged cricket bat. So I had all the "static" pickups respawn with the player, via a new permanent field that I added to the code (I'm still slowly chipping away at the cpp before getting around to making a full frontal assault on programming at a later date -- I did try to create a custom "thin" version of shapebase but it didn't go well).

All in all it works quite nicely, the extra ammo helps if the player is finding it tough. The player respawns into the continuing game rather than a reloaded one, so if you've killed half the bad guys at a position before being sent beyond the mortal coil yourself, you only have the remainder to get past. I've still to sort out a full "external" save system for campaign progress or restarting a game half way through.

And so on to cutscenes - or really player controllable in-game comics. There's next/back buttons so that the player can flick through triggered plot scene. These are mostly for story, my jokes, and occaisional hints/tips. The story boards and in-game comics are there to "complement" the gameplay - but there's a big old "Skip" button if the player would rather just get back to the action without flicking through them all.


Never let it be said that I ain't a sucker for dry wit ...

In other news, I added a visual indicator of the number of player lives remaining in the "random battle" mode (3 lives for each area - previously you had to read the info to know this and then keep count), and will also add this to a selectable "challenge" mode for the campaign levels. Eventually I'll figure out some sort of scoring system for all modes as well - not particularly important in campaign, but it takes on more significance in "random battles" and any possible, future co-op mode.

Anyhoo - vidya! Here's the comicbook and flares in action ...


And here's an older one without them which features a play through of the first 5 minutes of one of the routes through the level.


I've a few more things to sort out yet, a bit of GUI refaffing for various menus, and finishing off level 1, plus creating a randomized battle mode for that map. And then I'll release a new demo, probably next blog - which will be done when it's ready.

Saturday, 28 August 2010

Blender-PureLight-Jefferson Starship-ShapeEditor-Prefabs-LOD

Yep, I think that sums up this posting quite accurately ... and if it doesn't, well hell, I ran out of space in the title anyhow.

Blender ... scourge of Damocles, liberator of ... er ... I don't know ... stuff ...
Also Jefferson Starship.

As free goes, Blender's awesome, but rather lacking of a working DAE importer (no, I haven't tried 2.5 yet). But it's free - so workarounds should be expected. It's not like you've forked out a shovel full of cash for PS and then have to patch the PNG exporter, can't say freebie Gimp ever suffered from not being able to export a standard format ...

I'd been thinking of ways to (re)build a town (again ... and again - BSP lol!) since making various test versions, and had come up the idea of using a few stock buldings, repeated through-out the landscape. Basically a detached house, a semi-detached (dual building), a cottage, a large manor house, a church and chapel, a multipurpose large public building with changeable props, and a couple of other things.

And whilst knocking up a detached house in Blender (with 140 collision meshes) I cam across a formula. Exterior Mesh - heavily LODed, Interior Mesh - (just the rooms no details) lods out completely at distance and the exterior takes over, and Props - furniture, stairs and details which lod out once the player is a bit outside. Props is the biggy 5500tris of beds, wardrobes, sofas, toilets, stairs, window ledges - uses 3 textures. Interior is a simple 700 tris, but uses 6/7 textures, and the Exterior has a fair few textures, but quickly LODs down to a simplified single texture (by amalgamating all the materials into a single low-res texture) and Interior also does this, so all good for performance there.

Of course there's one problem ... and that's that the unlit interior looks kinda flat, and in Lowest Lighting is just bloody awful.

PureLight Huzzar. So I decided to tonemap the Interior and Props meshes, giving a little depth and interest to the ambient. Nothing fancy, just a light ambient through the windows, something that doesn't look too out of place if you have in-game sunlight coming in as well.

Also Jefferson Starship.

Now in Max or something, you'd reimport your tonemapped meshes and stitch the whole thing into a file ... but Blender ain't gonna do that, so I cranked out the Shape Editor for a test run. I found that it was easy enough to add a new mesh LOD to my Interior (2 meshes remember, same tris but one has only 1 material) and then a dummy LOD of a single triangle to force the mesh to LODout completely. I soon found that sharing a dummy LOD object with another mesh causes issues so each new LOD/Dummy requires it's own individual dummy LOD object (might've helped if I'd renamed them but nah ...).

Anyhow the upshot was :
Exterior - fully Loded, no tonemaps
Interior - Loded with ShapeEditor, tonemaps
Props - single Lod, Lodsout fast, tonemaps

Also placed correctly, the only thing remaining is to zip them up into a prefab, and drop them into a level as I please. RESULT!

And then I found that somethings can affect lightmapping. SubSurface scattering seems to help lightmaps fight off the power of the ambient and preserve their vibrance.


And as you can see from the above pic, various settings alter the way ambient and tonemaps interact ... and boy, does BasicLighting look nice now! Not that I'm ever going to be using it personally ... but someone ... somewhere will.

Also Jefferson Starship.

Did I mention Jefferson Starship? (caution:Flash)Clovis Music Festival. Tip the parking attendants, if they speak with a funny accent that includes words like "ee bye gum" they might be my folks - don't ask my dad to explain cricket ... Last year featured my mum holding back a horde of hysterical middle aged women as they tried to rush the stage and tear the clothes of a teenage Richie Vallens impersonator ... the lucky young bastard!

Of course some of us poor buggers aren't retired so it'll be business as usual on the one man -who's not entirely sure what he's doing- game development.

Talking of which, I had a quick test of close range combat against a melee based foe.


Which was geniunely quite panicky - so I was pretty chuffed with myself.

Now ... do I really need to make roads with sidewalks/pavements as models ... if I don't have curbs then I could just use decal roads ... but curbs do give a rather urban feel ...

... decisions, decisions the pressures of command ...

Tuesday, 6 April 2010

Fluppin' Drawcalls and Forget How to Use Blender and PureLight

And an end to said fluppin' testing of Drawcalls. I was going to use fluffin' but after a quick check on the interwebz, it turns out "fluffer" has a rude conotation --- I mean, who would of thought it? So flup it is.

No pics. Just the facts, ma'am.

I had a quick test --- read that as far too much time --- ripping the whole drawcall/performance thing to bits and seeing what I could get it down to.

In previously mutterings on the whole performance thang I'd made it clear "why" I'd done things in a certain way previously, older tech, older hardware, a paranoia of >512px.

First off I amalgamated a few of 512 and few 256 non-tiling textures into larger 1024s. And drawcalls fell, fps went up by a bit.

I'd also extended the fixation with 512 to my lightmaps, splitting up meshes into ever smaller pieces to get the texture size down, so next up was to stitch all those meshes back together into larger ones to reduce instancing.

This meant realising that I'd forgot how to use pureLight ... and after a fair bit of jiggery-pokery, remembered that I had to delete the object in PL before replacing it if I'd changed materials or UVs (or it'd import with mixed by UVs), and if the mesh-object in Blender wasn't at 0 0 0 then the object/node it's parented to bloody had better be - even though that thing isn't getting exported - such as price to pay for using Open Source apps for these sorts of things. Oh, and collada doesn't do curvy and thus ase is needed. And ase needs materials and UVs, and collada sorts it's materials from it's UVs so time saver there ... as long as you don't want soft edges...

*note to self: write this stuff down on more than post-it notes sometime*

And finally, I took a look at what renders and what occludes. Previously I'd used zoning to split my corridor-crawler of a level into 3 main areas, and kept to the same principle with scripting, just dropping the zoning (though they might come back, at the moment there's a bit of an issue with portals at certain acute angles and things suddenly not rendering that should).

And so the up shot was this.

(GTS250 - Advanced Lighting @ 1024px without shadows / with shadows)
old drawcall average = 783 / 1076
new drawcall average = 410 /602

And the biggy - busy scene @ 1080p with everything maxed out
old drawcalls / minfps = 2295 / 57
new drawcalls / minfps = 869 / 80

So, as a total average of all my recordings, drawcalls were reduced by a third, and fps increased by a fifth. Which was nice...

In other news I saw ... well, heard some music I liked, and had to approach the guy on spec for commercial licensing (same chap I used on my lightmap video under CC). He appeared reasonable, so we'll see how that goes once this Easter break thing is out of the way.

Also, I redid my weapons with first person hands and reloading animations, and dug out an old (deactivated - don't call teh Fedz!) lever-action rifle for the metal scraping audio. At which point I discovered nearClip and the fact that it defaults to 10cm, which causes all kindsa hassle with camera penetration on aim-down-sight animations. If only I'd realized that before. I set it to 1cm and things are better. Still need to do a couple more bangsticks for my proposed demo, and so video of all of this later.

End of rambling stream of conciousness...