
Me, trying to get a mesh friendly to weight painting ...
Now I have done all of this before - in very low poly - on the version of Blender3D which I am used to using. That version is 2.44 which came with it's own custom plugin for the DYNAMIX THREE SPACE file format exporter 0.964. You remember Dynamix? They were that video game company founded in 1984. They made Rise Of The Dragon in 1990, a futuristic detective, adventure game which ripped off Bladerunner and I never understood what the hell I was supposed to be doing whilst playing it ...
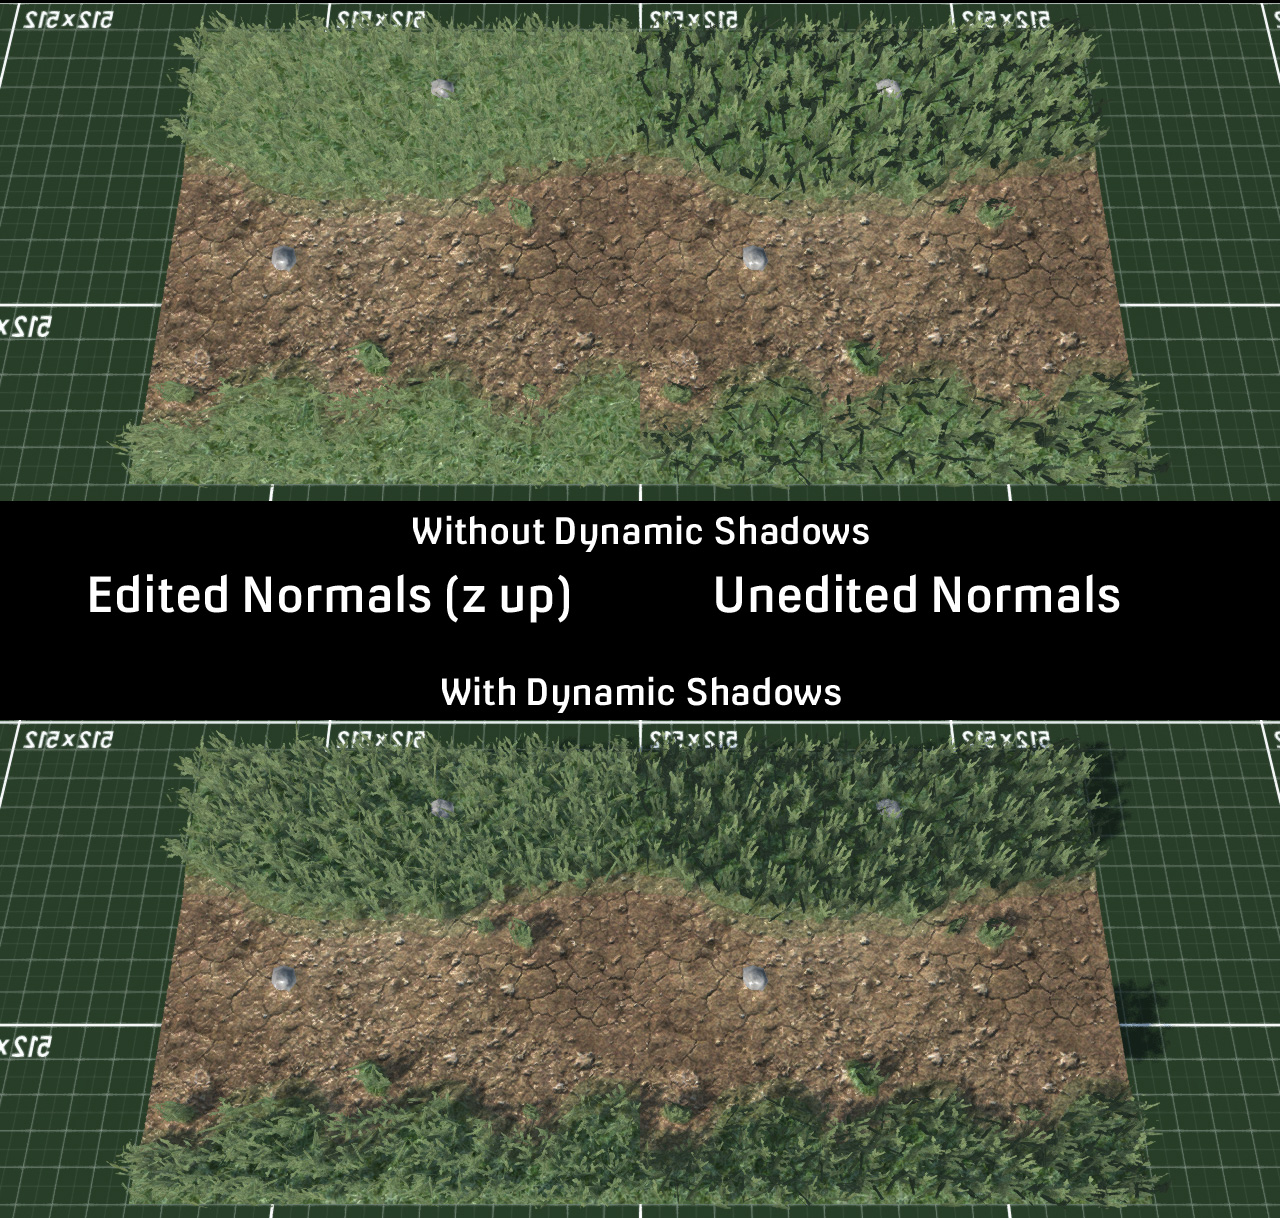
Anyway, that version of Blender3D dates back to around 2007, which is at least 100 years ago... so there's probably been some improvements and changes since then. And it turns out there has been. In fact I already knew that there had been as I've been tentatively using version 2.78c for a while, ever since they created the normal editing modifier to stop foliage and especially grass, from looking like complete shizen.
Turns out it was February 2016 and still no finished game fml ...
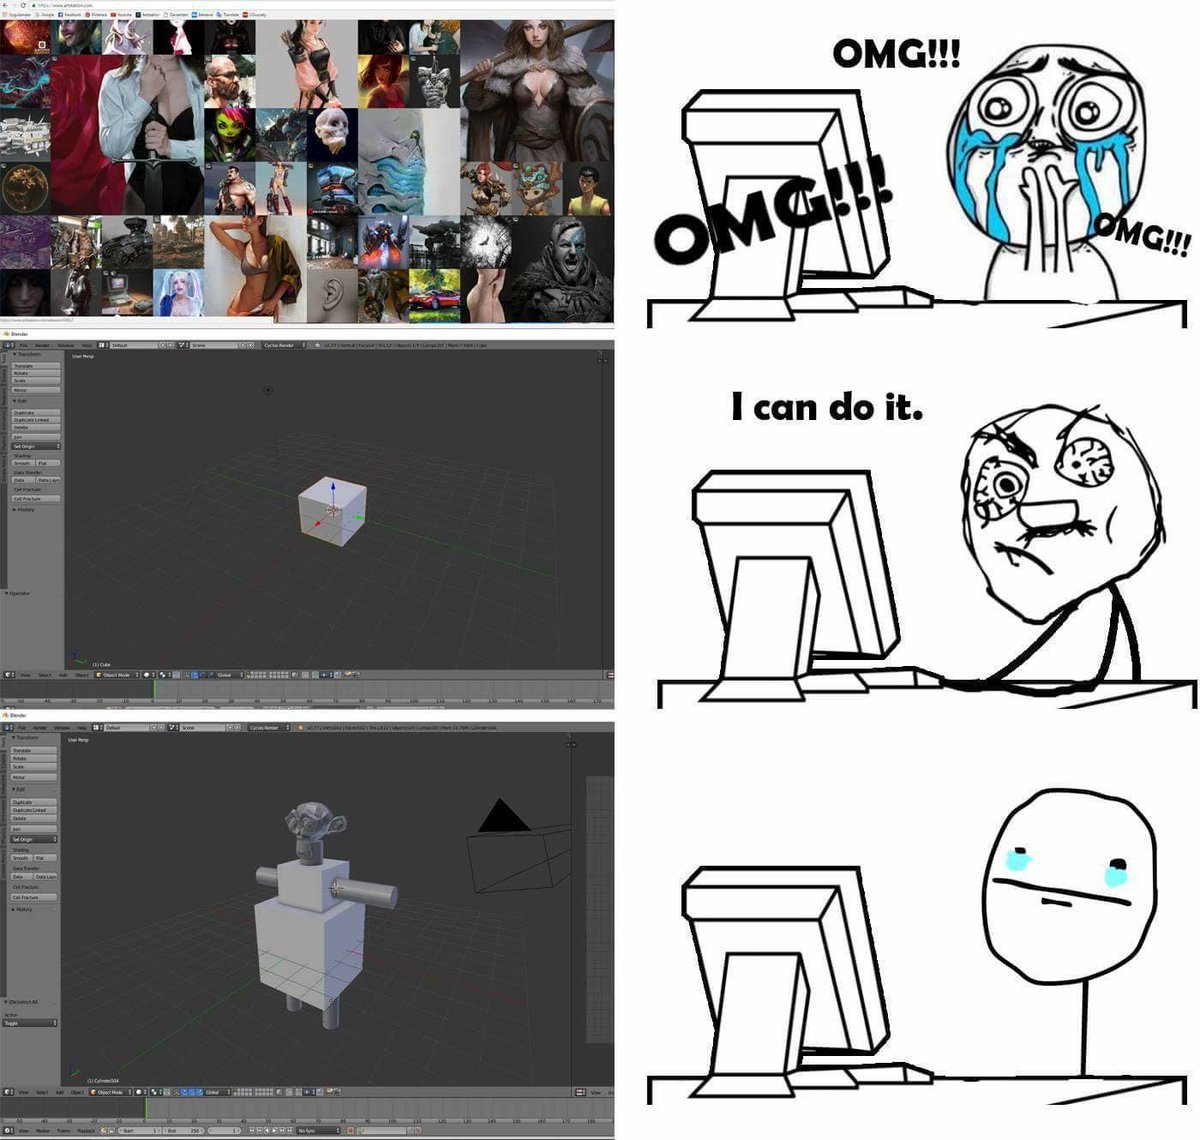
So first up, how do I into character modelling? I can not even into character modelling!
Hello makeHuman! makeHuman is a 3D character/human body generator which I played with years ago and never got back to. However it has one important thing going for it - it exports with a various skeletal armatures and comes pre-weight painted for bones nodes.
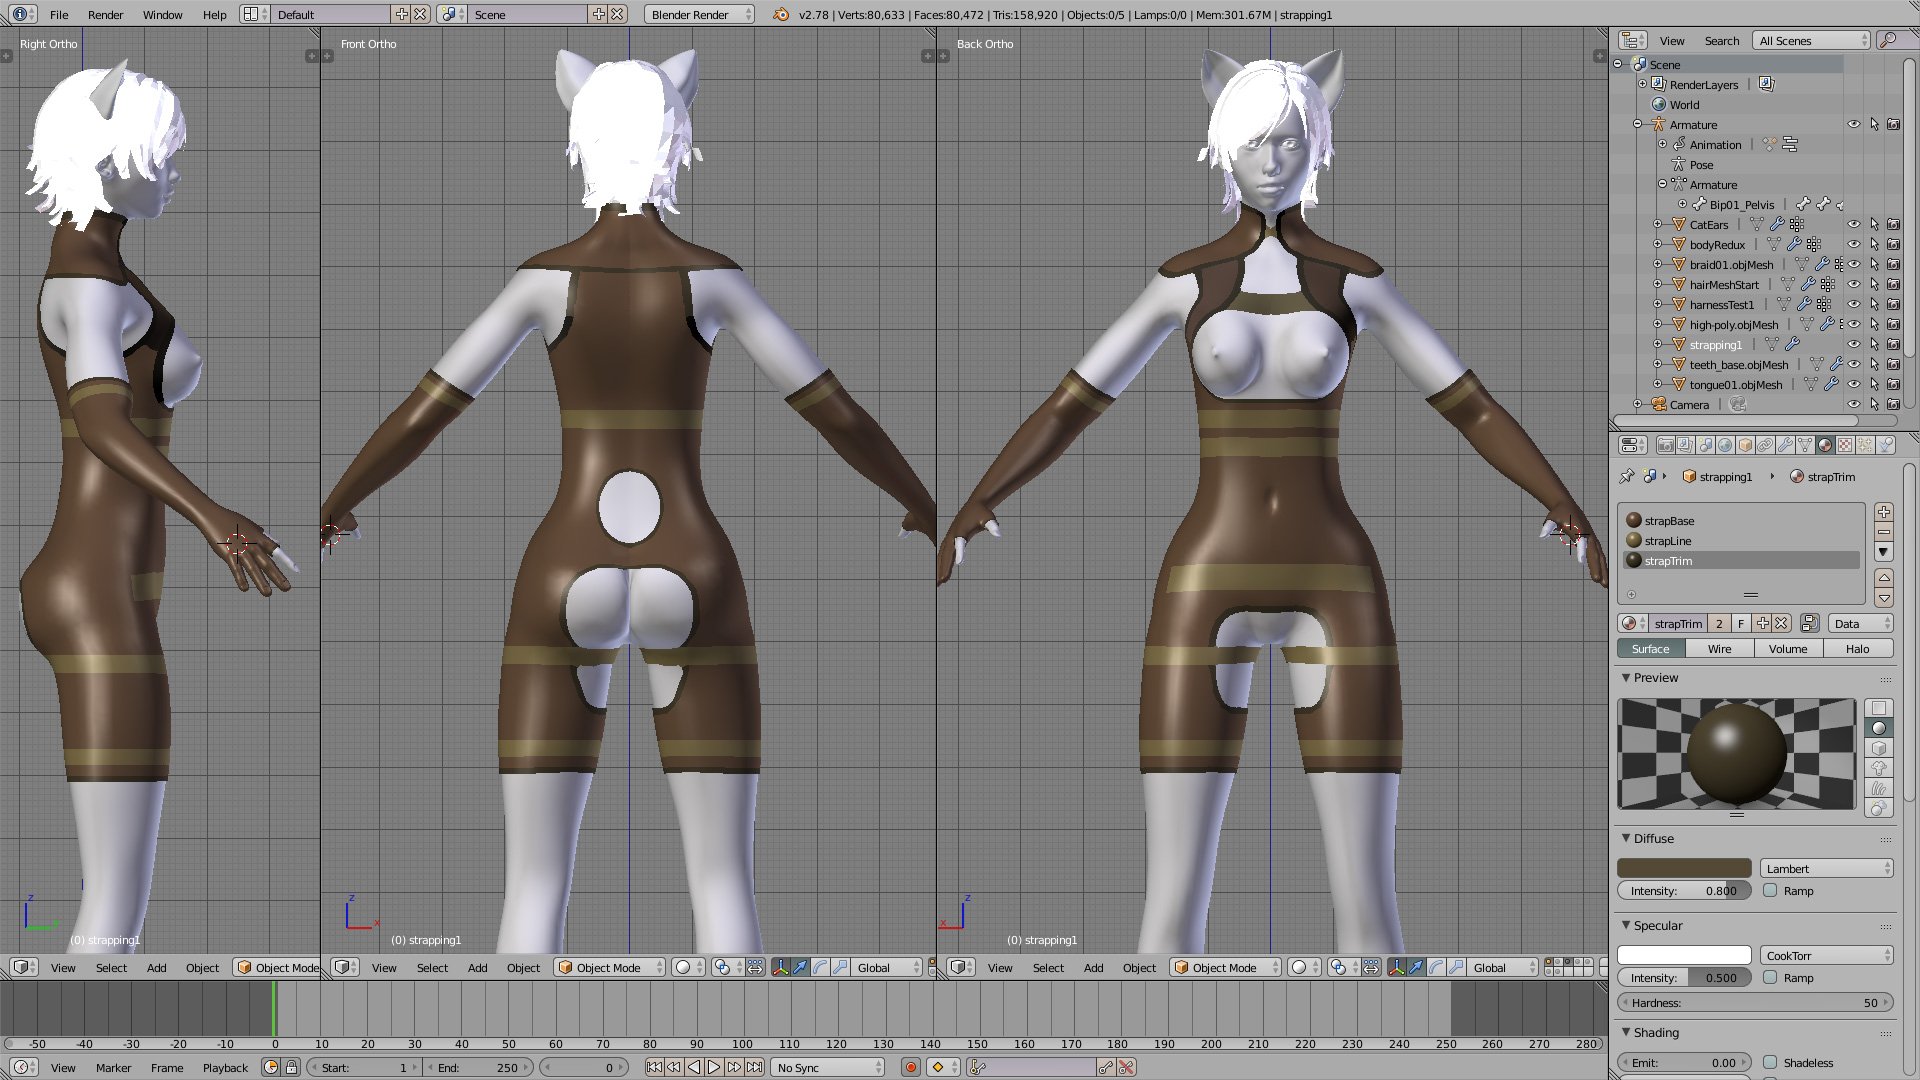
After quite a bit of fiddling around, I had previously managed to make a fairly accurate rendition of Toobz in makeHuman (though the fatassed robut needed more ass fattening and the legs slider was never going to be long enough) (and I added extra oppai) and exported it into Blender3D with a rigged skeleton and then slapped some cat ears on it.
makeHuman created a near perfect replica of Nier: Automata's 2B but the butt slider maxed out ...
So next up ... I need said model with cat ears slapping into a harness which would ultimately be attached to some sort of steampunk propeller pack. Cue searching for tutorial videos on all the other changes to Blender3D's modifiers. One of these I have already found out by testing - is that the decimate modifier, which turns your overly high poly mesh into something more video game and Level Of Detail (LOD) distance friendly, now keeps the weight painting data for bones in the armature. Ye olde 2.44 version used to just kill the vertex information, leaving you with an unanimatable (that's not a word is it?) model, so I used to have to do my LODs for Airship Dragoon by hand/eye manually ... which was a real pain in the Shizener. So this improvement was another major reason to finally upgrade to a newer version of Blender3D.
How character modelling usually turns out without using a proven work flow ...
The model I have been working with is somewhat overly high-poly for in-game. It is also overly rigged, with many bones that I do not require for gameplay. However I am hoping to do a few high poly "cut scenes", so I am currently concentrating on making an intermediate model I can both "poly up and down" later as needs be.
So, this harness then ... I mooched around the internet (as usually but this time trying to be useful) and found a load of video tutorials from 2011 about making a static character model - which is still a lot newer than my 2007 knowledge. And it had this amazing thing called the "shrink wrap modifier"!. Basically I make clothing too big, and then "shrink to fit". And it works pretty good.
Shrink to fit, just like that baggy T-Shirt and a hot bucket of water
So that wasn't too bad, I made horribly baggy mesh around the model for tight fitting clothing, and got it to reduce to the model's topography with an offset with the push of a button (after much experimenting). Next up was building various straps over the new harness mesh manually.
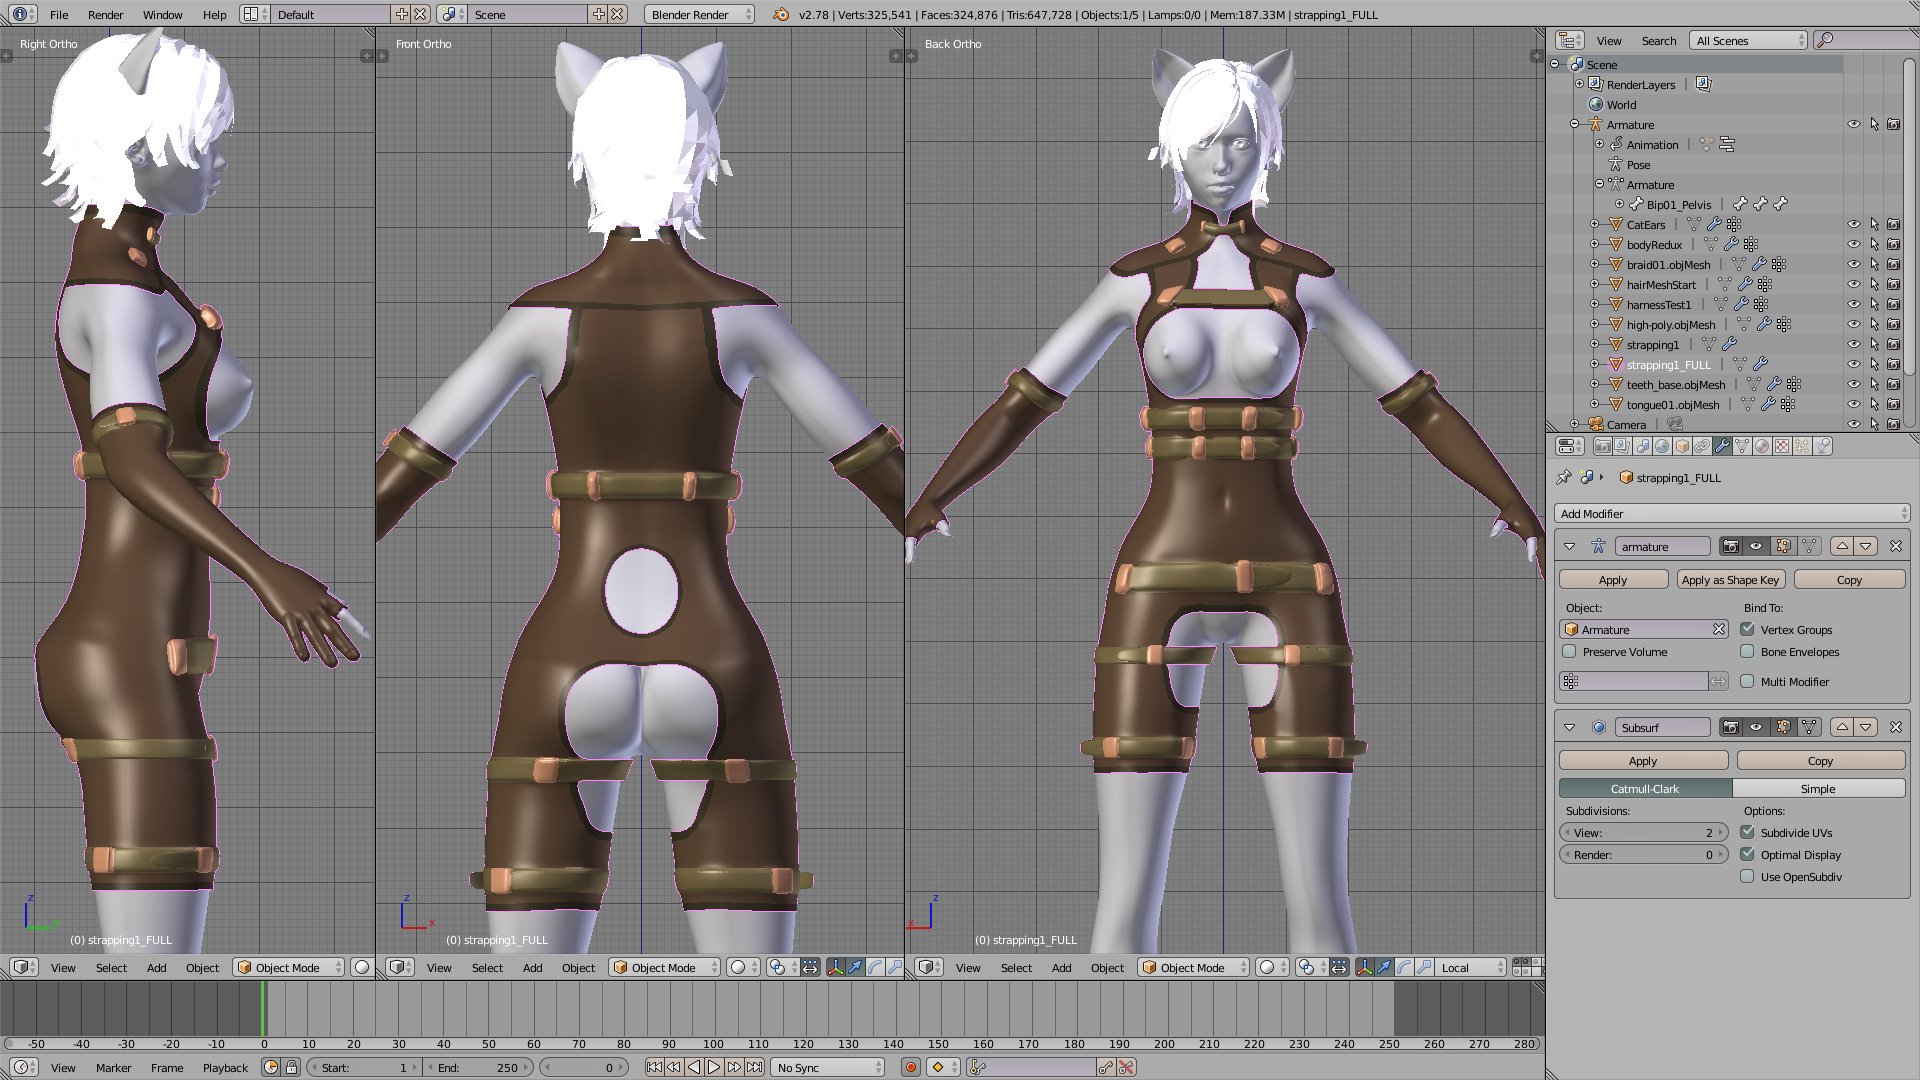
Extra strappiness to stop overly excited catgirls from falling out
And this is when I hit (another problem). I had previously been using the mirror modifier so I only needed to create half the harness, then apply it and shrink wrap. But now I noticed that the buckles/clasps above the waist were not perfectly symmetrical. makeHuman exported the pose with a slight kink in the spine, so everything above the waist is slightly to one side. Straightening the pose manually was easy enough in Blender3D, but it didn't make the mesh perfectly straight, and it was still off. Note to self; check this sort of thing before you start working on it.
Bravely/stubbornly/being past caring* (delete as applicable) I continued, ad libbing (which turns out to be 2 words) as I went and continued. Now the whole idea of the character is that they ski around the level with a propeller driven backpack - hence the strappy harness. The rotors/propellers themselves are going to be flat, animated textures - so that saves some polygons and drawcalls.
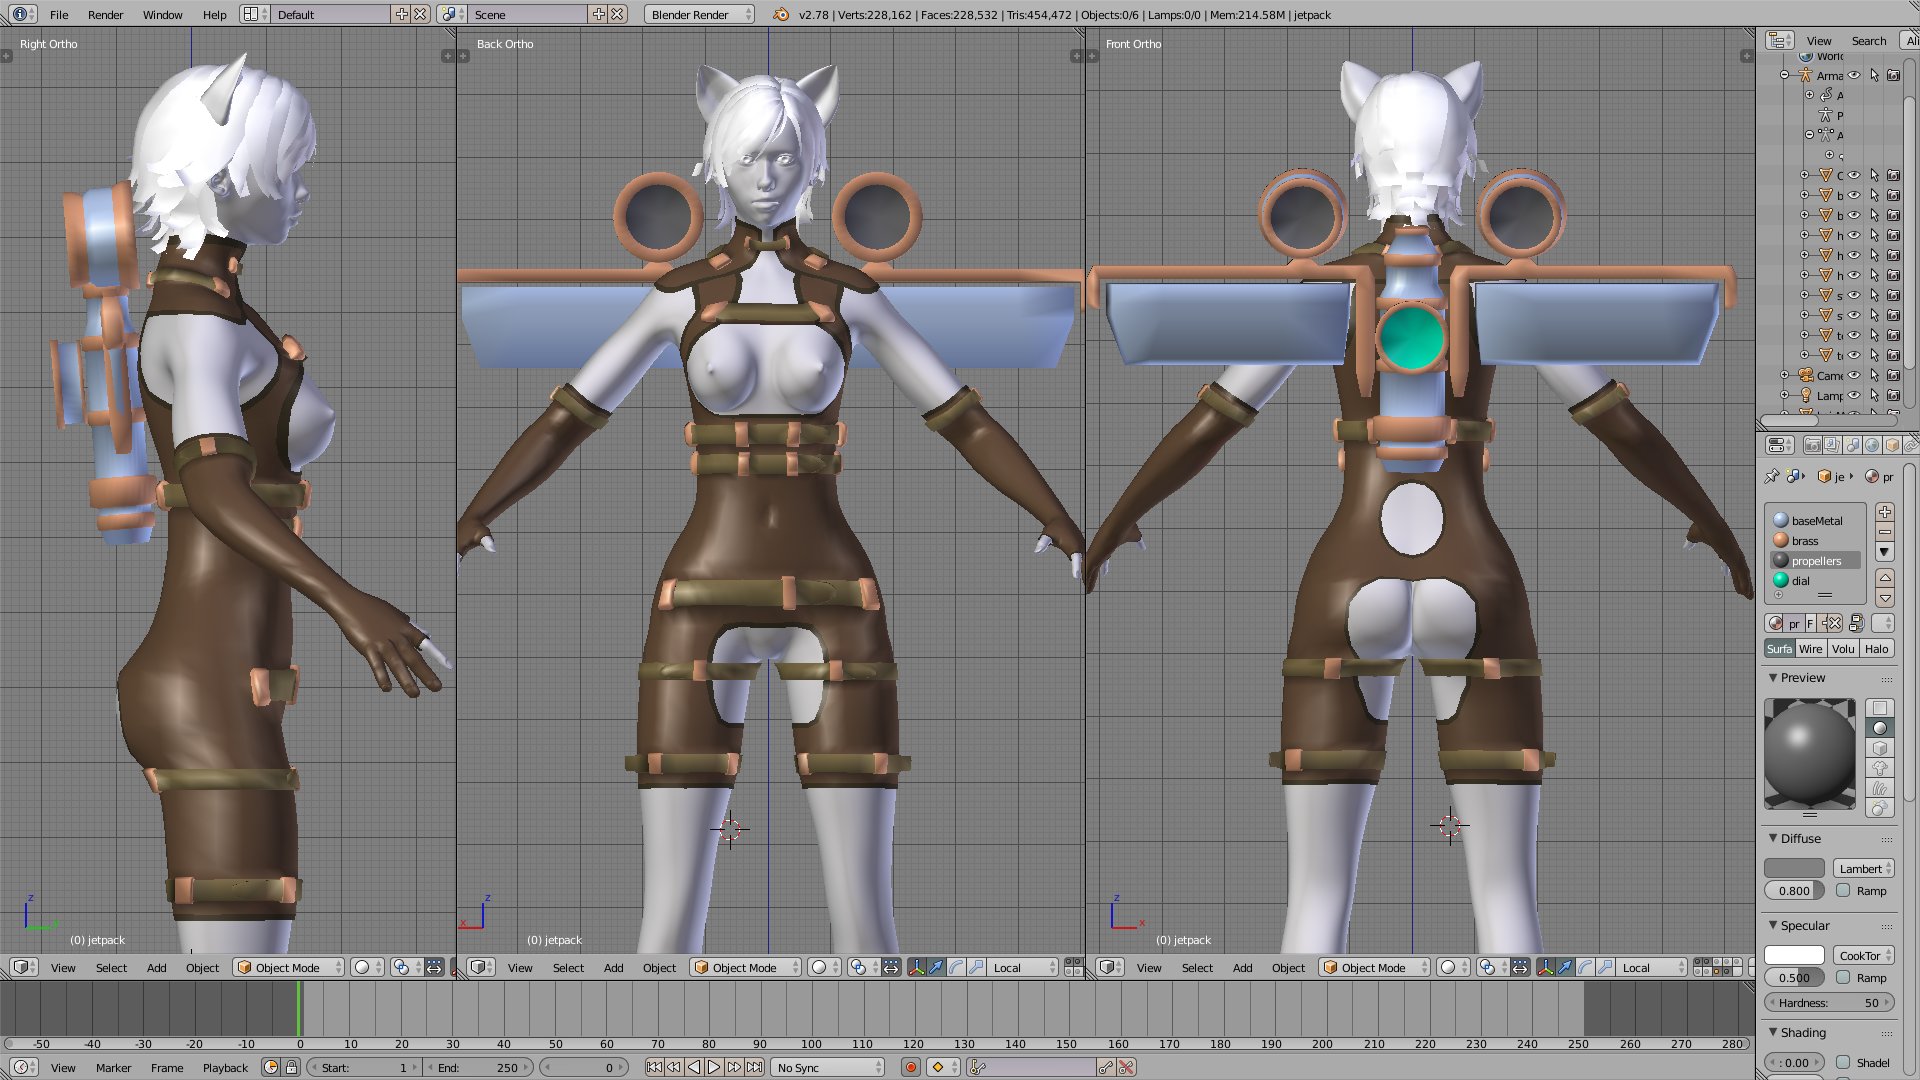
Propeller area in dark grey, green is a gauge
Next up I needed some sort of under clothing, rather like a skin suit or leotard or boobtube (which was a thing in the 1980s). I attempted some sort of vague modelling by hand/eye co-ordination, which is not that great at the best of times, and then went off to find some more video tutorials on Blender3D to see if they would help. This is when I discovered physics. Now I studied physics at school, by which I meant the teacher didn't care if anyone learnt anything or not as he got paid all the same, and thus let me sleep in class (this was the 1980s, the greatest decade in history). I got an E grade which was surprisingly better than I thought I would get for doing nothing.
Anyway, back to the physics inside Blender3D. With a bit of jiggery-pokery it can be used to create clothing that falls into place with gravity (note: T-pose is best for this or it slips down the arms and falls off). I made a whole series of tests, but only screenshotted the final result. This was a bit "flappy" so I ended up tying down the bottom manually. This looked rubbish, so I ended up extending the character mesh out to meet the material which didn't look so great either so I ended up faffing until I had some sort of boobtube, carved a few dints into the middle and called it quits.
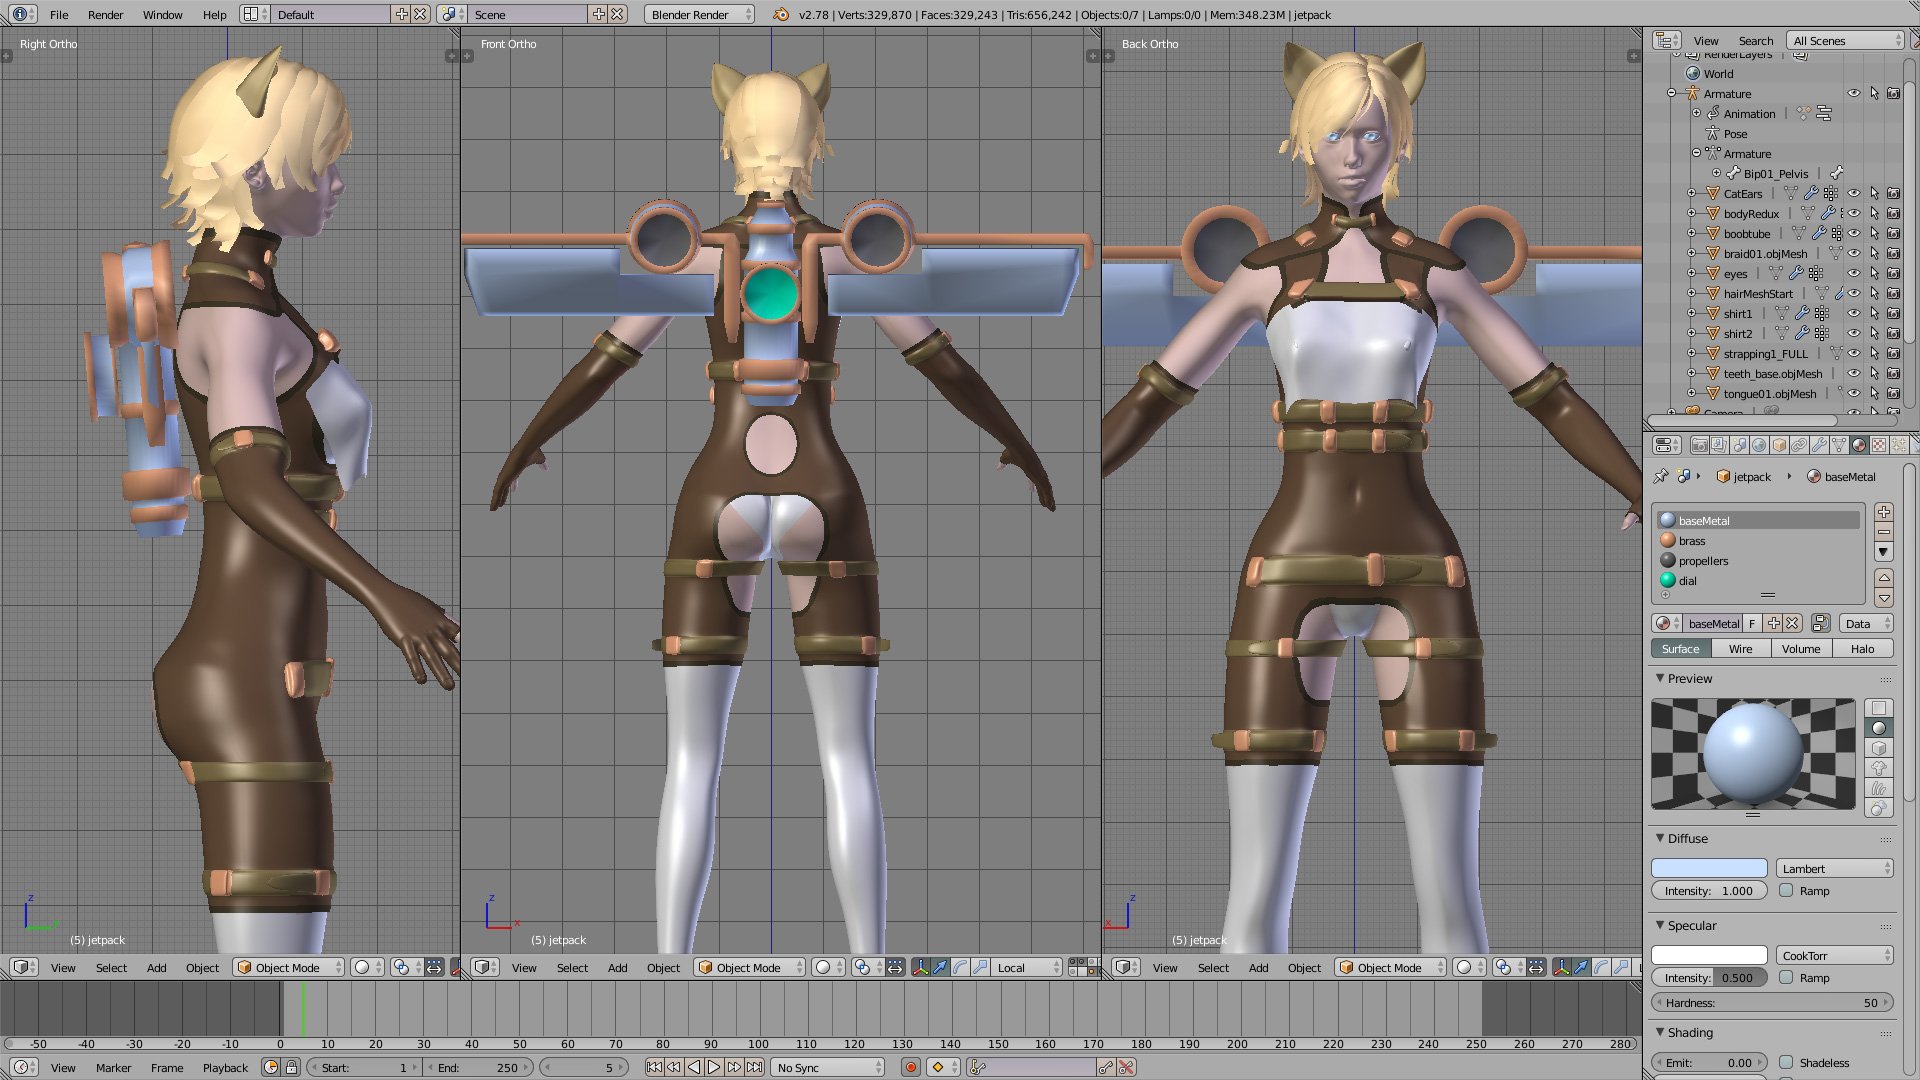
Physics in action! Meaning the one physic of gravity
By this time I had decided I did not like the propeller casings being so high and had dropped them into the mainframe of the jetpack - or should that be proppack?
And now to merge the two meshes into one - whilst also deleting all geometry hidden behind the harness in one fell swoop! First up duplicate the original character model, because if everything goes horribly wrong we might need the original again later (wise, wise words). I sealed all the open sections of the harness, thus cutting into the character model and then used the boolean modifier (named after George Boole, tricorn hats off to you, sir) to remove all the unnecessary bits of character mesh that was hiding behind the brown harness mesh.
This created abject chaos.
Firstly, it severs straight through the target mesh, which is exactly what you want ... kind of. It creates F-Gons (a plane with more than 4 vertices)- which are nasty planes surrounded in loose vertexes everywhere. Hunting all of these down to manually fix them to the edge of the source mesh is a nightmare. And it will have to be manually, because the automated remove doubles is distance based and will just eat up random geometry. Secondly the target mesh seals itself where it's cut, creating lots more elongated planes which have to be deleted. After much faffing around with the first problem I decided to try a different tack.
I selected all the visible planes of the source model around the harness and deleted the rest. Merging both objects I manually merged vertices when close enough and built new planes so elsewhere so the source mesh and harness mesh became one. Whilst this was somewhat labour intensive, it was easier and faster than dealing with over nine thousand F-Gons.
So, finally I have a single mesh, at least of the character body and the harness. Next up, data transfer to get the original makeHuman bone weights into my new Frankenmodel. Playing around with the system I found that using "Nearest Face Interpolated" filled out the weight painting to the entire model, whilst some of the others left the buckles of the straps unfilled with weight data.
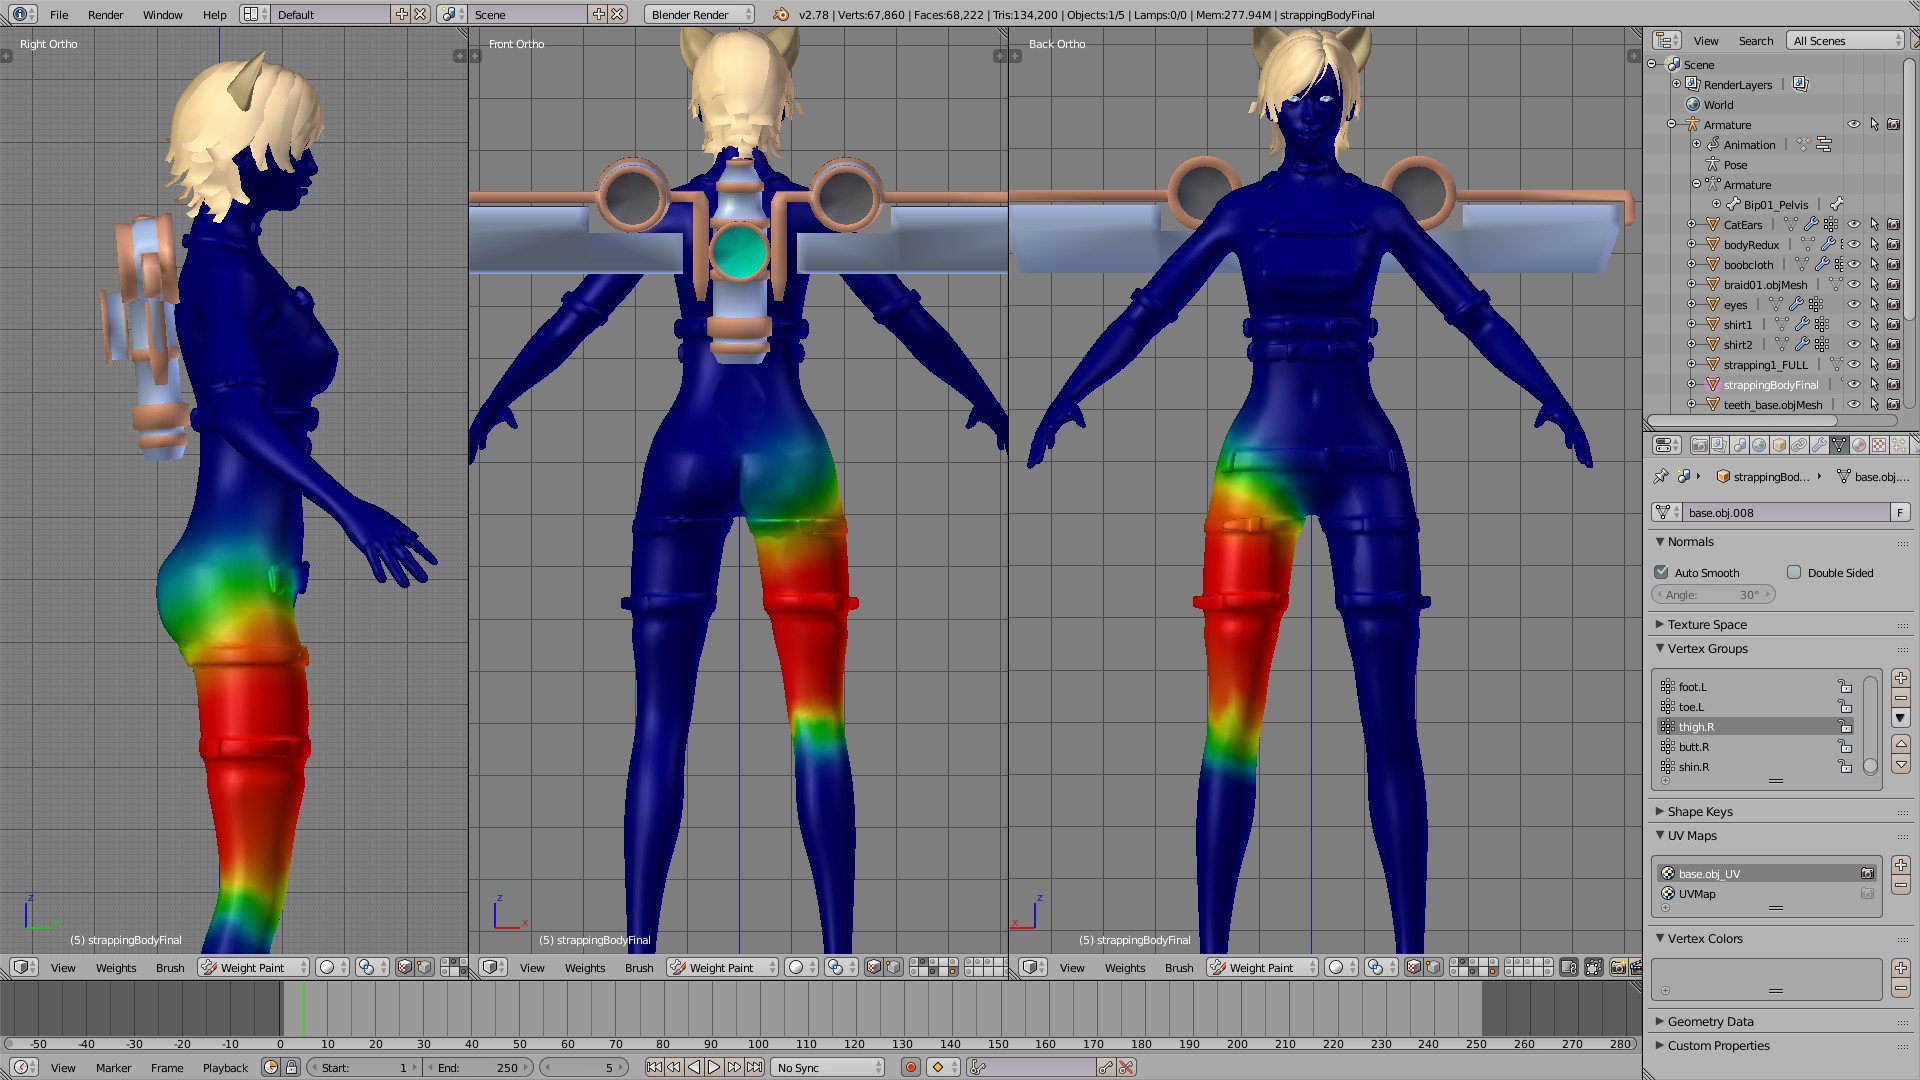
Great success! Glad I didn't have to do that manually!
So, that's about it for this month. We had a heatwave and I got a great tan. Next up, hair, because what I have been using in all of these pictures is a placeholder, and then to start on UV mapping and textures. I also need to rig that backpack.
There is a new version of Blender3D out, it's 2.80! As it's taken me ~15 years to upgrade to 2.78c ... I might wait a bit ...