Showing posts with label indiedev. Show all posts

Saturday, 31 August 2019

Placeholder Yellow Cube Has Been Retired

Don't mind me, I'm just retiring a yellow cube.


If you want to be pedantic, it's actually a rectangle.


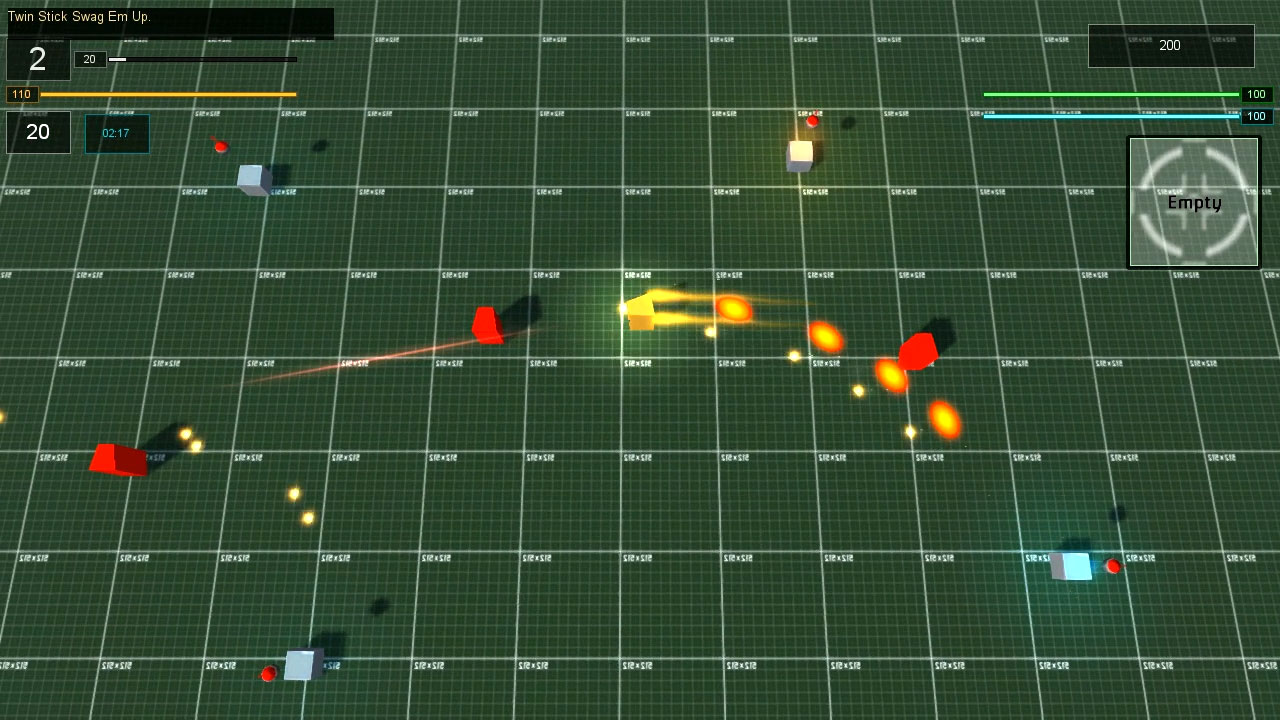
And here's it's replacement going all John Woo/Chow Yung Fat/Revy with dual wielding pistols.

Ooooh looks gamey!

But first to Blender3D 2.8. It's the newest version of Blender3D with a whole host of changes - like inverting mouse buttons for selection ... which is gonna take some getting used to after 15 years of it being the other way ...

However it did have a new addon I wanted to test out, an addon for generating LODs (level of detail) for my high poly mesh by creating retopology of the mesh automatically. What I wasn't expecting was for the new Blender 2.8 to hunt down and retire my older version of 2.78c which was in a totally different directory location.


So it turned out to be time to learn the new Blender whether I really wanted to or not ...

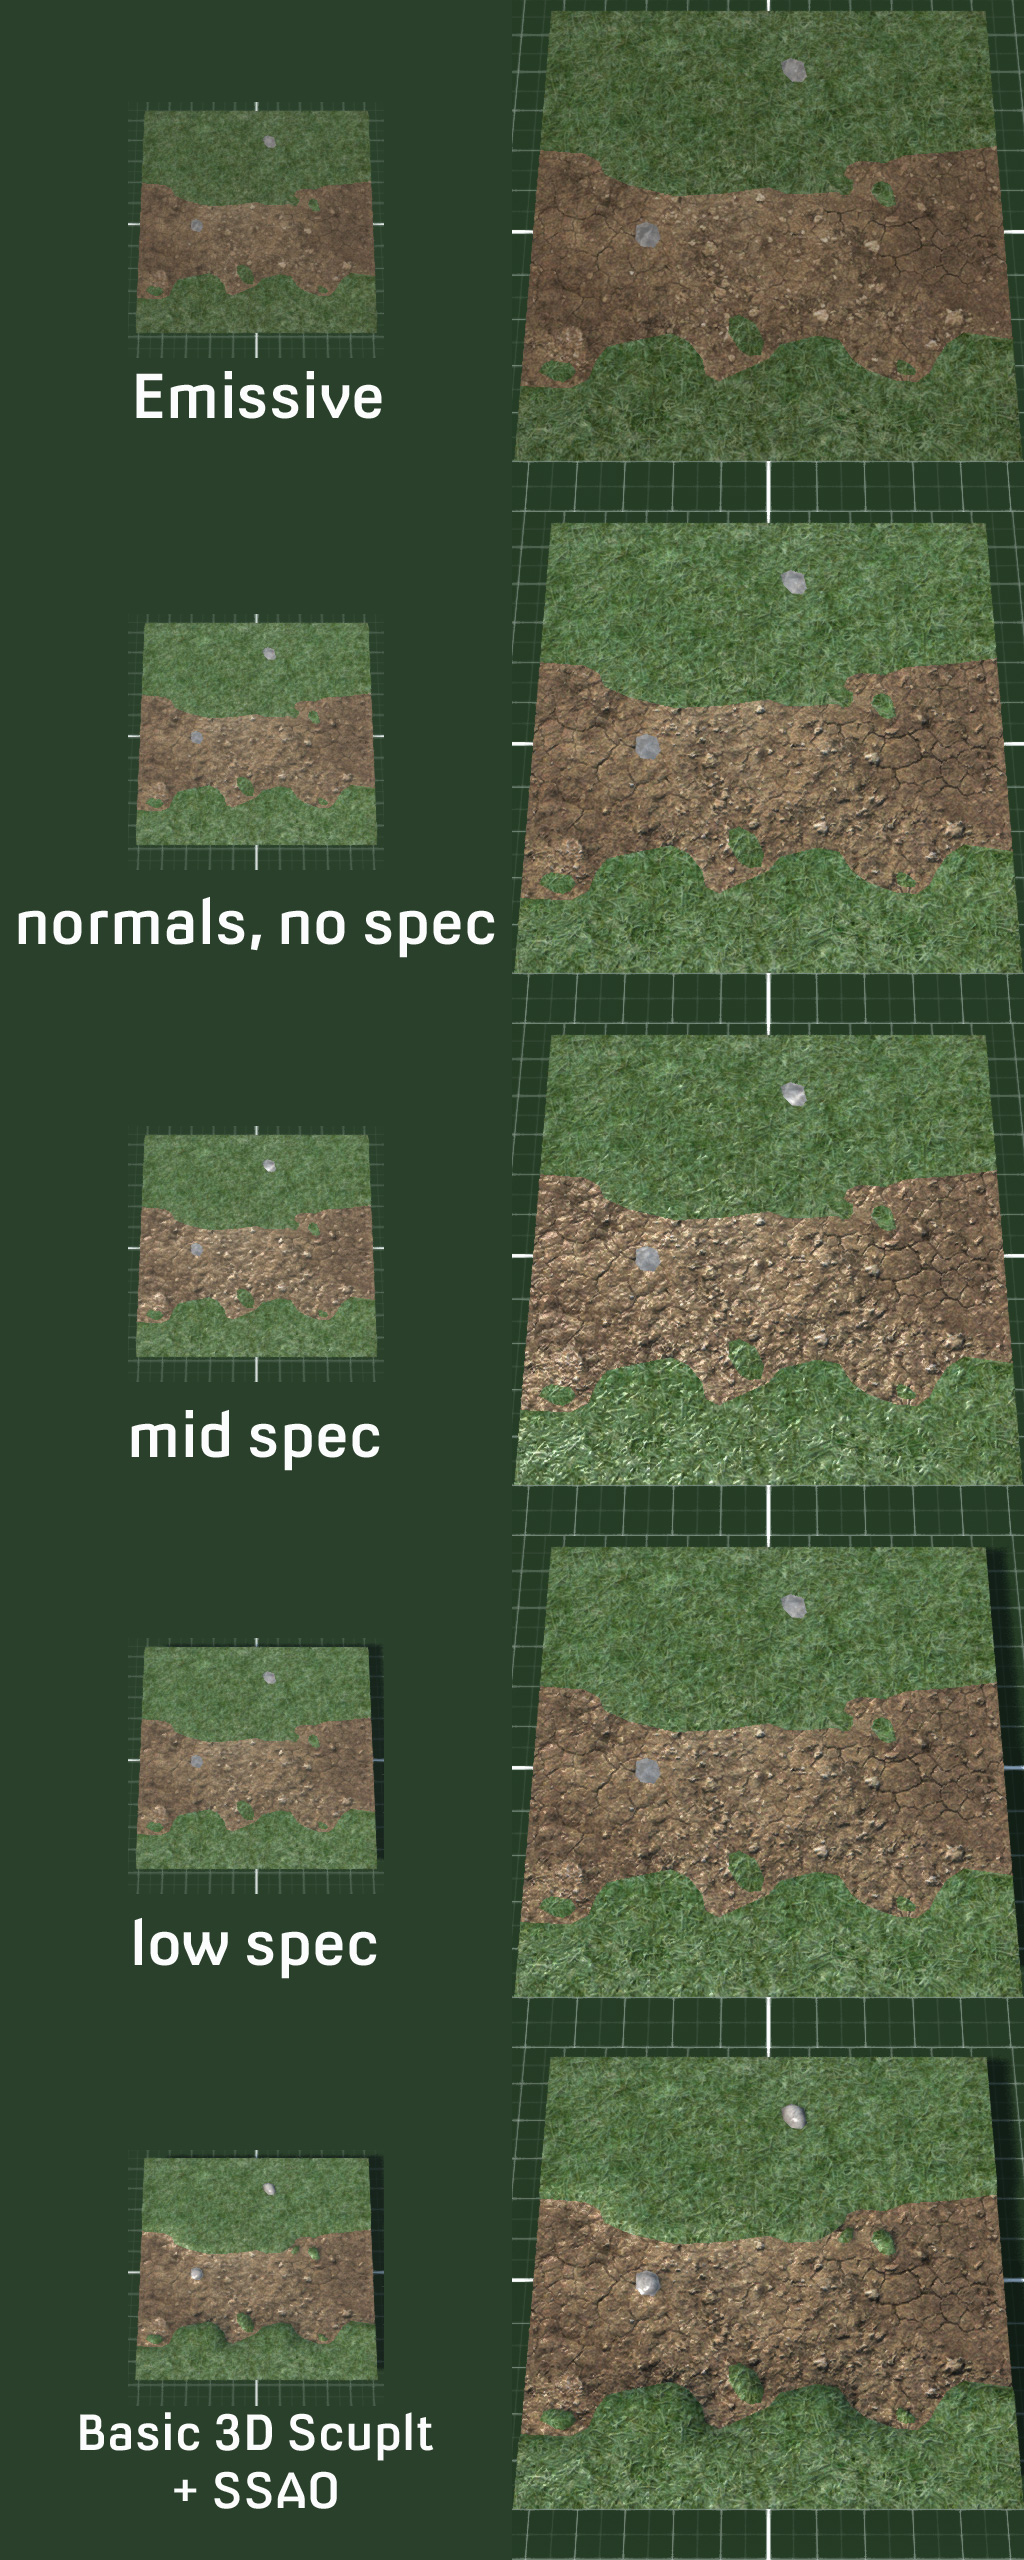
This was going to happen anyway due to the new Blender being all PBR and stuff ... it's just that I wanted to worry about that later, but now I had to worry about that now. The first problem was ... well ... PBR, and the fact that no materials or textures would render without creating some sort of spaghetti of virtual nodes - and this was just to get textures to show up on the model. And of course PBR textures won't render without both roughness and metal values.

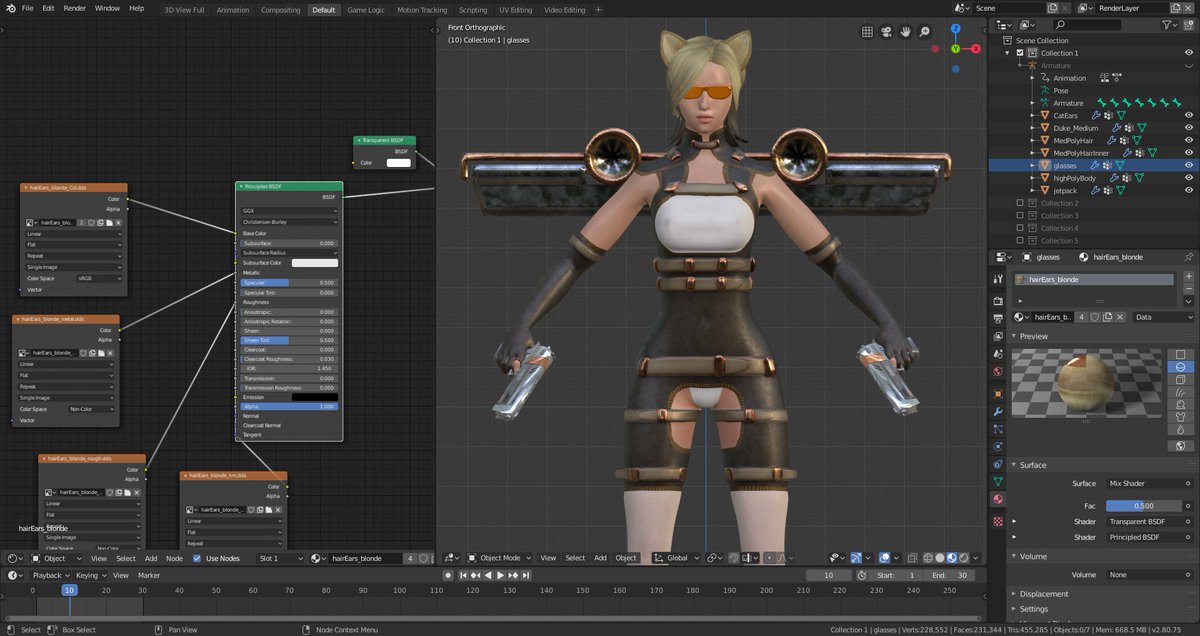
Spagbol junction in the left pane, just to make textures visible in the right ...

After a bit of work, et voila!


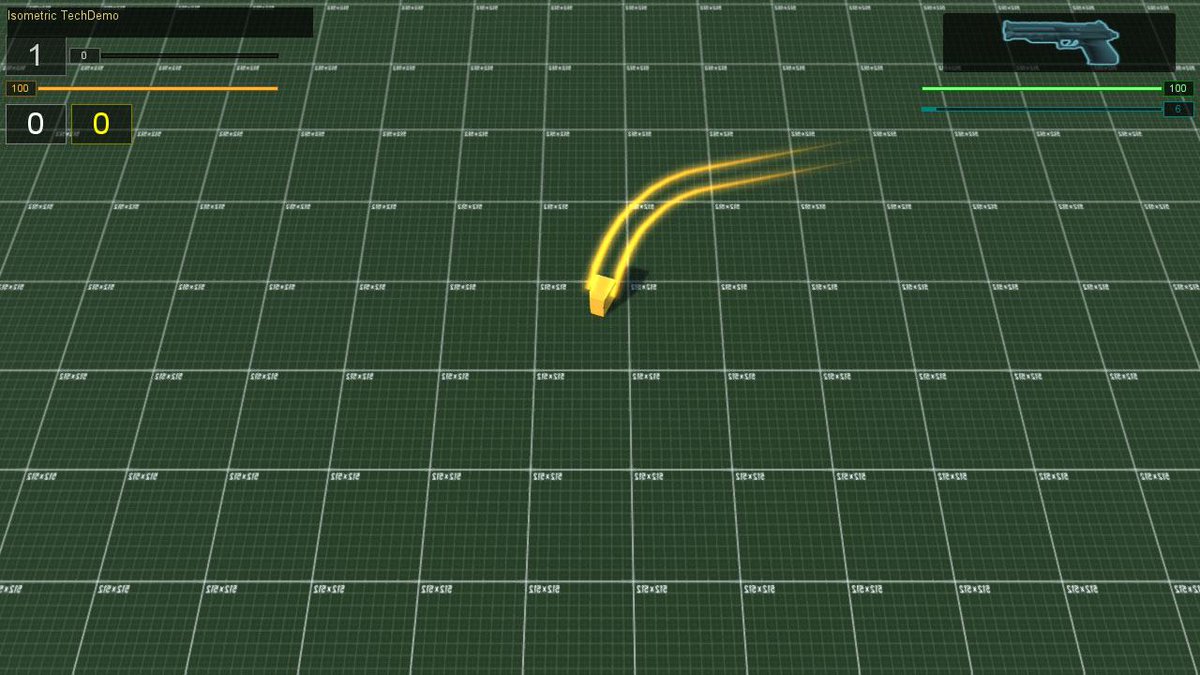
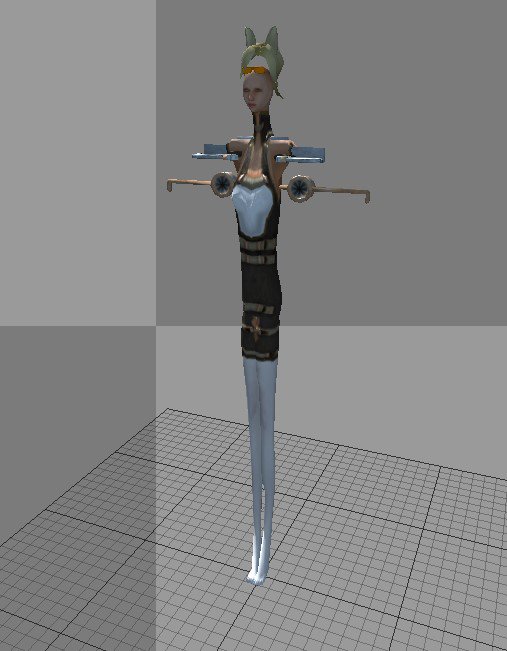
 And how it looks in the latest, PBR friendly version of the open source game engine.

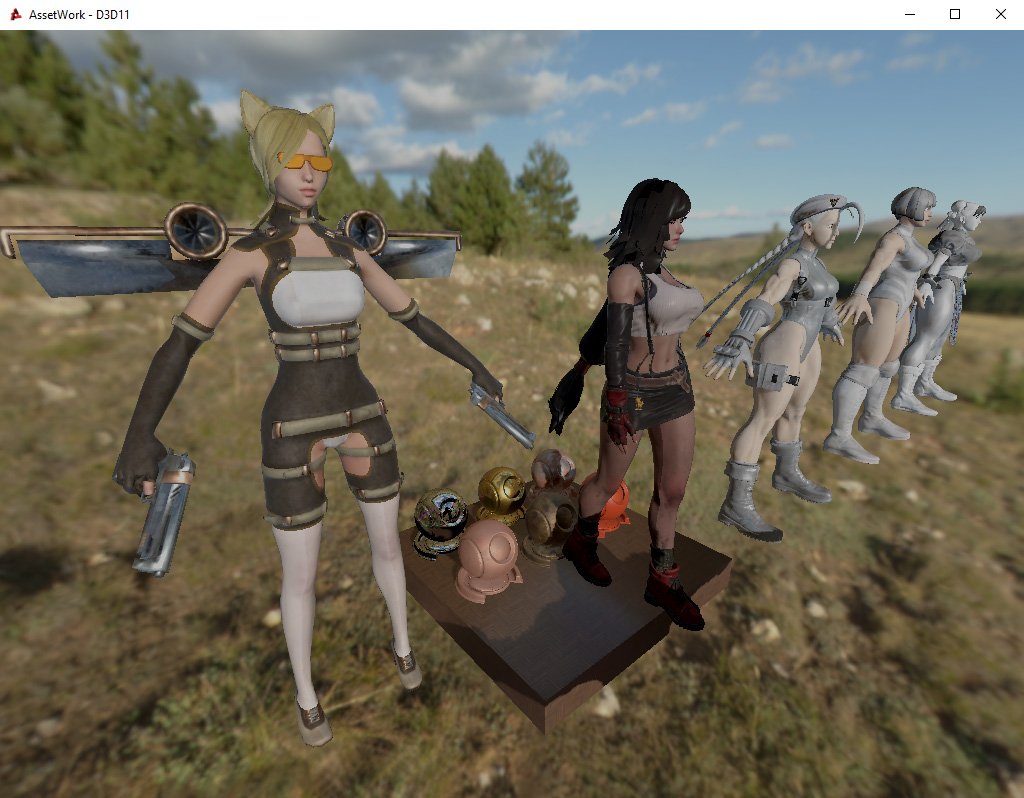
Catchick hanging with the TripleA Thicc Squad in PBR land

Which is when I found out that transparency was broken and filed an issue report on the code repository, github ... by which I mean I whined in the discord server to the power's that be, because github is my mortal enemy for reasons of never having been able to successfully create a working pull request that didn't get rejected ...

So, back to that auto-retopology LOD generator I wanted to test. It's called Game Asset Generator and is looks like a pretty nice piece of kit. I had a model with around 27K triangles and beefed it up to a completely ridiculous 440K using some catfish-bob subsurfing (or whatever the hell it's called).

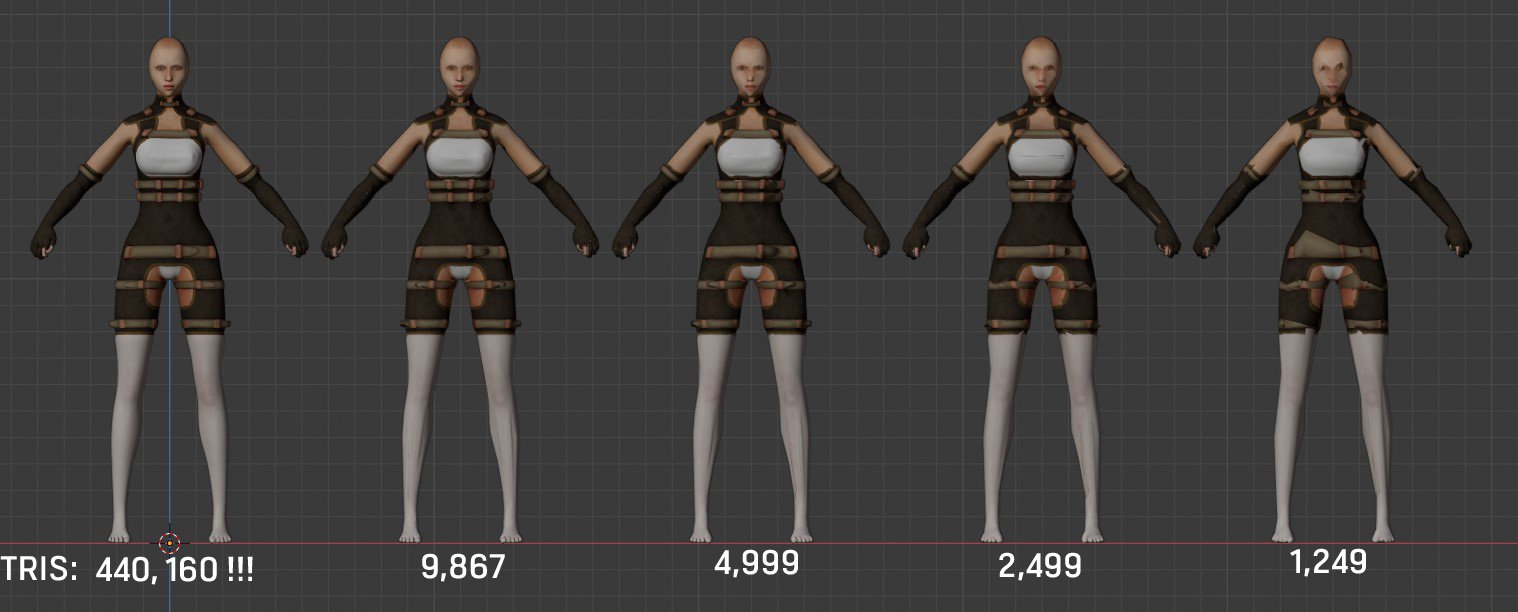
From "USE ALL THE TRIANGLES!!!!" to "use a more reasonable number of triangles in one simple click ...

The real down side to it was that it completely mangles the original UV maps into one horrible mess, and these were something which I wanted to try and preserve.

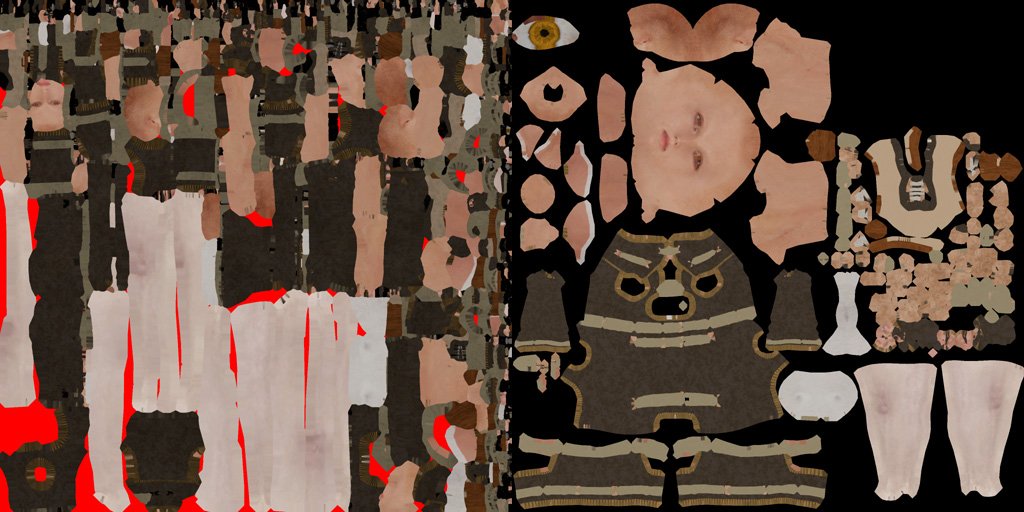
Whisky Tango Foxtrot on the left, as opposed to the original on the right

Now this is why people go about the arduous and rather boring process of manually retopology on high resolution meshes. But I want some sort of quick fix and my cake and eating that cake and still having cake, so I set about a cunning plan and broke the model up into separate sections based on the UV island layout, before automagically creating a lower topology. I then checked that the seams were still intact and adding new ones if they were not and recreated an approximation of the UV map, stitched all the parts together again and finally baked the textures from the original high poly mesh. Whew ...


And that all worked quite nicely. It wasn't "quite" as automated as I would have liked, and wasn't "quite" as good at retaining mesh loops as I had hoped for, but it did work. Having said that perhaps taking the extra time to manually retopology the high poly mesh into a lower poly mesh may be worth it ...

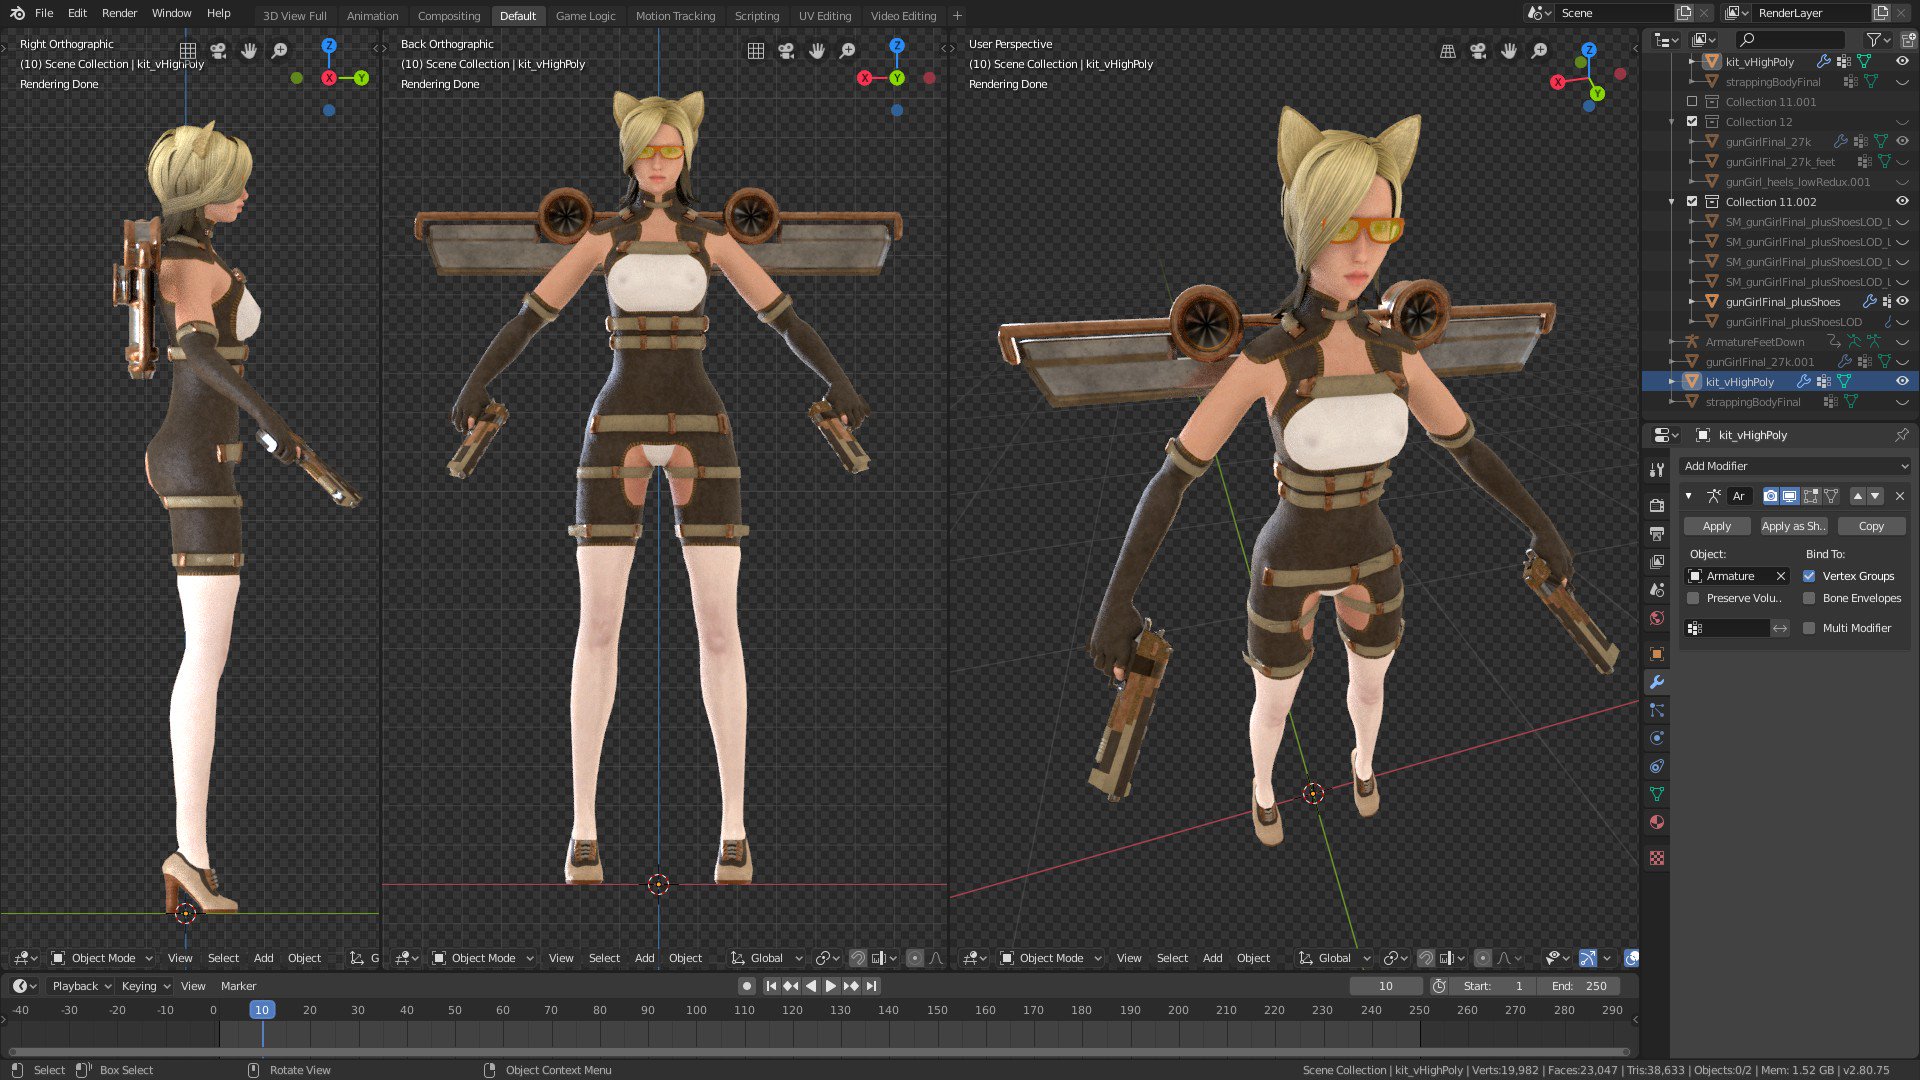
Next up was to rig the whole model with an armature for animation, and export as we would normally via the COLLADA exporter. Except the new Blender3D 2.8's COLLADA exporter has a whole range of new and completely undocumented options. So, in usual fashion I just went and dived in testing what worked and what didn't.
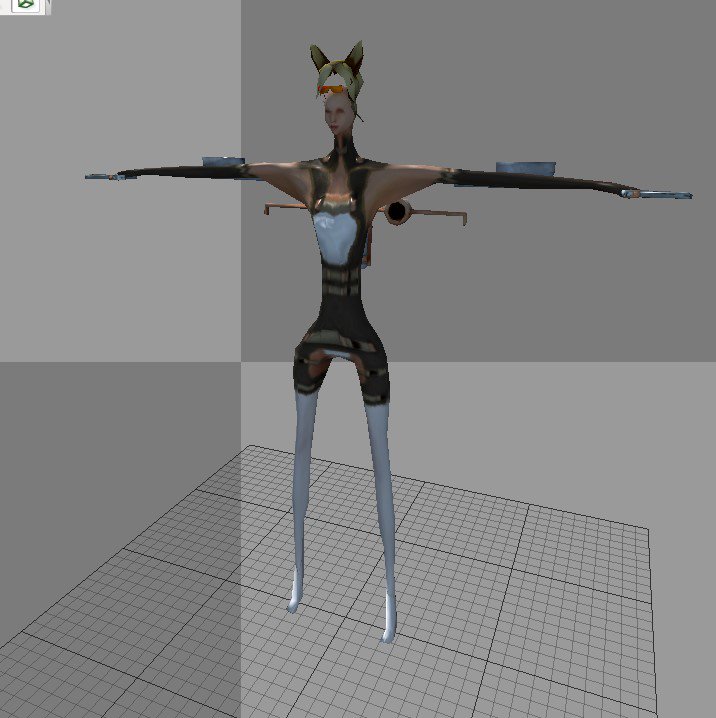
 Nope

Nah

Eventually I got a rigged armature exported. It turned out it didn't like being parented to the actual skeleton directly and could pick it all up via the armature modifier. Now for animations!

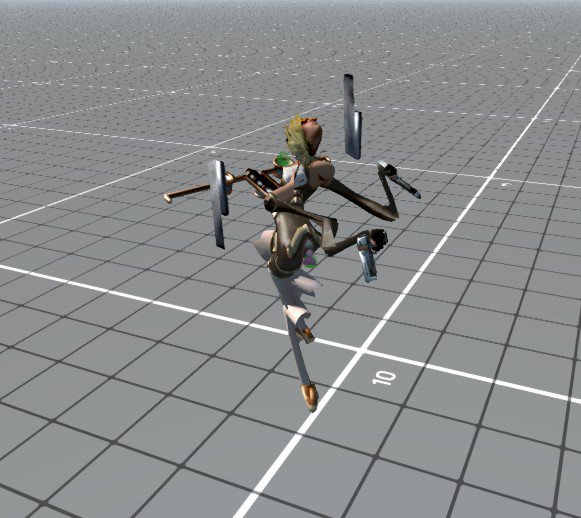
Dancing on ice? Close but no banana as far as a nice clean export goes ...
To successfully export an animated model required making disabling exporting of all actions and relying on keyframes only, whilst keeping bind info and sorting objects by name to prevent a duplicate armature from arriving for no particular reason ...

I wrote a more detailed thread up on the forums here.

And eventually I got a working, and fully animated character out of Blender3D 2.8 and into the game.

Those Taoist charms say no and they mean no

Whilst trying to get the more hardcoded movement-to-attack animations working I came across numerous issues (which is just kinda part of life as an indie dev to be honest, especially when you're a One Man Army). The first was an unexpected naming convention for attack/recoil animation which took a day and a half to solve. This would have been a lot quicker if I had just gone and looked through the source code instead of thinking that something else was wrong.

The second was that the weapon finite state machine (FSM) kept overriding my second fire state with the first. The character has two handguns and I wanted them to fire each in turn for the standard light attack, and then both together in a heavy attack, except only the first light attack would work and occasionally half the animation for the second would attempt to play. It turned out that because I was using a hardcoded "stateFire=true;" setting, on loading it would store the animation, audio and particles for the fire state into memory and reuse it in any other state that had stateFire. However, stateFire does not actually launch any attacks or projectiles as that is all done via each states script, so by disabling stateFire on the second light attack I could prevent it from overriding the state and have the left handgun shoot.

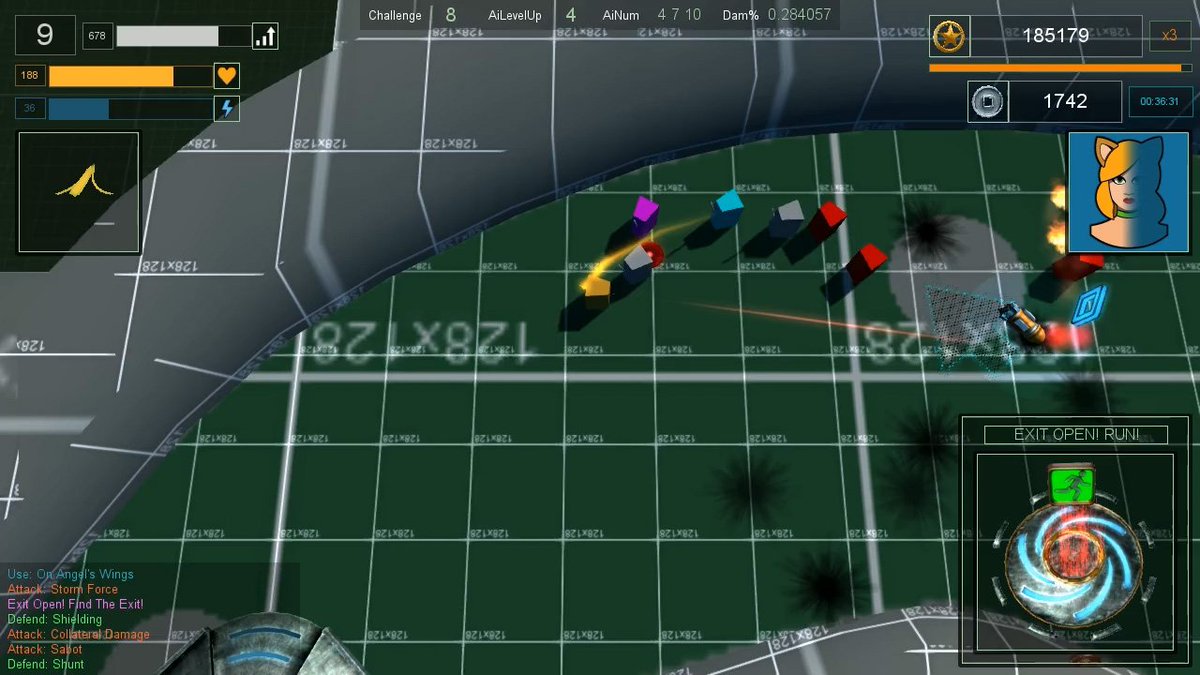
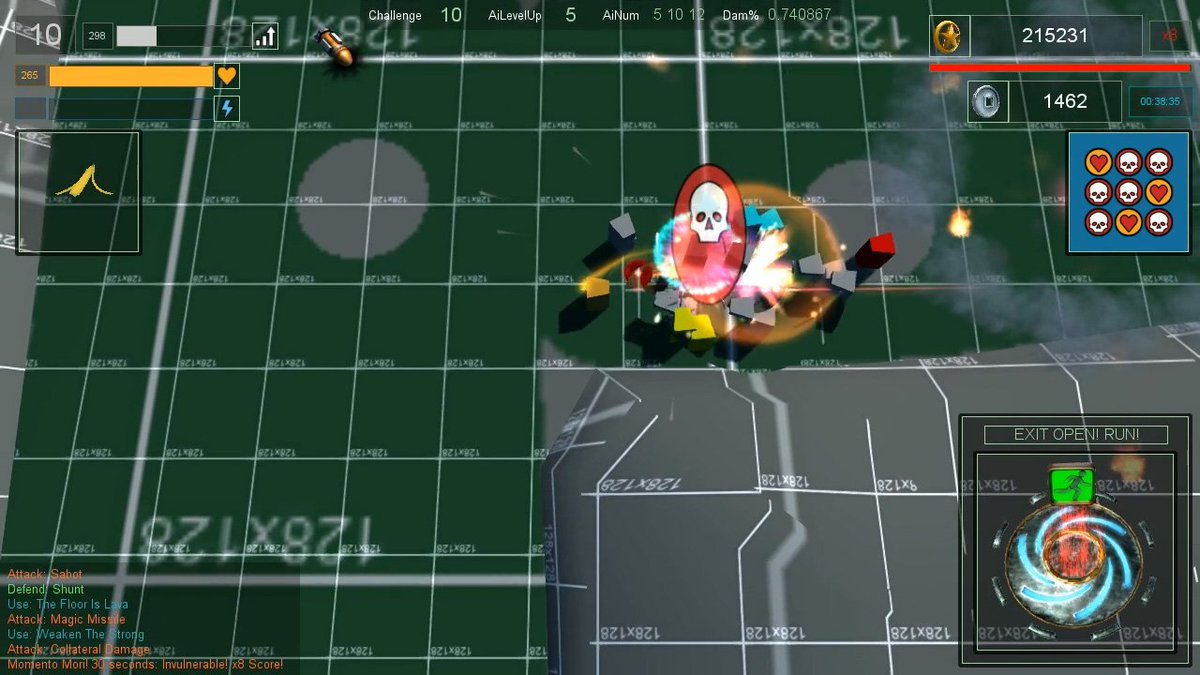
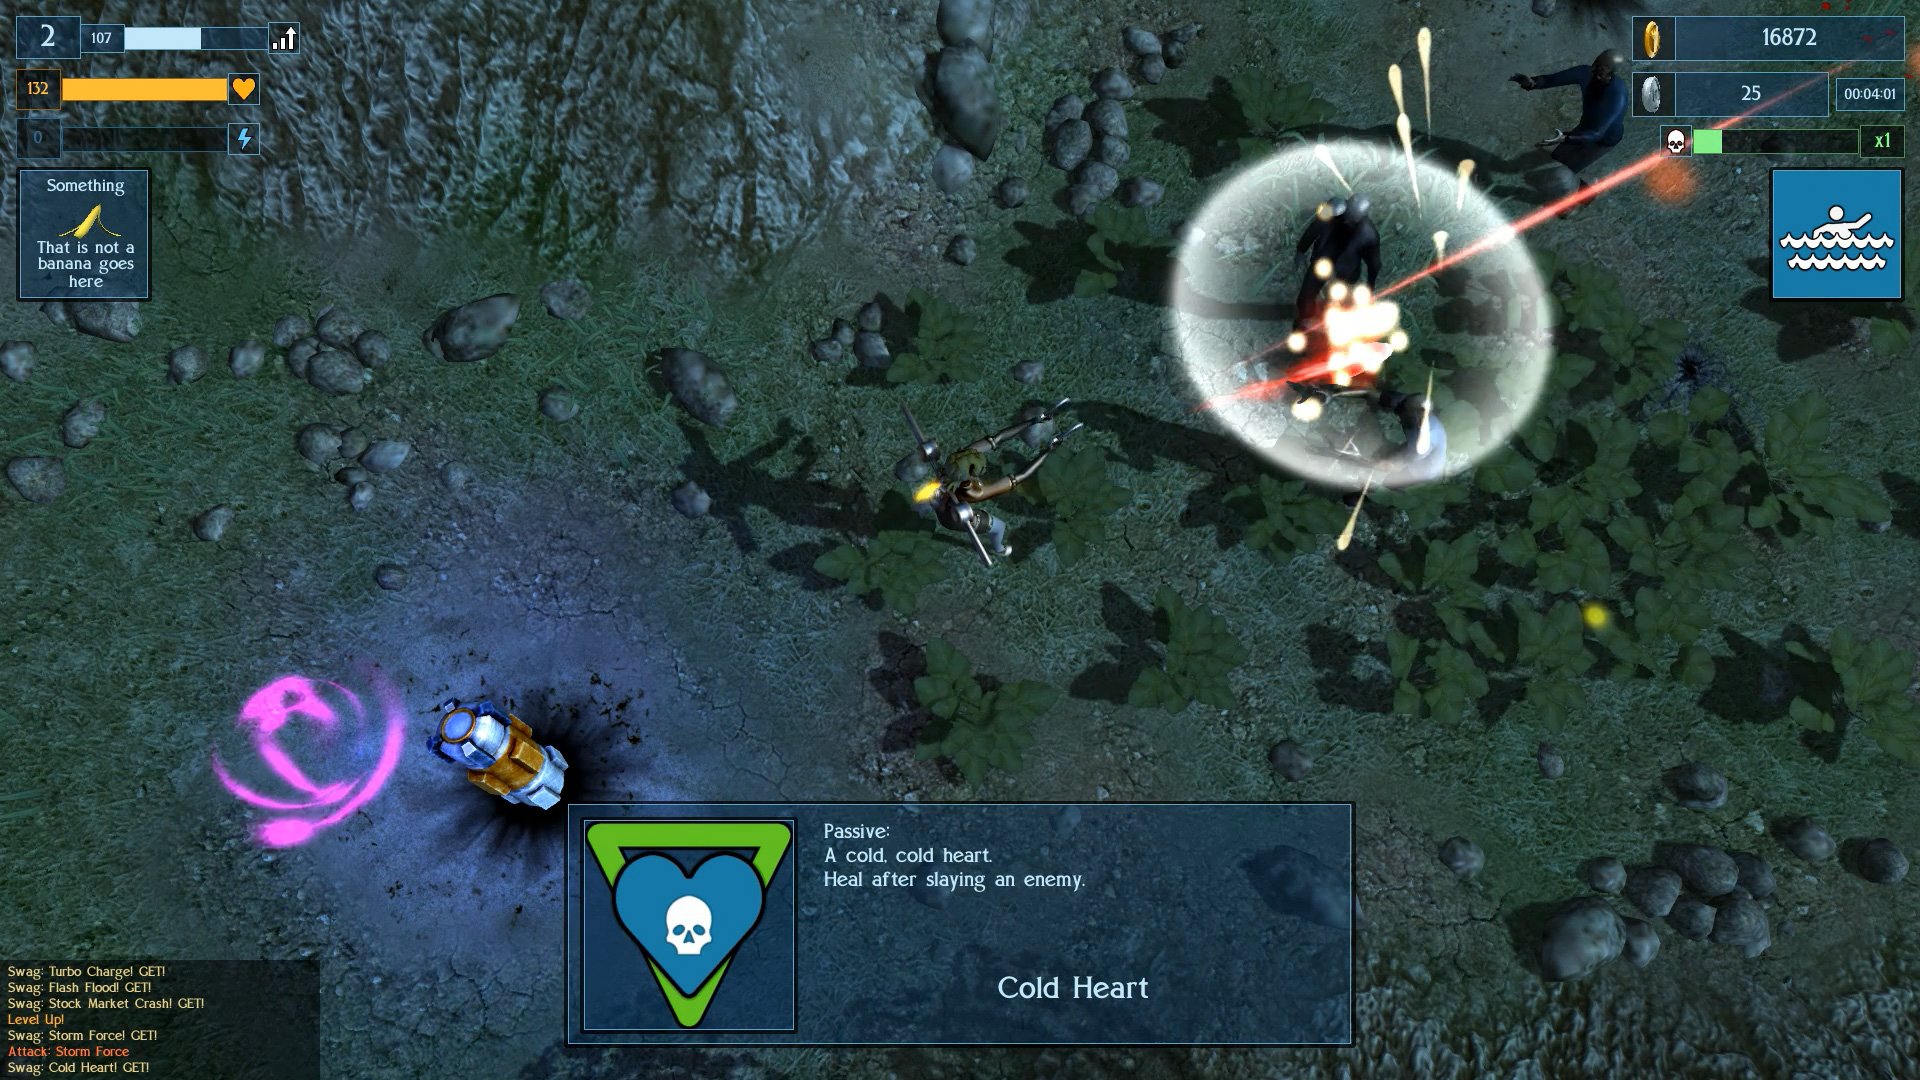
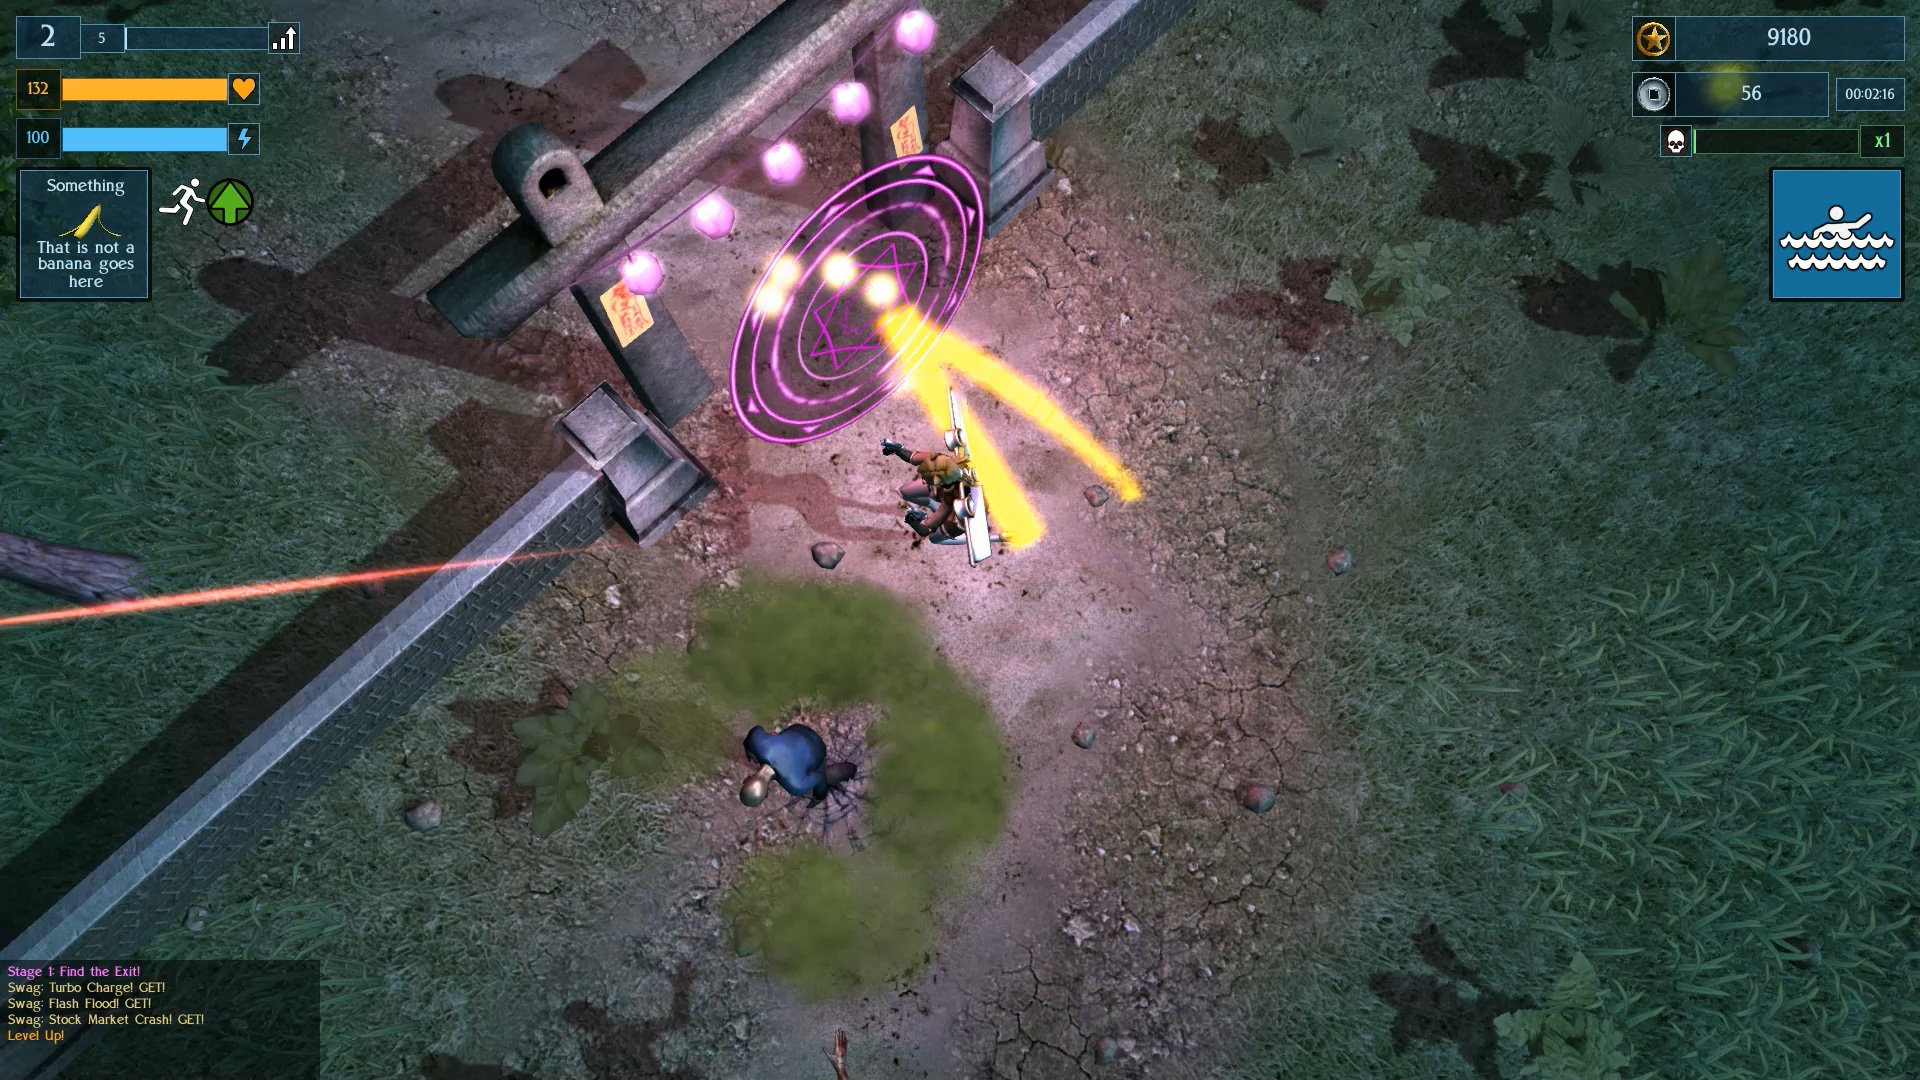
And here is the game in all of it's post-yellow cube glory. This is the old DirectX9 version and not the new PBR one, recorded at a slightly janky 30fps because my upstream internet is bad.


So, that was the month that was ... I learned the new Blender and PBR by accident, pummelled exporting and animation until it worked, and finally replaced placeholder cube with an actual working character. And tomorrow is the first day of meteorological autumn.

Friday, 29 December 2017

Tests, Checks And Gameplay Balancing

It's that time of year again folks, when you feel like this ...


And end up looking like this ...


Of course some of us are still working hard on "muh gaem dev" - and this month it's been mostly playtesting to try and create game balance, and hunt down a few elusive bugs. And when I say "elusive", I of course mean badly/drunk coded.

Like the Rocketrix offensive smart bomb attack. It picks the most dangerous group of enemies so it can do the most damage, swoops in and ... blows the player to smithereens. Yep, pretty sure that is not supposed to happen. Turns out I was calling the attack from the enemy target instead of through the player. Simple mistake by passing the opposite variable, possibly explained by the following image:


One thing that extended playtesting has shown is that stacking powerups - repeatedly collecting the same swag - does not happen as often as I thought it would. Even with 15+ items available each level, there are a total of 108 seperate bonuses (including upgrades to weapon drones). Whilst this does not really effect offensive or defensive events (which are added to an array list for chance of activation during attacss/damage), it does mean that permanent bonuses (health, speed, energy, etc) to attributes do not happen as often as originally planned, and individual bonuses confer too little benefit to the player.

Boosting the effect of permanent bonuses is the obvious way to balance this unforeseen lack of reward. For instance increases to player health are now percentage driven rather than a stock value, and speed is now hiked much higher as the original gain was meaningless beyond the first few game levels.

Another event that did not quite live up to it's predictions is the "Momento Mori". This is a sort of "rage gauge" which fills each time the player kills an enemy, but reduces each second. Enemies killed by heavy attacks fill the gauge faster than light attacks, and all other attacks (drones, swag events, etc) even less. The bar can fill multiple times, changing colour and conferring a multiplication bonus to the player's scoring.

"Gore Gauge" - Orange Bar and x3 Text, top right

Originally the player would fill the "rage gauge/kill bar" three times - now forever to be known as the "Gore Gauge" ;) - at which point the player would be healed and for the next thirty seconds the Gauge would stick at 4, multiplying the player's scoring.

To make this more of an actual event for the player to aim for, I increased the fill trigger level to 4, at which point it leaps to score multiplication x8 (4 = death, 8 = wealth), the player is healed 100% and for the next 30 seconds whilst the Momento Mori lasts is also invulnerable to all damage, which is a really big help in crowded and frantic later game levels.

Momento Mori event triggered. Red bar and x8 text top right (GUI still needs some work)

The GUI incorporating the Gore Gauge needs a bit more work, such as an icon to show what it represents like the XP/LevelUp, health and energy bars top left (a small skull would probably be a good fit here).

Momento Mori in action from ~02:02. Gore Gauge starts at x3.

Of course, what was missing from the above video is an indicator for the player that the Momento Mori event is still on-going and not yet ended. After a quick bit of modeling, texuting and scripting, I created what I felt would be a suitable aura type object to mount on the player to signify that the event was active.

Behold, one visual indicator, brought to you in the format of GIF

There have also been numerous other bugfixes and tweaking of code and gameplay - it's not all been eat, drink and be merry this Decemeber. ;)

So, next up is more gameplay balancing, but I am at the stage of development that this requires creating the actual data for the enemies which the player will be encountering in the game worlds, and their unique attributes and characteristics for attack and movement. This also requires drawing up a list of boss types rather than the singular one which I have at the moment.

Roll on 2018 ...

Friday, 12 February 2016

World Building Test And The Secret Of Grass

Onwards to world building. I had decided to dispense with the stock terrain and foliage systems, and instead thought of constructing each level out of custom meshes.
With the game's perspective being topdown/high-isometric, I had decided that polycount would not be much of an issue for the whole thing to run smoothly, as not too much of the game world would ever be visible at any one time. I intend to tonemap all of the world geometry with third-party app pureLight, though I've also used Blender to do this previously, and then set the in-game lighting to incorporate lightmaps, so that the diffuse/albedo map is influenced by the tonemap but the normal/specular maps are altered by the dynamic lighting.

Before I could getting cracking on world building, there was the small issue of coming up with a functioning work process, as well as load testing, and the awkward issue of how to get grass to animate without using the forestObject's moving foliage shaders. Players love stuff on screen, and if there's one thing they love more than stuff on screen it's moving stuff on screen.


How do I into grass?

First up, basic construction testing. I decided on a 10x10 mesh with multiple textures of grass, dirt, and rock - 1 drawcall per material. I was not particularly bothered about polycount for testing so there's a lot more geometry than needed. I wanted to create a few islands of grass and rock to make it look more interesting. Specular was initially somewhat overkill and really needed toning down to almost off, but just enough to create some very slight highlights. I modeled the mesh for some physical depth, raising grass and rock layers.


Not bad for a start but the edges of the grass and dirt were a little hard. Of course in real life, grass and dirt don't just fade into one another, but in video games things look odd without blending. I tried various levels of blends but found that just 2 worked fine for what I wanted. Spreading the blend over a metre seemed enough distance  to break up the harshness of the change from dirt to grass.


Satisfied with how modeling was going I moved on to grass and immediately hit problems. I found a grass image to use as a placeholder and covered the grass terrain texture in a couple of thousand planes for testing. With the game's high viewpoint, having straight polys looked bad, so I set about dividing the meshes and bending them over at an angle so everything leaned and tilted. Polys facing directly away from the main lightsource had some strange and frankly annoying blackness to their planes. Using an emissive material solved this - but then everything looked like a uniformed colour and became just an amorphous mass. Adding subscattering to the shadows helped to ease the harsh blackness of the polys but it still didn't appear as though they were being properly illuminated.


So off I went on an intrepid quest to find out what the hell was going wrong via insert-your-favourite-internet-search-engine-here. Normals were the problem. Foliage normals apparently need to point up to receive proper lighting. But alas the ancient 2.44 version of Blender from 2007 which I still use - because ... convenience - cannot into normal editing - however the new 2.76 version can. Luckily most of the hotkeys seem to be the same so it wasn't too difficult to pick up, and normal editing itself is just a modifier.

Goodbye horrible black stuff ruining the aesthetics of my foliage

I had decided that making an animated texture for moving grass would give the look I desired with very low overhead. I had created a huge level with over 9000 meshes for load testing, and just to see how bad it would be,  I used bone animation to move the grass polys and the framerate immdiately died to around 20 fps. So, just as expected then, back to animated textures.

I created a high poly grass mesh in Blender based on this little gem found on the internet (http://forums.torque3d.org/viewtopic.php?f=18&t=18#p53), and then animated it using multiple bones, and rendered out the frames. I tried various frame numbers and speeds, and it shouldn't be too much of a surprise that the more frames an animation has, the better it looks, so I settled on 32 frames. I found that the grass didn't really need much movement in the animation, and in fact looked better with less, rather than wildly thrashing about with higher movement. The renders also scaled nicely. Originally taken at 256 pixels, it gave a rather terrifying size of 8192 pixels, way more than older GPUs would want to cope with. It could be reduced via "nearest neighbour" to prevent blurring to 64x2048 and still look good.


One thing which I had noticed was an annoying uniformity of movement in the animation which gave an unpleasant  "swelling" effect. Setting different planes to different parts of the UV map meant that they played different parts of the animation and helped break up the regularity. I also decided to create multiple animations based on differing meshes and combine them all into a single atlas/mega texture. I ended up with 1 thick grass render with lots of grass stalks, a thinner medium one, and 2 thin small ones. I then combined the 2 small ones to be anew  medium one, and finally added the other medium to create a new thick mesh. All in all, this gave meanimations for 6 different sized grass clumps to help combat the sameness of just one animated texture. Combined together on a single 2048 pixel image, there was plenty of space for further cosmetic variations such as colour, lightness/darkness, saturation changes and the sort.
I had a little play around with alpha reference to see the difference have thick to thin grass made.


Quite happy with conquering the secrets of grass I moved on to load bearing. I had previously created a 1 kilometre level, filling it 10,300 copies of the mesh. Viewed in it's totality it was 119 million polys, 124,000 drawcalls and a mspf of 666.667 - which gave me a sudden urge to play Iron Maiden's greatest hits. However, even close in the result was 40 million polys and 5 fps. A quick check of culling revealed ... well, not as much culling as I had hoped. With the camera set back and angled a lot more was rendering in the fustrum than was actually visible. Of course during these tests I had no "Level Of Detail" for my 10K meshes. I made multiple levels of LOD and set up the options preferences so that they reduced polys and materials the lower you set it, but also LODed hard outside of the immediate camera view. In the end I had things down to show the highest LOD on screen all at once with 70 fps, 665K polys with 913 drawcalls and half of that is shadowing which won't feature as much once I start using lightmaps and the diffuse material filters the main dynamic light source.

I also tested less instances of meshes, combining 9 of them into a single object. This reduced the total number of meshes from 10,300 to a mere 1,160. Polys went up slightly to 772K, drawcalls fell dramatically to just 235 - a third of which was shadows, and fps rose to a thrilling 100+ fps. All of which was somewhat to be expected.

So here's what that all looks like with the additions of screen spaced ambient occlusion and a vignette shader around the edges. I think having the grass bent over a little more might help aesthetically, but I'm quite pleased with the result and the performance.


Tuesday, 15 December 2015

99 Bottles Of Swag On The Wall ...

Last blog post "Wednesday, 8 July 2015" --- bad indiedev, bad!
Devblog Harder, The Devbloggening

Having been back to sorting things out for Steam and Airship Dragoon (such as Trading Cards) apparently it was February when I last mentioned the concept of my new indie game project "The Swag 'Em Up". Back then I was testing a basic isometric control system which I went on to use in the "7 day Rogue-Like Game Jam" back in March. Since then, we've made a bit of progress, though it might not really look that way as everything is still displayed as a placeholder object. Here come the cubes ...


I created the ability to unlock objects with cash picked up from deceased enemies. These objects then dispense power-ups and swag. Can't have a Swag 'Em-Up without swag! ;) 


Having found memories of Ye Olde Arcade game Gradius (also known as Nemesis in the UK back in Ye Olde 1980s) I thought it might be fun to have a Gradius style "Option" which follows the player around, adding additional firepower to all attacks. Like the Gradius Option, these "Followers" link up in a chain, trailing behind the player's movement and inherit the player's rotation to fire in the same direction. A bit of tweaking code meant that the player and Follower would happily not shoot each other.


Of course a Swag 'Em-Up needs swag, so I spent quite a lot of time thinking up 108 unique pick-ups - which is a lot by any stretch of the imagination. These are split into 30 common power-ups, 25 uncommon power-ups, 20 rare power-ups, 25 single use special items and finally 8 upgrades for Followers. Making all of these pick-ups unique took quite a lot mental gymnastics, especially after I had gone through the many of the more obvious ones such as speed-up, health faster, more, health, dodge, shielding, teleport, fire attack,armour piercing, and the normal sort of stuff you see in video games. So here's a quick selection in action:

Magic Bullet - attack ricochets through enemies causing 4 wounds (a free internet for anyone who spots the politcal assassination reference).


Homing Missile - For those times when you want to cast magicMissile ... at the darkness! Here demonstrated by the enemy AI attacking the player.


Laser Beam - ImaCharjinMaLayZor! Big old energy beam which slices through ranks of enemies for damage. I've since dropped the explosive blast from the end and let the beam continue further off screen.


And there's plenty more where they came from ... 104 more including Follower upgrades. Minus the 8 Follower ranks and 25 special use items, the remaining 75 player upgrades divide into 8 attribute power-ups, 9 general bonuses, 30 attack upgrades and 28 defensive power-ups.

For enemies, I'm planning on using an updated version of my "7 Day Rogue-Like" AI code. So the current job is to code up the remainder of power-ups to placeholder art status, and then start testing to find the best way to create the levels as I currently imagine them to be.


Thursday, 26 February 2015

Swag Em Up

New project: Swag 'Em Up.

I had been umming and ahhing about what to do as my next project. I had toyed with the idea of another strategy game, albiet less niche hardcore and more casual, but fancied putting my skills to the test elsewhere with something a bit more fast and furious with an infinitely shorter development period. Hence the Swag 'Em Up was born.

 Boxxy placeholder with ribbon trails

Swag 'Em Up as a gameplay genre revolves around rushing about, blasting enemies, and unlocking items and collecting powerups and upgrades which form the swag question. Rogue-like or possibly rogue-lite seems a good basis for this as randomizing items, placement and enemies should lead to varied challenges and unique replayability with new unlockables being available dependant on how previous play-throughs went.

Initially I'd toyed with the idea of a top down view but immediately found it rather boring visually, so I switched to a rather high isometric view of around 70 degrees. This showed off models better and gave more depth to the scene. Here's a quick visual explanation of the differences.


After deciding on my camera system I created a screen relative movement system. When input says up and right, the player's avatar moves up and right relative to the camera/screen. This works especially well with gamepad controllers which can increment the rotation of the control stick.

I coded a new cooldown system for weapons and sprinting So that abilities take a few seconds to recharge. My thoughts for player abilities were thus, light attack with no cooldown, heavy attack, evade (in this case sprint) and special object use. I created a few new systems to allow for permanent upgrades as well as temporary time based ones and a whole experience gain and leveling system which adds health and regen bonuses. Originally I had considered a cash system alongside score and XP to buy unlockable items but instead have opted for trading experience for them. This method involves the player deciding whether they'd like to spend their hard earned experience on powerups or let it accumulate for leveling, which grants upgrades of it's own.

And here's a little demonstration of what I've got after a month of coding featuring our very own cube placeholders. Camera relative control system, light attack, heavy attack, evade, cooldowns, experience gathering and leveling.

 Now it turns out that there is a minor issue with the control system - it's bloody difficult to shoot at anything accurately. This is not really helped by being a placeholder cube with no obvious centre of facing. I might add some sort of laser aiming object to help alleviate this, or I might split movement and direction into two seperate states, like in a twin-stick shooter.

In the meantime, there it is, the start of my new project: "Action Rpg Mecha Musume Catgirl Rogue-like Swag 'Em Up".