I've been playing around and testing with materials to try and get a good work procedure for creating variation.
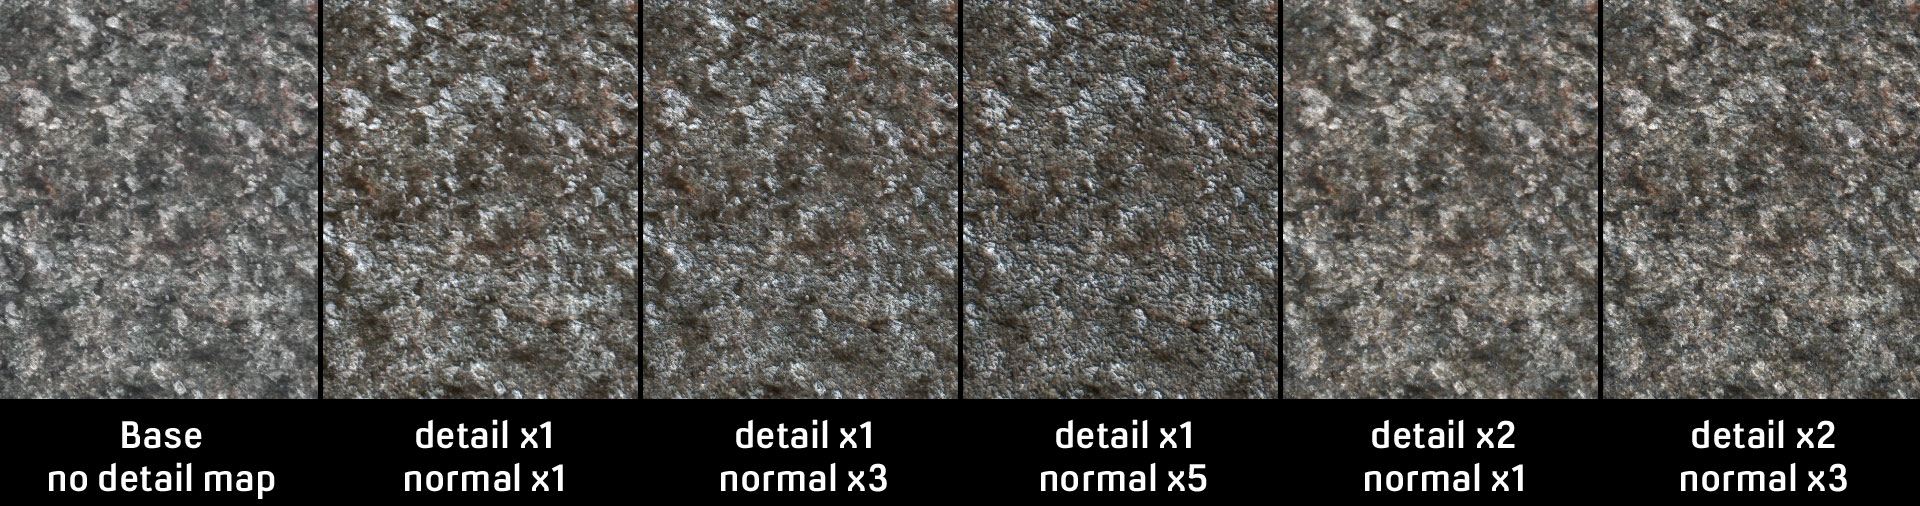
First up, I used some open source art resources from the Torque3D Pacific Demo, which can now be found free for download with all art assets here http://wiki.torque3d.org/main:downloads. I amalgamated various terrain textures with their images marked _detail for overlays, such as grass, dry ground and volcanic rock to create a starting texture. I used the detail textures as specMaps and the original normalMaps, before testing the various slots of detailMap and detailNormalMap in the matieral.
Adding a detail map with a scale of 1 made the highlights and shadows of the diffuseMap stand out more. Hardly surprising as the detailMap is taken from the diffuse. Increasing the strength of the detailNM increased the grain of the image. Scaling the detailMap across the diffuse caused a more even grain without sharpening specific features. I thought that textures tended to look better close up the more sharp they were, and the opposite further away.
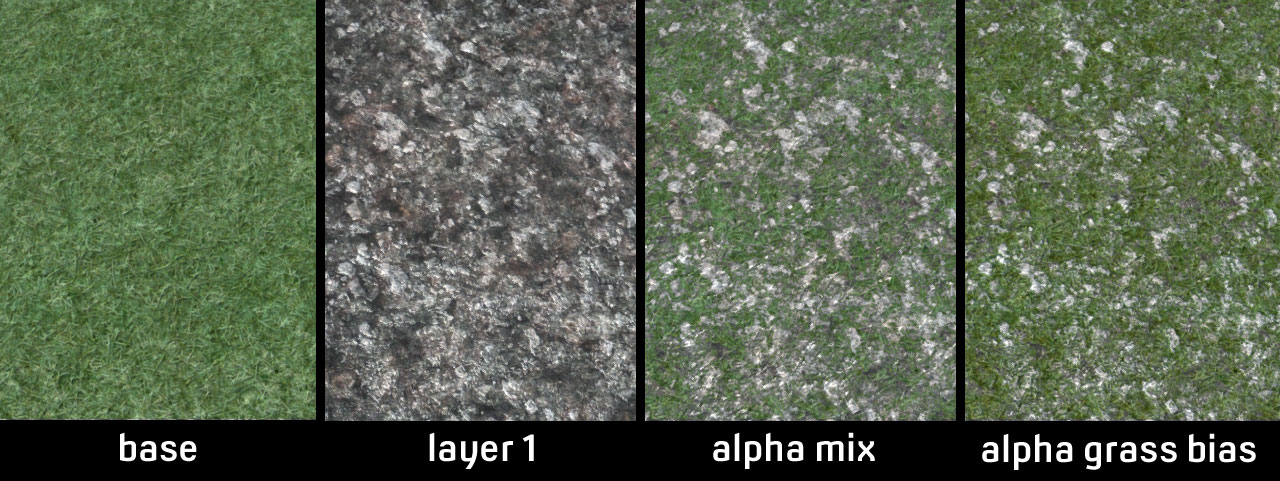
Next up I tested layering textures. The idea was to create new materials without having to manually merge two images in an image editing app, thus saving on texture memory in the long run. I took a grass texture for the base layer0, and overlayed it with the volcanic rock texture in layer1, to which I had added an alpha channel. The alpha channel was quite simple, I simply boosted contrast on the reference image and took highlights, mid, and shadows.
After intial testing I thought that the grass was somewhat washed out so I boosted the reduced the mid levels of the alpha channel so that it favoured the grass over 50-50 mixing. Originally I had based the alpha channel directly from the contrast of the texture, but found it better to boost the hightlights and then expand them for white, then expand a smaller area for mixed and have the remaining as fully translucent black. This let much more of both layers appear with only limited fade, making the whole thing sharper.
For the final test I added a mask onto the grass texture to simulate earth or dirt (though this could have done this with another layer between grass and rock to again reduce image quantity and thus texture memory, but these are only tests for visual effect). I hoped this would give a more naturalistic effect rather than just having rock sticking out of grass.
Rock and Alpha Channel (at 25% scale) Very 1-0 with only a little semi-transparent
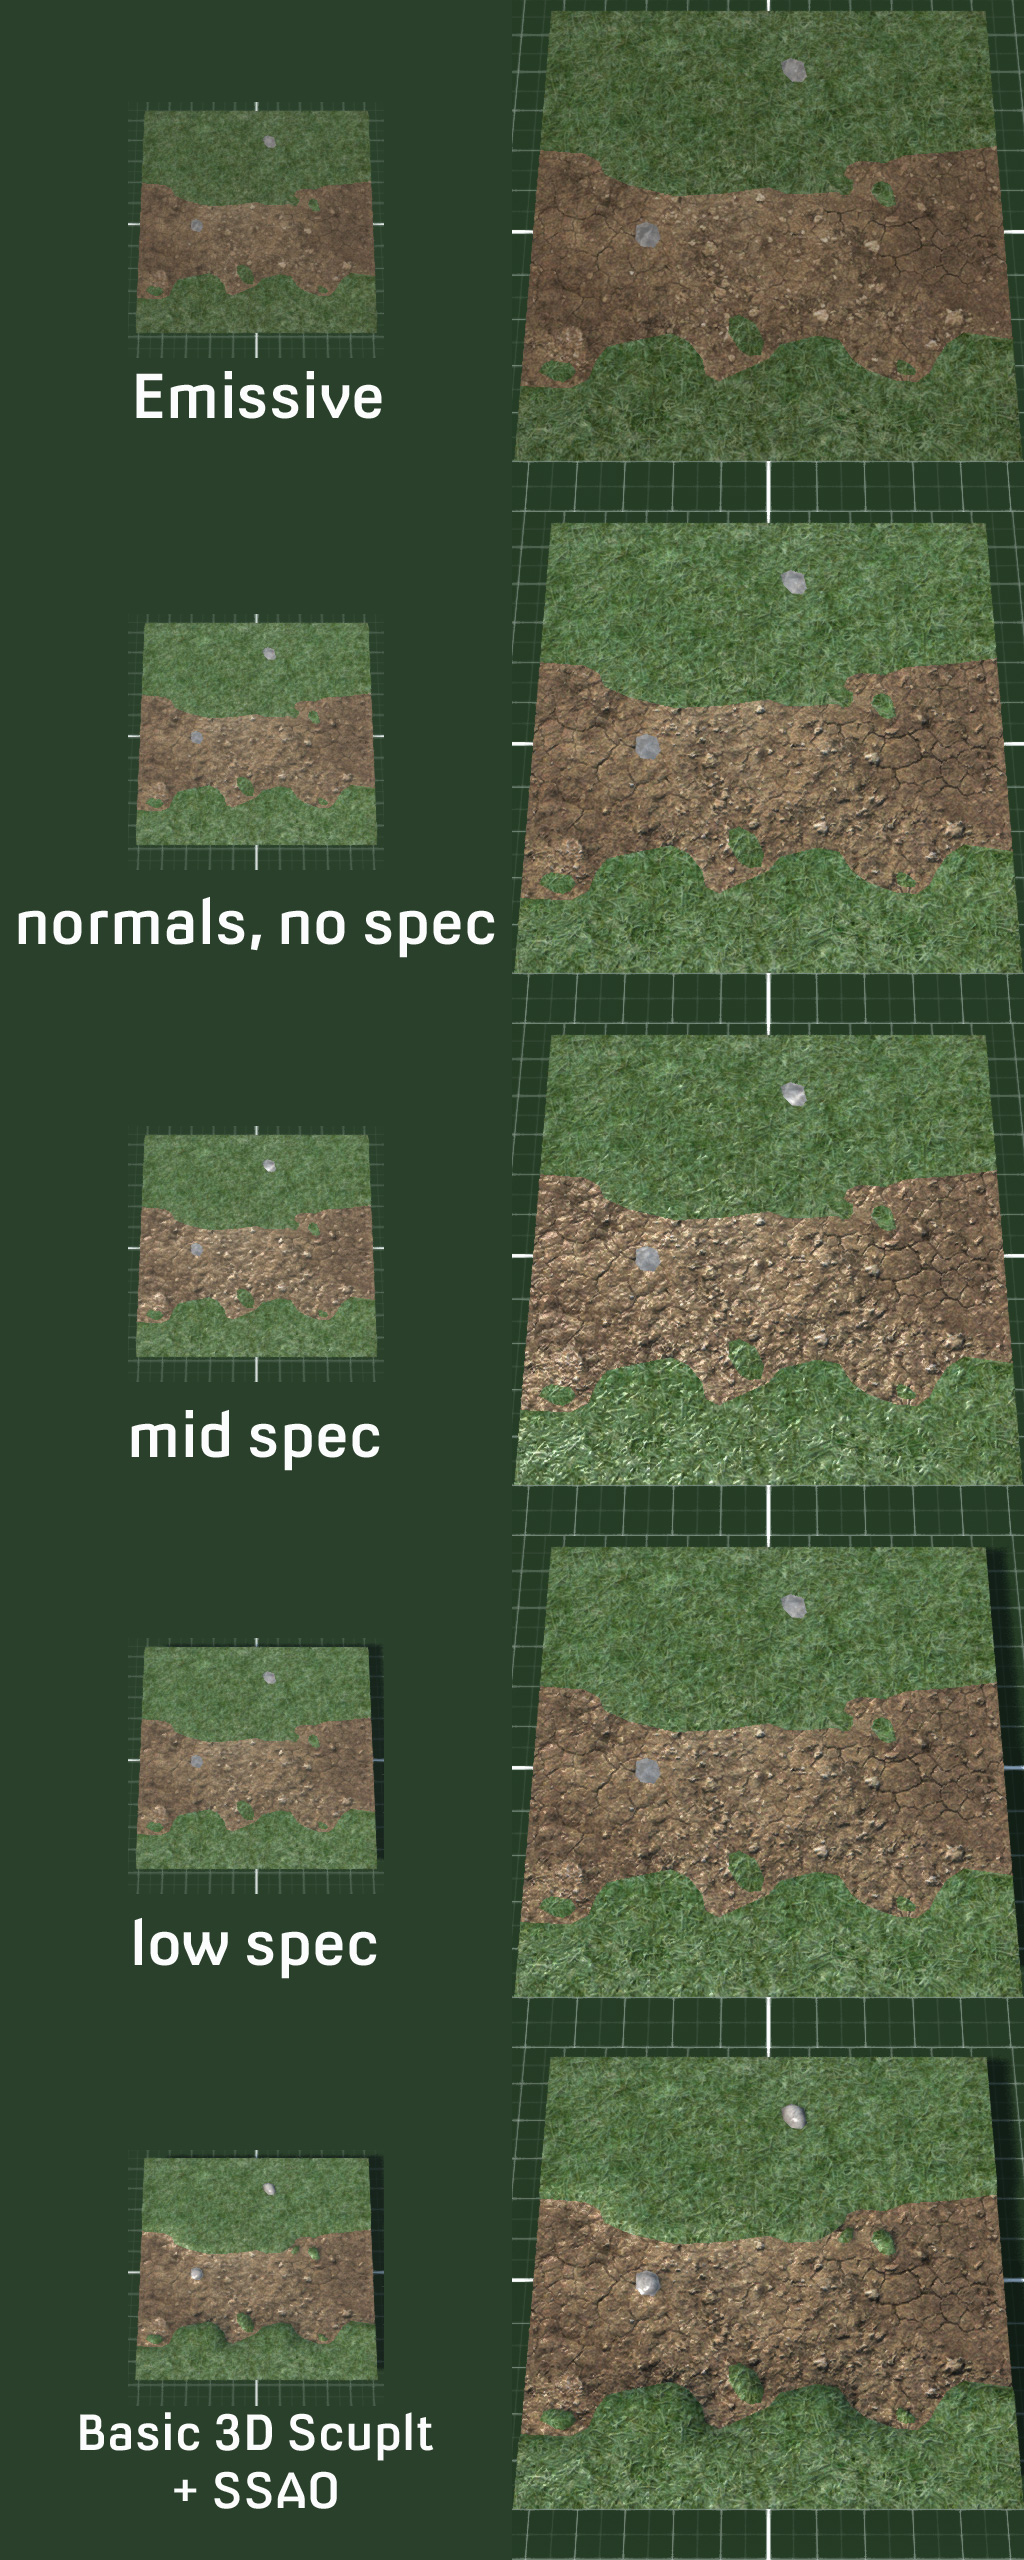
I also noticed in previous tests that whilst detailMaps, detailNMs and specMaps worked on higher layers, standard normalMaps only used the base layer0. To give the rock layer some extra height, I used the volcanic Nm and Spec for layer0 with the grass texture. I had used the rocks alpha channel to paste dirt over the grass and now reduced the size of the white and grey levels so that more of the dirt would show around the edges. I proceeded to do various tests to see it looked, changing detailMaps, detailNMs, and even tweaking layer1 diffuse.
Eventually my eyes went all googly from looking at tiny changes.
Onwards to world building. I had decided to dispense with the stock terrain and foliage systems, and instead thought of constructing each level out of custom meshes.
With the game's perspective being topdown/high-isometric, I had decided that polycount would not be much of an issue for the whole thing to run smoothly, as not too much of the game world would ever be visible at any one time. I intend to tonemap all of the world geometry with third-party app pureLight, though I've also used Blender to do this previously, and then set the in-game lighting to incorporate lightmaps, so that the diffuse/albedo map is influenced by the tonemap but the normal/specular maps are altered by the dynamic lighting.
Before I could getting cracking on world building, there was the small issue of coming up with a functioning work process, as well as load testing, and the awkward issue of how to get grass to animate without using the forestObject's moving foliage shaders. Players love stuff on screen, and if there's one thing they love more than stuff on screen it's moving stuff on screen.
How do I into grass?
First up, basic construction testing. I decided on a 10x10 mesh with multiple textures of grass, dirt, and rock - 1 drawcall per material. I was not particularly bothered about polycount for testing so there's a lot more geometry than needed. I wanted to create a few islands of grass and rock to make it look more interesting. Specular was initially somewhat overkill and really needed toning down to almost off, but just enough to create some very slight highlights. I modeled the mesh for some physical depth, raising grass and rock layers.
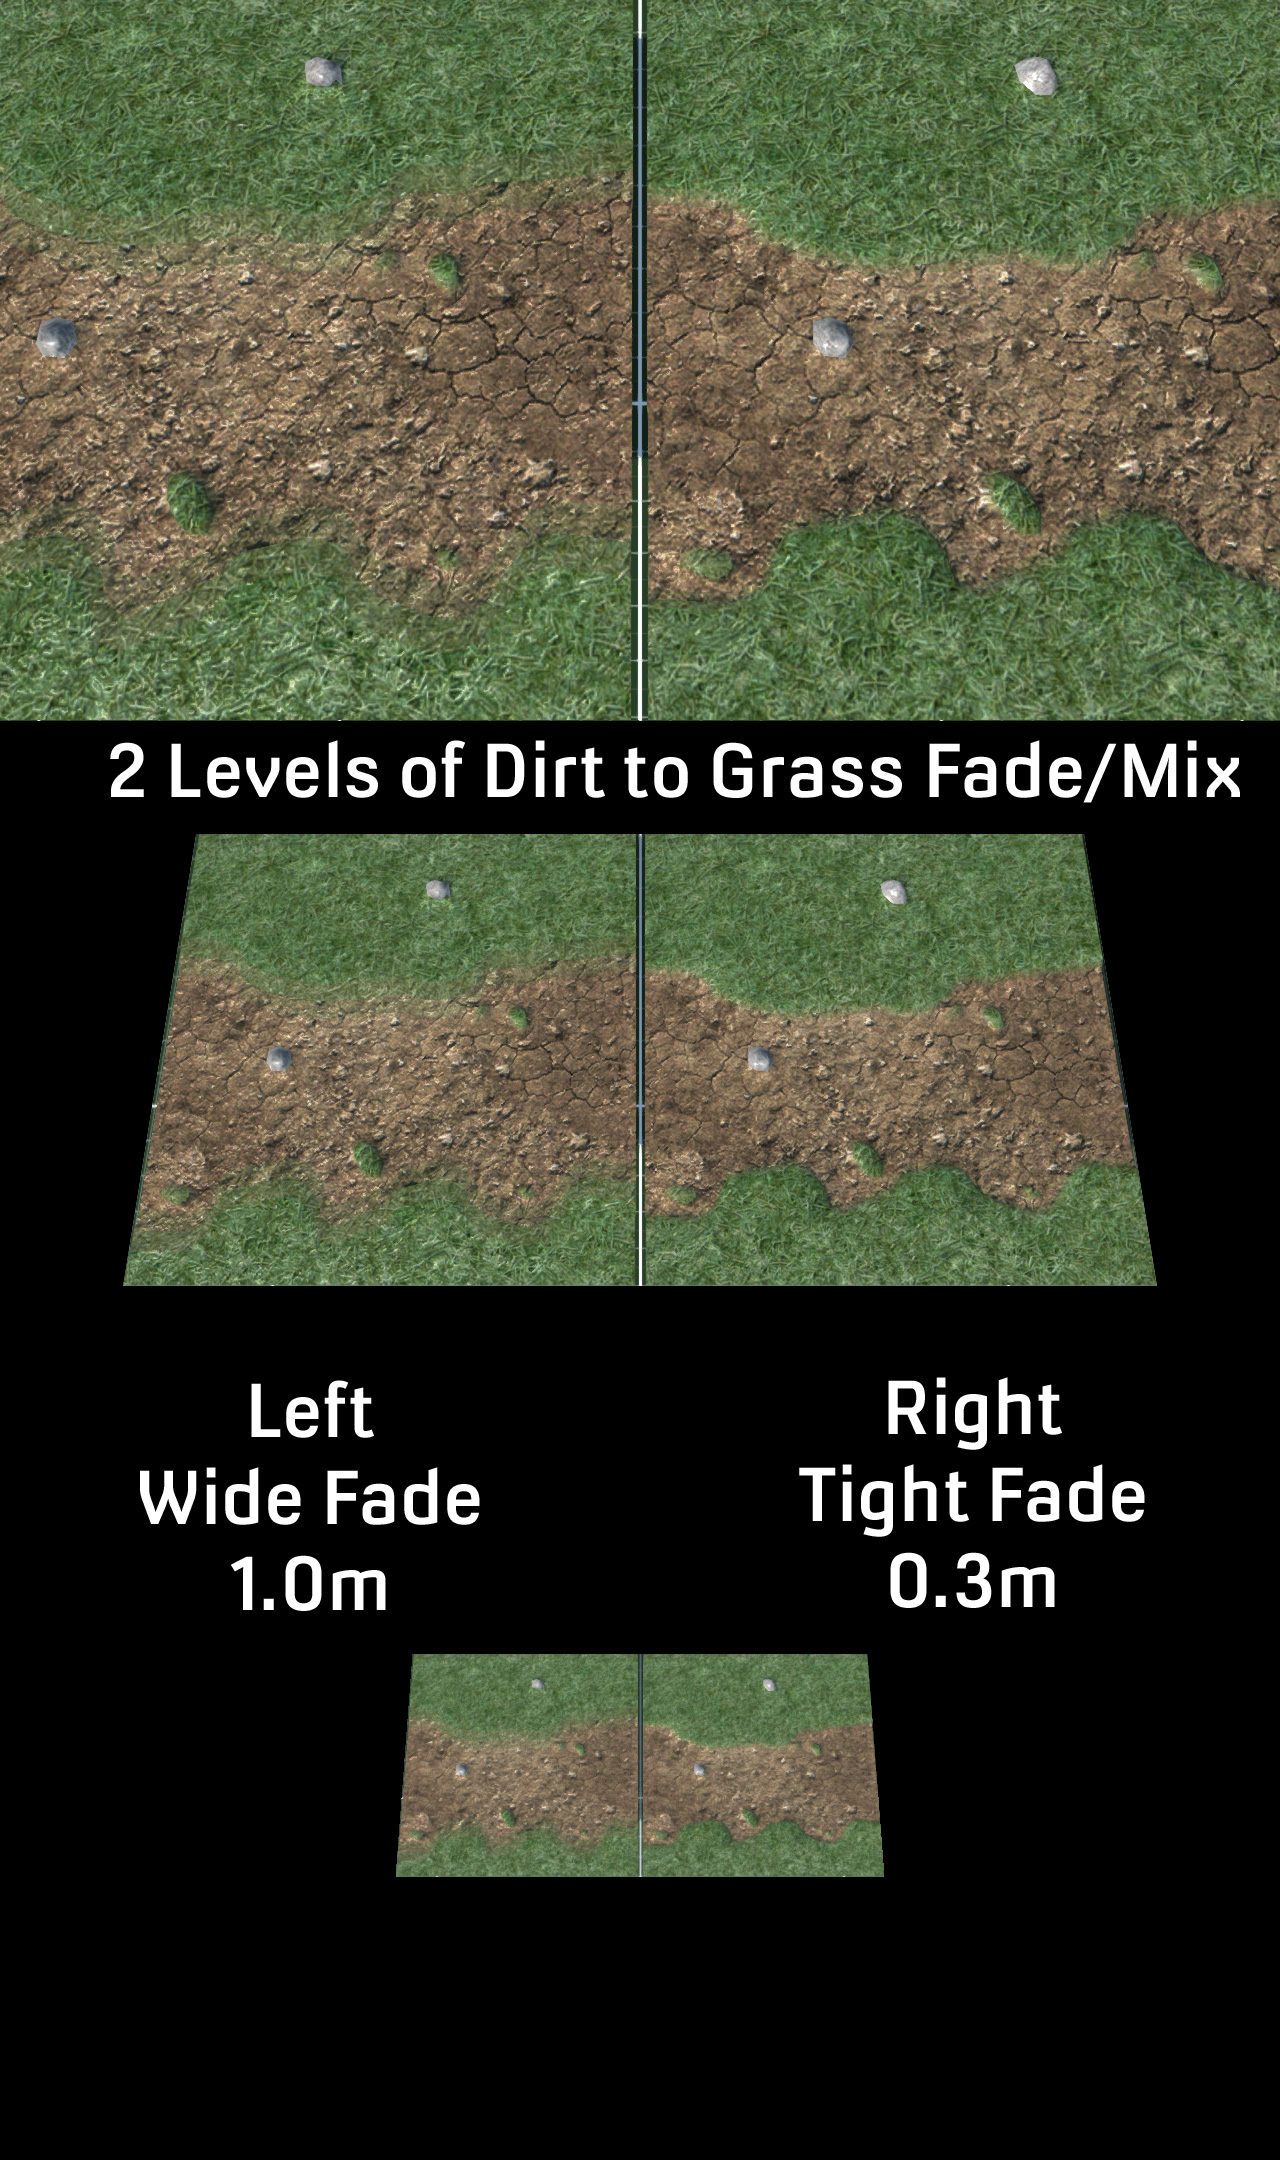
Not bad for a start but the edges of the grass and dirt were a little hard. Of course in real life, grass and dirt don't just fade into one another, but in video games things look odd without blending. I tried various levels of blends but found that just 2 worked fine for what I wanted. Spreading the blend over a metre seemed enough distance to break up the harshness of the change from dirt to grass.
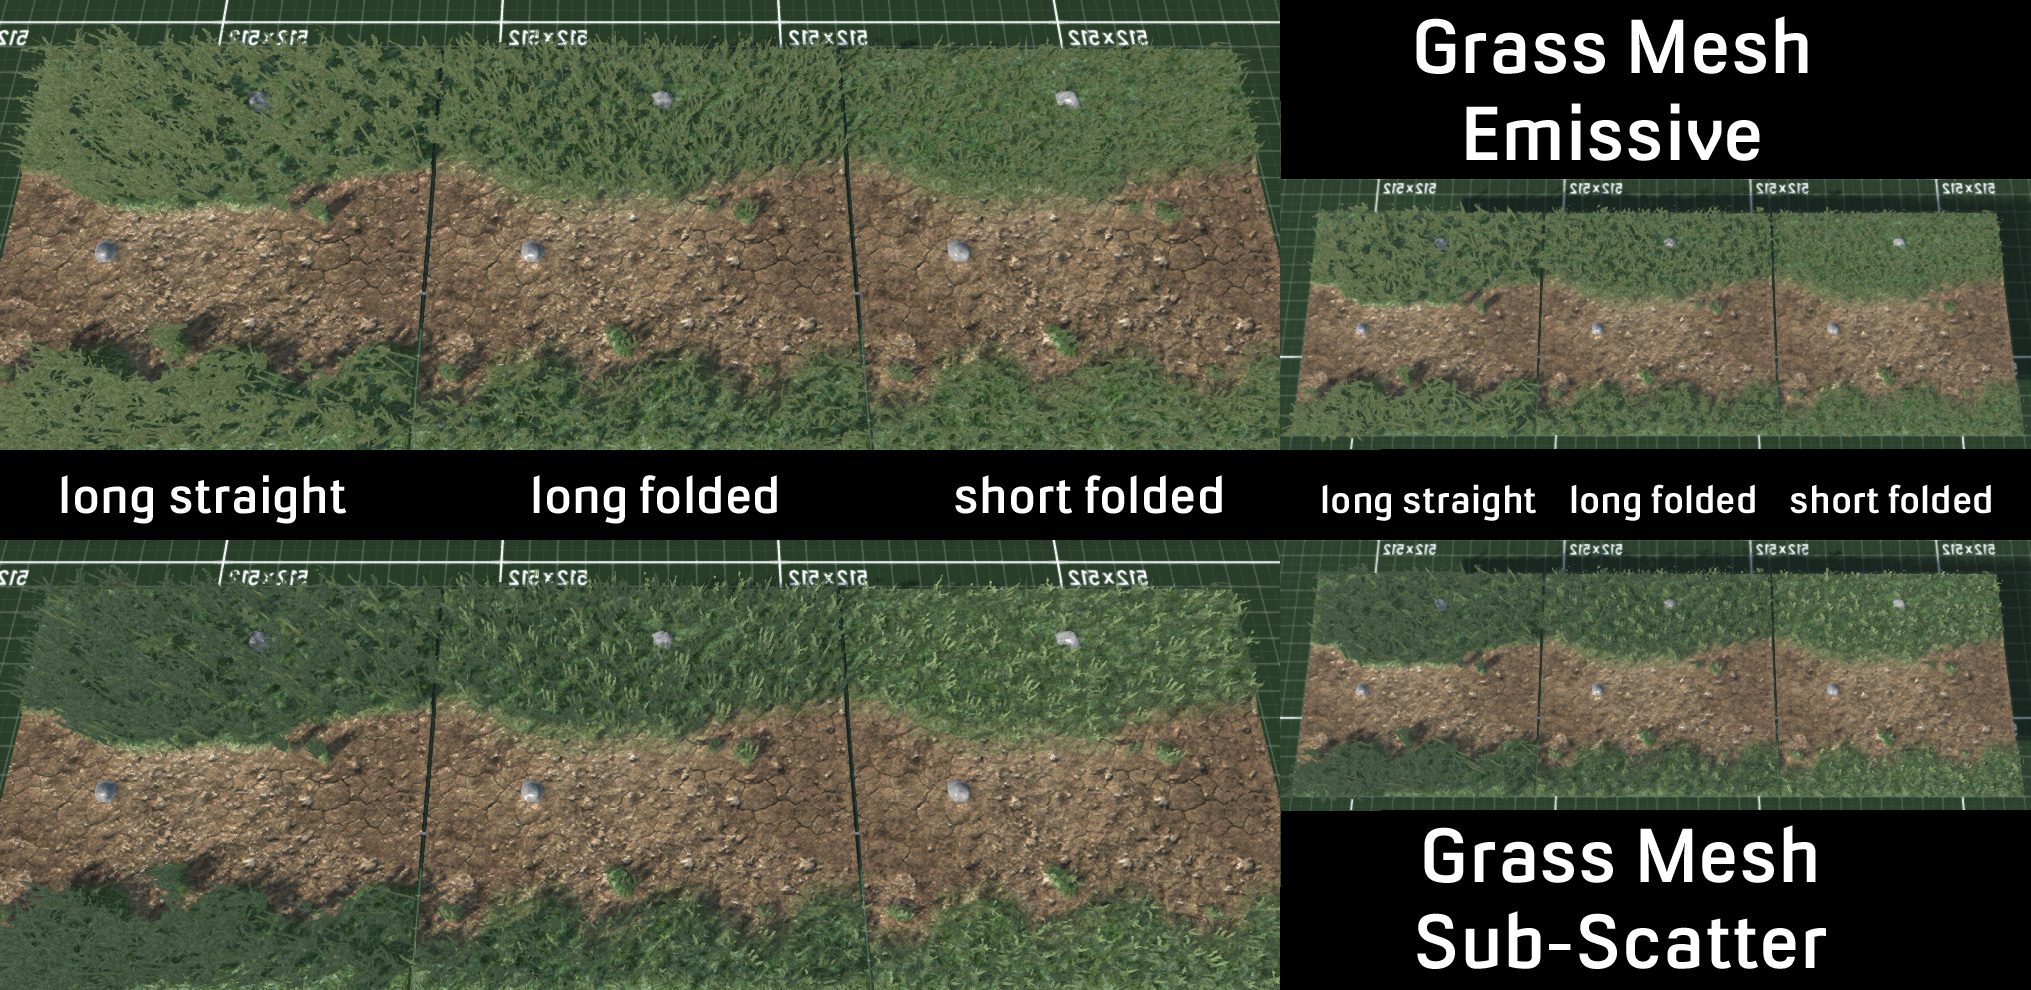
Satisfied with how modeling was going I moved on to grass and immediately hit problems. I found a grass image to use as a placeholder and covered the grass terrain texture in a couple of thousand planes for testing. With the game's high viewpoint, having straight polys looked bad, so I set about dividing the meshes and bending them over at an angle so everything leaned and tilted. Polys facing directly away from the main lightsource had some strange and frankly annoying blackness to their planes. Using an emissive material solved this - but then everything looked like a uniformed colour and became just an amorphous mass. Adding subscattering to the shadows helped to ease the harsh blackness of the polys but it still didn't appear as though they were being properly illuminated.
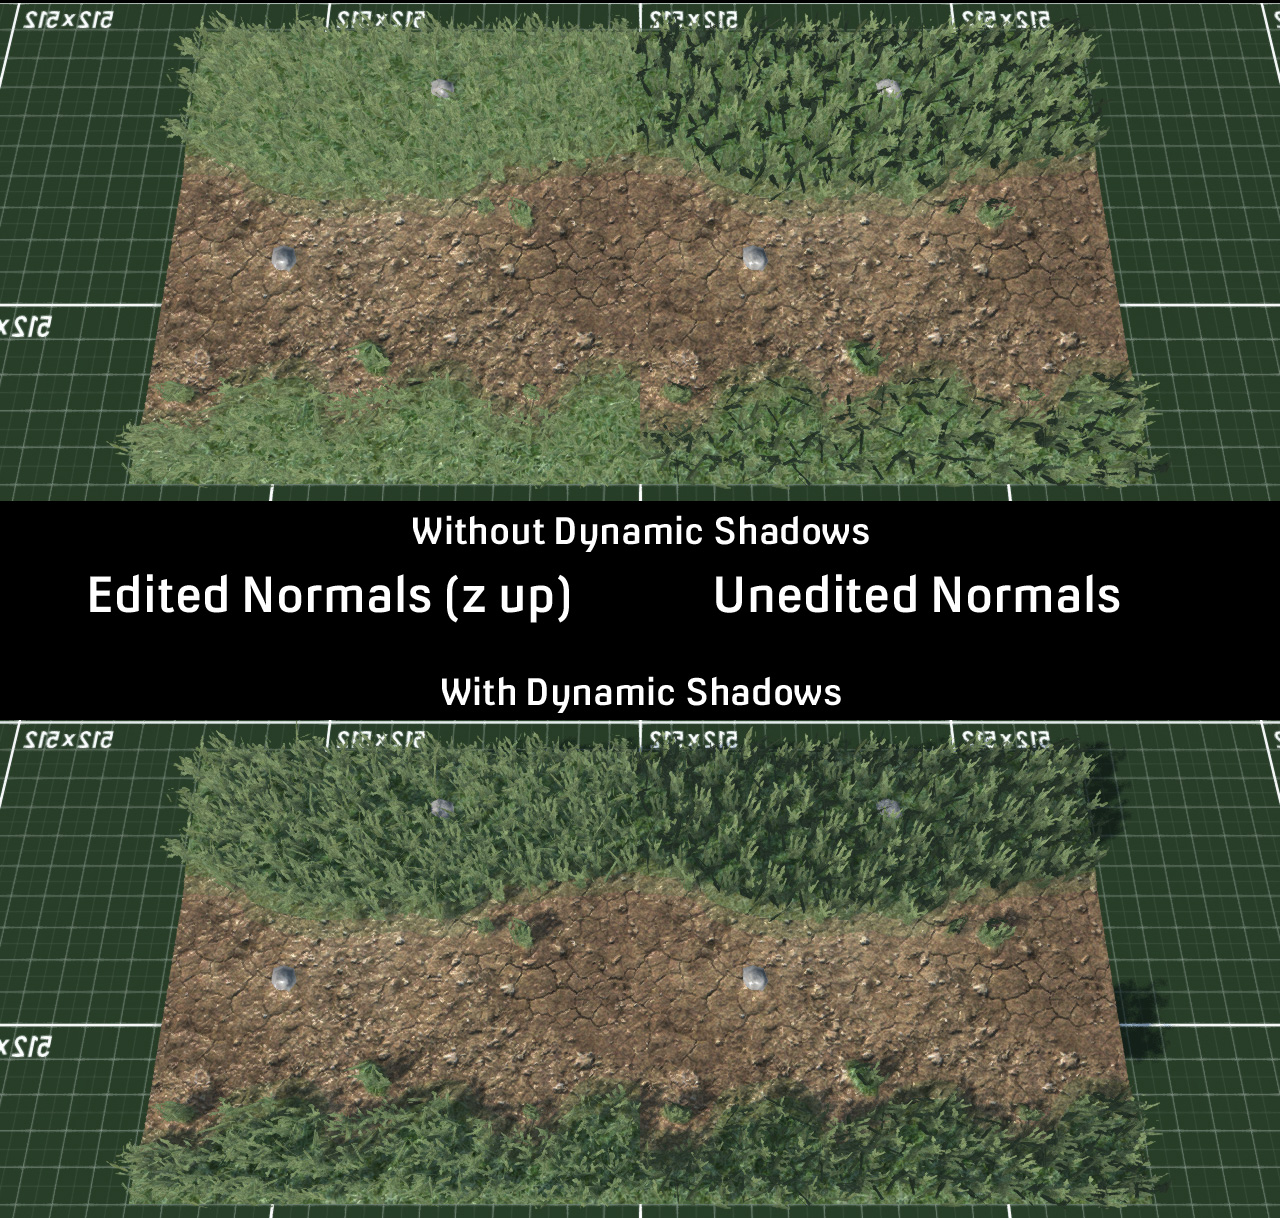
So off I went on an intrepid quest to find out what the hell was going wrong via insert-your-favourite-internet-search-engine-here. Normals were the problem. Foliage normals apparently need to point up to receive proper lighting. But alas the ancient 2.44 version of Blender from 2007 which I still use - because ... convenience - cannot into normal editing - however the new 2.76 version can. Luckily most of the hotkeys seem to be the same so it wasn't too difficult to pick up, and normal editing itself is just a modifier.
Goodbye horrible black stuff ruining the aesthetics of my foliage
I had decided that making an animated texture for moving grass would give the look I desired with very low overhead. I had created a huge level with over 9000 meshes for load testing, and just to see how bad it would be, I used bone animation to move the grass polys and the framerate immdiately died to around 20 fps. So, just as expected then, back to animated textures.
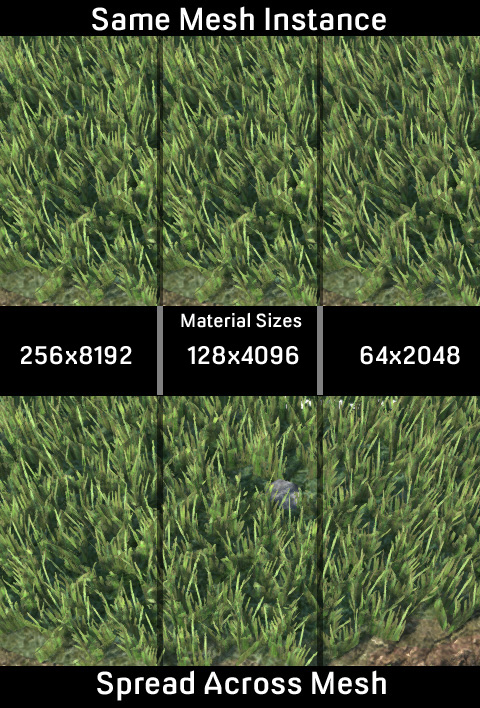
I created a high poly grass mesh in Blender based on this little gem found on the internet (http://forums.torque3d.org/viewtopic.php?f=18&t=18#p53), and then animated it using multiple bones, and rendered out the frames. I tried various frame numbers and speeds, and it shouldn't be too much of a surprise that the more frames an animation has, the better it looks, so I settled on 32 frames. I found that the grass didn't really need much movement in the animation, and in fact looked better with less, rather than wildly thrashing about with higher movement. The renders also scaled nicely. Originally taken at 256 pixels, it gave a rather terrifying size of 8192 pixels, way more than older GPUs would want to cope with. It could be reduced via "nearest neighbour" to prevent blurring to 64x2048 and still look good.
One thing which I had noticed was an annoying uniformity of movement in the animation which gave an unpleasant "swelling" effect. Setting different planes to different parts of the UV map meant that they played different parts of the animation and helped break up the regularity. I also decided to create multiple animations based on differing meshes and combine them all into a single atlas/mega texture. I ended up with 1 thick grass render with lots of grass stalks, a thinner medium one, and 2 thin small ones. I then combined the 2 small ones to be anew medium one, and finally added the other medium to create a new thick mesh. All in all, this gave meanimations for 6 different sized grass clumps to help combat the sameness of just one animated texture. Combined together on a single 2048 pixel image, there was plenty of space for further cosmetic variations such as colour, lightness/darkness, saturation changes and the sort.
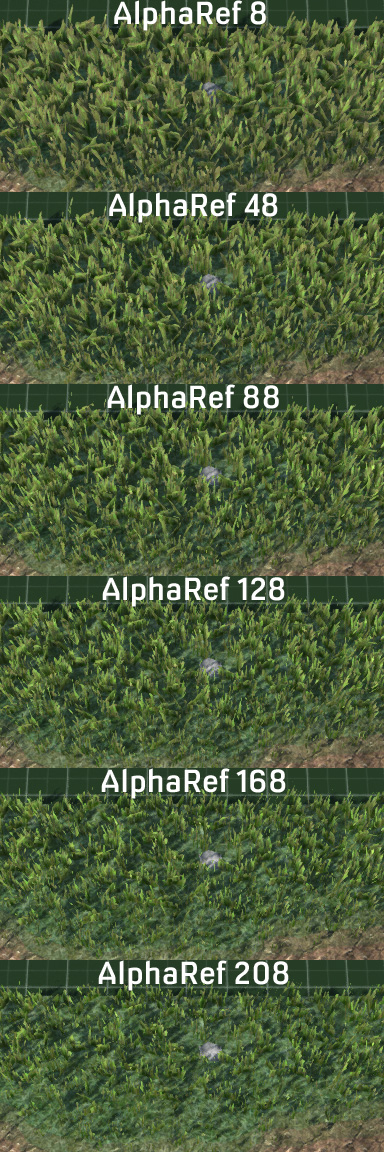
I had a little play around with alpha reference to see the difference have thick to thin grass made.
Quite happy with conquering the secrets of grass I moved on to load bearing. I had previously created a 1 kilometre level, filling it 10,300 copies of the mesh. Viewed in it's totality it was 119 million polys, 124,000 drawcalls and a mspf of 666.667 - which gave me a sudden urge to play Iron Maiden's greatest hits. However, even close in the result was 40 million polys and 5 fps. A quick check of culling revealed ... well, not as much culling as I had hoped. With the camera set back and angled a lot more was rendering in the fustrum than was actually visible. Of course during these tests I had no "Level Of Detail" for my 10K meshes. I made multiple levels of LOD and set up the options preferences so that they reduced polys and materials the lower you set it, but also LODed hard outside of the immediate camera view. In the end I had things down to show the highest LOD on screen all at once with 70 fps, 665K polys with 913 drawcalls and half of that is shadowing which won't feature as much once I start using lightmaps and the diffuse material filters the main dynamic light source.
I also tested less instances of meshes, combining 9 of them into a single object. This reduced the total number of meshes from 10,300 to a mere 1,160. Polys went up slightly to 772K, drawcalls fell dramatically to just 235 - a third of which was shadows, and fps rose to a thrilling 100+ fps. All of which was somewhat to be expected.
So here's what that all looks like with the additions of screen spaced ambient occlusion and a vignette shader around the edges. I think having the grass bent over a little more might help aesthetically, but I'm quite pleased with the result and the performance.
It took some doing, but I managed to design and code, a full 100 collectable power-ups. Most of the artwork is still placeholder but all bonuses, attributes, special attacks, etc work in practice.
They come in 6 flavours:
ATTACK - bonus event on striking an enemy. eg: critical damage, exploding attack
DEFEND - bonus event on being hit. eg: shield stops damage, retribution attack against enemy
TEMPORARY - boost to attributes for x seconds. eg: for 8 seconds speed x2, increased healing
PASSIVE - works passively. eg: cause damage on touch, enemies drop more loot
ITEM - Items are single use and player can use any item that they have collected when they wish. Can be good for getting out of trouble when your back is to the wall.
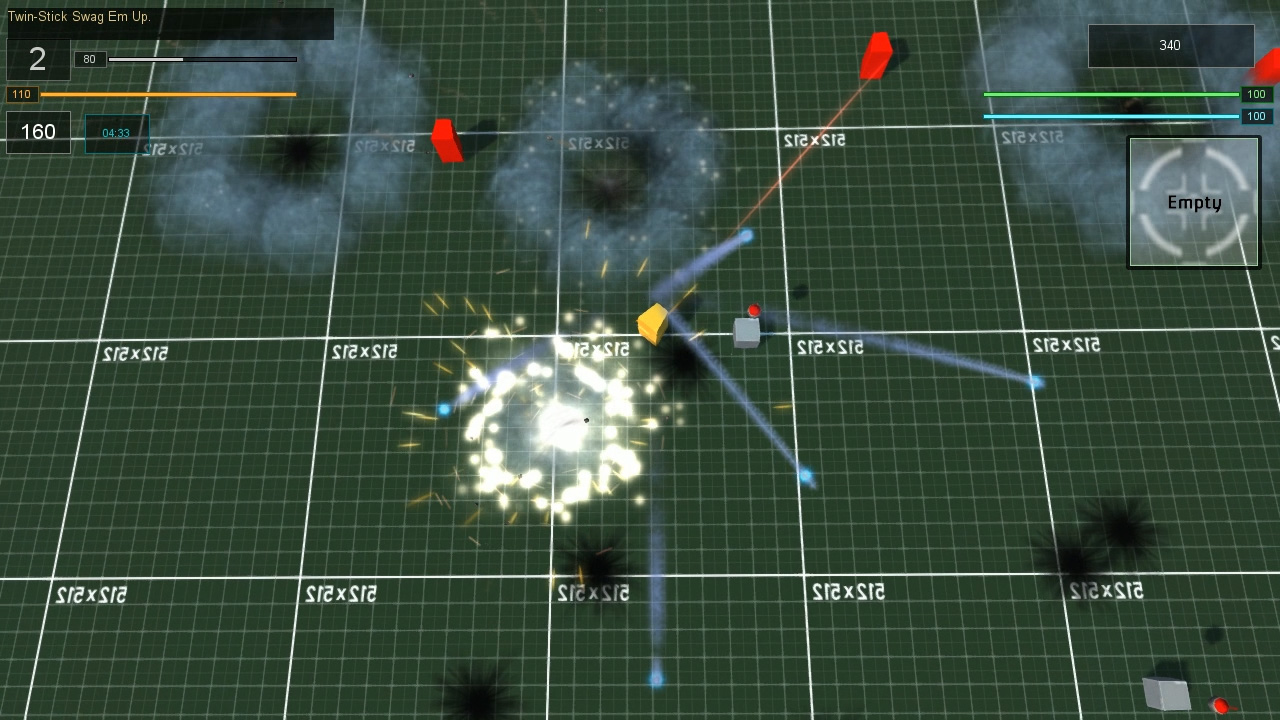
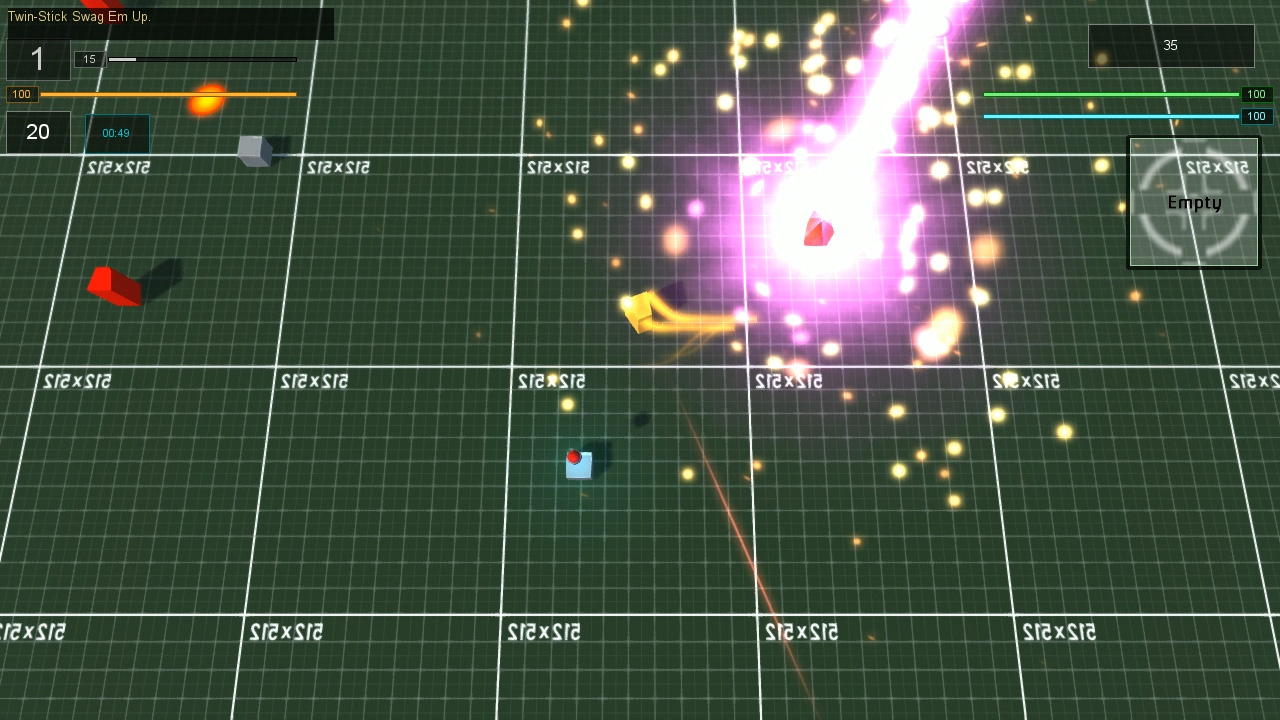
So here's some pics and videos of a few of more of them being tested. See last blog for previous ones.
Bonus offensive machine-gun and grenade spam attacks.
Super Orbital Laser (anyone guessing the source of the name wins a free internet)
The Zone of Brass Monkies - slows all enemy who enter it.
Napalm Strike (need to work on those particles, not entirely satisfied with those flames)
And a quick test of shields in various colours.
I also spent some time reading through the code (this is why it's important to leave comments people!) and found a few things I didn't previously know about explosions - such as you can tie animated meshes to them. This help save a bit of overhead on things as in Airship Dragoon I had spawned "concussion blast spheres" seperately. So I decided to make the basic impact attack a little more interesting.
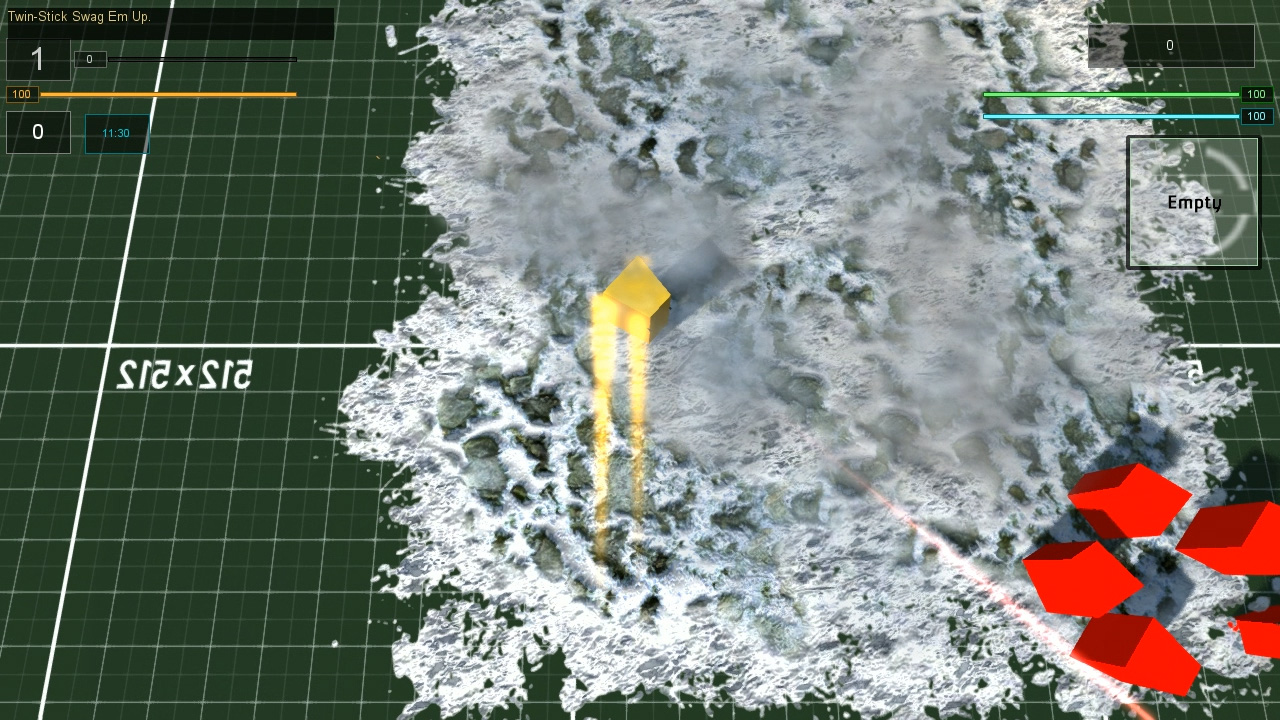
With the swag collectables coded if not modeled, next up is to test my ideas on how to actually model the environment and levels. And it looks something a little bit like this: